Book Image

Mahara 1.2 E-Portfolios: Beginner's Guide

Book Image

Mahara 1.2 E-Portfolios: Beginner's Guide

Overview of this book

Mahara is a user-centred environment with a permissions framework that enables different views of an e-portfolio to be easily managed. These views helps you display your artefacts – text files, spreadsheets, images, and videos – in a way you choose and to the people you want. You can also create online communities and social networks through groups, blogs, and forums.Being a novice, you will need a quick and easy implementation guide to set up your feature-rich digital portfolio.This book is your step-by-step guide to building an impressive professional e-portfolio using Mahara. It covers the key features of Mahara that will help you set up your customized digital portfolio and display the artefacts in your preferred way allowing contribution from selected users only.This book will introduce to the exciting features of Mahara framework and help you develop a feature-rich e-portfolio for yourself. You will see how easily you can create folders, upload multiple files like journals, project documents, pictures, and videos and share them with your friends. You will learn to set up views of these files, making these visible to your chosen friends only. And then, you will allow people to give their inputs.You will learn to create blogs and forums and get connected to the rest of the world. Customization and administration of your Mahara site will become easy after you have gone through this book. Imagine how good you will feel when you will see your knowledge, success, and ideas going live and available to your chosen audiences for their inputs.
Table of Contents (15 chapters)
Mahara 1.2 ePortfolios
Credits
About the Authors
About the Reviewers
Preface

Time for action - creating and laying out your View


  1. 1. To create a View from scratch, click on the My Portfolio area on the Main Menu bar.

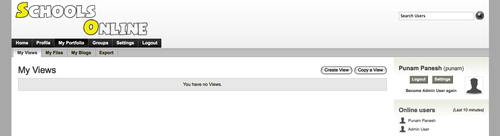
  2. 2. Now click on the My Views tab. You should see a screen similar to Punam's below; she has decided she is now going to create a View about the Tudors. You will see that you currently have no Views listed in this area:

  1. 3. Click the Create View button on this page.

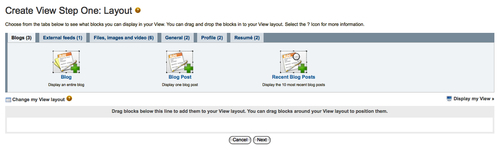
  2. 4. The screen you now see is almost identical to the one that you saw when creating your Profile Page; however, the title is different—Create View Step One: Layout. From the title, you can probably guess that there is going to be more than one step. In this Time for action section, we will be concentrating on this first step. You will notice that no blocks have been automatically added for you:

  1. 5. Punam decides to start creating her first View on 'The Tudors'. She remembers that the text block hides under the General tab. Drag a Text Box into your View. Punam uses her textbox to write an introduction...