
The phpList system contains HTML and image files, as well as the PHP code, which comprises the phpList. These are static files, and not expected to change, unless you upgrade, or otherwise manually modify them.
The database is where the dynamic content is stored, including lists, members, and messages.
We will install the phpList files and then use a setup process to have phpList set up the database.
For the purposes of this book, we will limit ourselves to the developer-tested system requirements detailed at http://www.phplist.com/system_requirements, namely:
A Linux-based platform
The Apache web server
MySQL database (version 4.0+)
PHP (version 4.3+)
Note
As it will be discussed in detail in Chapter 3, Setting up E-mail Bounce Handling, phpList's bounce handling also requires the
php-imapmodule.
While phpList has been reported to work on Windows servers, by using either IIS or an Apache/PHP/MySQL environment, this book and the examples herein will focus on the Linux-based system described previously.
Our first port of call is the phpList download page (http://www.phplist.com/download). Here we can download the latest version of phpList, packaged either as a ZIP file (typically for Windows users) or TGZ file (typically for Linux users).
Clicking either of the links will auto-start a download of the latest version of phpList in your preferred packaging format:

Unpack the .ZIP or .TGZ file into a new folder. You'll end up with a directory structure looking something as follows:

Note the three folders named bin, scripts, and public_html. Of these folders, only the public_html folder is required for phpList (like its name, these are the files which will be publicly available on your web server). The other folders are complimentary and contain useful scripts, documentation, and so on.
Note
The structure of the public_html folder assumes that you're going to put phpList at the /lists/ location of your URL—that is, your phpList installation will be accessed at http://www.yourdomain.com/lists/.
If you are satisfied with the default /lists/ location, then simply upload the entire lists folder directly to your web server, or else upload the contents of the folder to the preferred location where you want the phpList to be installed on your web server. Remember that this location must be publicly accessible (that is, it must be under the same directory structure as the rest of your publicly accessible web content).
How you create a database for phpList will depend on your web hosting provider, but after the database creation, the following information will be required to configure phpList:
Database server hostname (often
localhost)Database username
Database password
Database name
phpList's configuration file is config/config.php. This file is extensive, and contains many advanced settings, which will be dealt with later in this book. For starters, we'll configure some of the basic settings to get our phpList installation running.
Starting from line #22, customize the following four entries for the database you created before:
$database_host = "localhost";
Change this to the name of your database host. Leave it as"localhost" if you're not sure—if this doesn't work, contact your hosting provider.
$database_name = "phplistdb";
Change this to the name of the database you created.
$database_user = "phplist";
Change this to the user you created to access the database.
$database_password = "phplist";
Change this to the password of the user you created.
If you chose to install phpList to a path other than"/lists" when you uploaded it, you'll also need to change the following two entries, starting at line #48:
$pageroot = '/lists';
Change this to whatever you selected as your phpList path. This could simply be"/" or something else, like"/newsletters"
$adminpages = '/lists/admin';
Change this to match the $pageroot aforementioned definition. phpList requires that the"admin" portion remains the same, so this must be whatever your $pageroot is, with"/admin" added to the end, for example,"/newsletters/admin".
Access your phpList admin section at the location where you installed it, appending"/admin" to the URL, as follows: http://www.yourdomain.com/lists/admin.
Note
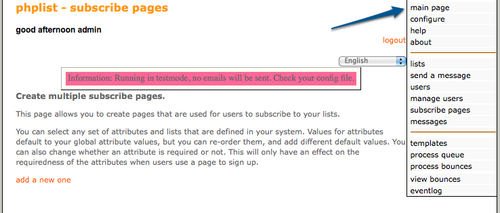
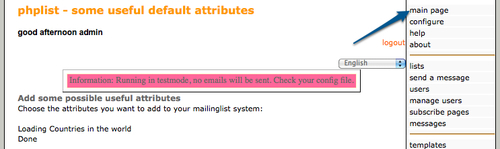
The test mode warning appears because we have not yet disabled test mode in the configuration file, meaning no actual e-mails will be sent. It's helpful to leave phpList in this state until the setup is complete, to avoid accidentally sending e-mails to "live" recipients.
Although it is hard to see because of the pink highlighting, you are warned that the database has not yet been initialized, so click on initialize database to continue:

The database initialization script will automatically connect to the database using the username and password you specified, and will create and populate all the required database tables. If you see any errors, check to see if your database settings are correct. A successful initialization will look like the one in the following screenshot. Having successfully initialized the database, click on the phplist setup link at the bottom of the page to continue:

You're now taken to the admin login screen and presented with a user/password request. The default username is admin and the password is phplist. Enter this combination to proceed:

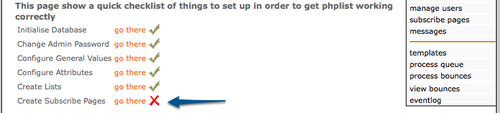
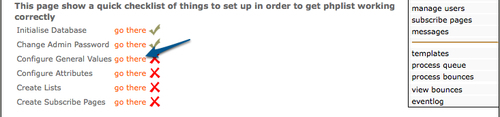
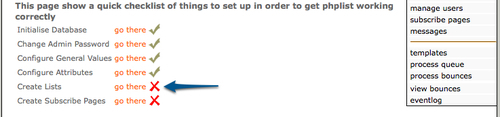
You are then presented with a quick checklist of steps to complete your phpList setup. Start by clicking on go there next to Change Admin Password to change your password:

Next, you are taken to the manage admins page (we'll cover this in detail in Chapter 5, List, User, and Administrator Management) and prompted to change the password for the "admin" user.
1. It's a good idea to associate your e-mail address with this user at the same time. Update the Password and the Email address and click on Save Changes:

2. You'll notice that when you click on Save Changes, the current page is simply reloaded with a message confirming that the changes have been saved:

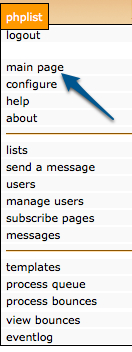
3. To continue with the setup, click on the main page link on the right-hand navigation panel:
4. We haven't completed the initial checklist yet, so click on the setup link to continue:

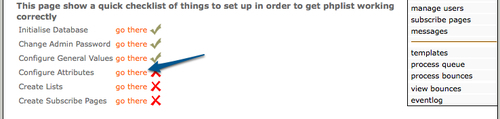
5. The next item on our checklist is Configure General Values, so click on go there to continue:
You are now taken to the configuration page. This can be accessed in future from the configure link on the right-hand navigation panel. These are the configuration values that are stored in the database, as opposed to the config/config.php file.
There are a few general attributes we should check right away—the rest of them can be tweaked later:
Website address (without
http://)—This value would have been auto-detected based on the URL which you used to perform the database initialization. Ensure it is correct, because this value is used to create the internal hyperlinks on the web interface.Person in charge of this system (one e-mail address)—Make sure this address is valid. Notifications of new subscriptions and other system actions will be sent to this address.
You can change a number of other configuration settings, like additional e-mail addresses to receive system notifications, default size of WYSIWYG editor windows, default welcome/confirmation messages, and so on.
Click on the main page link in the right-hand panel to return to the main page. Then click on the setup link to continue the initial setup.
Our next step is the Configure Attributes item, so click on go there to continue:
Attributes are used to record additional data about subscribers (such as, name, age, and so on), and to make selective decisions about e-mailing them based on these attributes (that is, you may send a different message to all female subscribers on Mothers' Day).
1. To get started, click on the predefined defaults link to import some pre-prepared attributes:

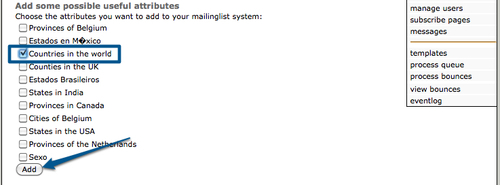
2. Choose the Countries in the world attributes and click on Add:
3. You can see a simple confirmation message, noting that the attributes have been added. To re-examine these attributes, return to the main admin page by clicking on the main page link:
4. Note that Country is now displayed under the Configuration functions section. Click on the setup link to continue the setup process:

5. The next item on our checklist is Create Lists, so click on go there to proceed:
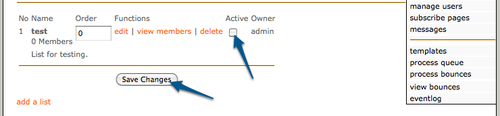
You're now taken to the lists page. This page can also be accessed using the lists link on the right-hand navigation panel.
Currently, there is only a single default list, named test. This list is inactive. We'll use this to test our phpList installation, so click the Active checkbox to make it active, and click on Save Changes to apply:
The lists page will be refreshed with your changes applied. Click on the main page link to return to the main page, and then click once more on the setup link to complete the last item on the checklist.
The final item is labeled Create Subscribe Pages, so click on go there to proceed: