Book Image

Moodle 2.0 First Look

Book Image

Moodle 2.0 First Look

Overview of this book

Moodle is currently the world's most popular E-learning platform. The long-awaited second version of Moodle is now available and brings with it greatly improved functionality. If you are planning to upgrade your site to Moodle 2.0 and want to be up-to-date with the latest developments, then this book is for you.This book takes an in-depth look at all of the major new features in Moodle 2.0 and how it differs from previous Moodle versions. It highlights changes to the standard installation and explains the new features with clear screenshots, so you can quickly take full advantage of Moodle 2.0. It also assists you in upgrading your site to Moodle 2.0, and will give you the confidence to make the move up to Moodle 2.0, either as an administrator or a course teacher.With its step-by-step introduction to the new features of Moodle 2.0, this book will leave you confident and keen to get your own courses up and running on Moodle 2.0. It will take you on a journey from basic navigation to advanced administration, looking at the changes in resource management and activity setup along the way. It will show you new ways tutors and students can control the pace of their learning and introduce you to the numerous possibilities for global sharing and collaborating now available in Moodle 2.0
Table of Contents (14 chapters)
Moodle 2.0 First Look
Credits
About the Author
About the Reviewers
Preface
Index

Adding a folder


The next item in the Add a Resource drop-down is Folder, which replaces the confusingly named Display a Directory from earlier versions of Moodle. This is a very useful resource as it enables a number of files to be uploaded in one go, rather than individually, and it allows teachers to create a tidier looking course page by having their files showing inside a folder rather than in a long and rather tedious list. In our case, Andy is uploading a folder containing all his Happy Hints from 2009. Selecting the Folder option brings up the editing screen, the top section of which is shown in the following screenshot and which resembles that of the File option:

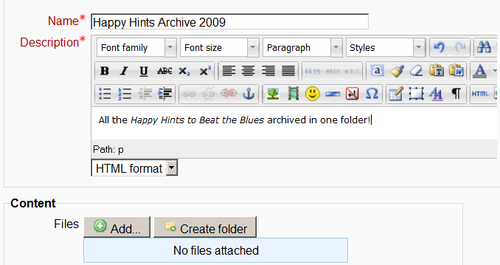
While Name and Description work in the same way as when we uploaded a file, the two options at the bottom deserve closer inspection:

Add is where we are about to click to upload our (zipped) folder to Moodle.

Create folder is where we would go to create a new folder if we wished. Clicking on it will give us the following...