

If you delete or otherwise lose a partition and realize that you need some data from the partition, there is still some hope. This recipe describes the steps to attempt data rescue from a lost or deleted partition.
While we hope it never happens to you, if you lose a partition by accidental deletion or by some other method and you do not have a backup of your data, this recipe may help you to rescue data from your partition. To improve the chances of rescuing data, do not write to the partition table by creating new partitions or resizing existing partitions.
This data rescue method supports searching for the following file systems: ext2, fat16, fat32, ntfs, reiserfs, and jfs. If you lost a different file system, then see the Restoring a deleted partition section at the end of this recipe.
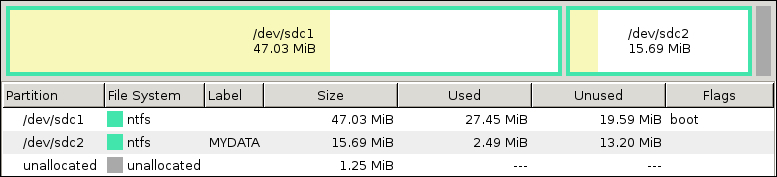
For this example, we started with a small 100 MB disk device with two partitions containing NTFS file systems. To demonstrate rescuing data, we deleted the second partition (approximately 15 MiB NTFS). The following image shows the partition layout in GParted prior to partition deletion:
Choose the GParted | Devices menu option and select the device with the lost partition.

Choose the Device | Attempt Data Rescue menu option.
Click on OK to initiate the disk device scan. Please note that the full disk scan might take a very long time to perform for large disk devices.

After the scan has completed, locate the lost partition file system entry in the list of file systems found (for example, the 15 MiB NTFS entry). Click on View beside this entry and GParted will attempt to mount the file system in read-only mode.
Tip
If your lost partition is not found, then unfortunately you will not be able to rescue the data using GParted. For a different recovery option see the Restoring a deleted partition section at the end of this recipe.

With the GParted Live image, a warning window is displayed.

If the warning window indicates Unable to open the default file manager, then proceed to the step 6.
If a different warning window is displayed, then there was a problem mounting the file system and you will not be able to view or copy the files in this partition using GParted.
To rescue data from other lost partitions, go back to step 4 and repeat the steps with a different file system entry.
In the Unable to open the default file manager warning window, make note of the directory where the file system is mounted. The mount point will be in the form:
/tmp/gparted-roview-XXXXXXOpen a terminal window by double-clicking on the desktop Terminal icon.

Optionally, confirm the contents of the file system using the ls command. For example:
ls /tmp/gparted-roview-6fyXvx
Attach an extra storage device, such as a USB flash drive, to the computer and wait several seconds. This permits time for the device to be recognized by the operating system.
Enter the
dmesgcommand into the terminal window to determine the device name (for example, sdX). For example,dmesg
Make note of the device name of this recently attached storage device (for example, sdd). We will use this device name in subsequent steps.
Make a directory to mount the recently attached storage device, by entering the following command in the terminal window.
sudo mkdir /mnt/myusbMount the USB drive on this directory by entering one of the following commands in the terminal window:
To mount USB drives as read/write with NTFS file systems use:
mount -t ntfs-3g /dev/sdd1 /mnt/myusbTip
The -t option will use the ntfs-3g fuse driver, which permits reading and writing to ntfs file systems. By default ntfs is mounted read-only. Most other file systems are mounted with read/write access by default.
To mount USB drives as read/write with other file systems use:
mount /dev/sdd1 /mnt/myusbUse the
cpcommand to copy files from the lost partition to the USB flash drive. For example, to copy all files, use:sudo cp -v -a -r /tmp/gparted-roview-6fyXvx/ /mnt/myusbUnmount the storage device by entering the following command in the terminal window:
sudo umount /mnt/myusbWait until the umount command completes, then disconnect the storage device.
Click on OK to close the Unable to open the default file manager warning window.
In the terminal window choose the File | Quit menu option to close the terminal window.
If you need to rescue data from other lost partitions then go back to step 4 and repeat the steps with a different file system entry.
Click on Close to close the Data found window.This will unmount all of the lost partitions that were mounted when you previously clicked the View button.
To find file systems on disk devices, GParted uses another application called gpart (not to be confused with GParted) to scan the entire disk device for recognizable file systems.
If file systems are found by this utility, GParted displays a window with an entry for each partition file system found. By clicking the View button beside the entry, GParted will try to mount the partition in read-only mode. If the mount is successful, you can manually navigate to the mounted file system. Moreover, you can manually mount additional storage in order to store a copy of the data from the lost partition.
When you close the window with the list of found file systems, these temporarily mounted partitions are unmounted.
The gpart application used to scan the disk device is not infallible. In some instances, gpart will fail to recognize common file systems. If this happens, you will not be able to use GParted to rescue your data.
Unfortunately the gpart application has not been actively maintained, leaving it behind current advancements in partition tables and file systems. As such, gpart suffers from the following limitations:
Can find, at most, 4 partitions.
Does not recognize newer file systems, such as BTRFS.
With these limitations in mind, if you have lost a partition with valuable data, it might still be worth the effort to attempt to rescue the data using the steps in this recipe.
If you wish to restore the deleted partition back into the partition table, we suggest you investigate a more powerful command line application called testdisk. The testdisk application is included with GParted Live. To learn more about testdisk, see http://www.cgsecurity.org/wiki/TestDisk.