
This recipe provides details about managing different types of content.
Content in Edublogs can take many different forms—posts, pages, uploaded media, and embedded media. The first step needs to be developing an understanding of what each of these types of content are, and how they fit into the Edublogs framework.
Pages: Pages are generally static content, such as an About or a Frequently Asked Questions page.
Posts: Posts are the content that is continually updated on a blog. When you write an article, it is referred to as a post.
Media [uploaded]: Edublogs has a media manager that allows you to upload pictures, videos, audio files, and other files that readers would be able to interact with or download.
Media [embedded]: Embedded media is different than internal media in that it is not stored on your Edublogs account. If you record a video and upload it, the video resides on your website and is considered internal to that website. If you want to add a YouTube video, a Prezi presentation, a slideshow, or any content that actually resides on another website, that is considered embedding.
Posts and pages are very similar, as was introduced in Navigating your dashboard (Must know). When you click on the Pages link on the left navigation column, if you are just beginning, you will see an empty list or the Sample Page that Edublogs provides. However, this page will show a list of all of the pages that you have written, as shown in the following screenshot:
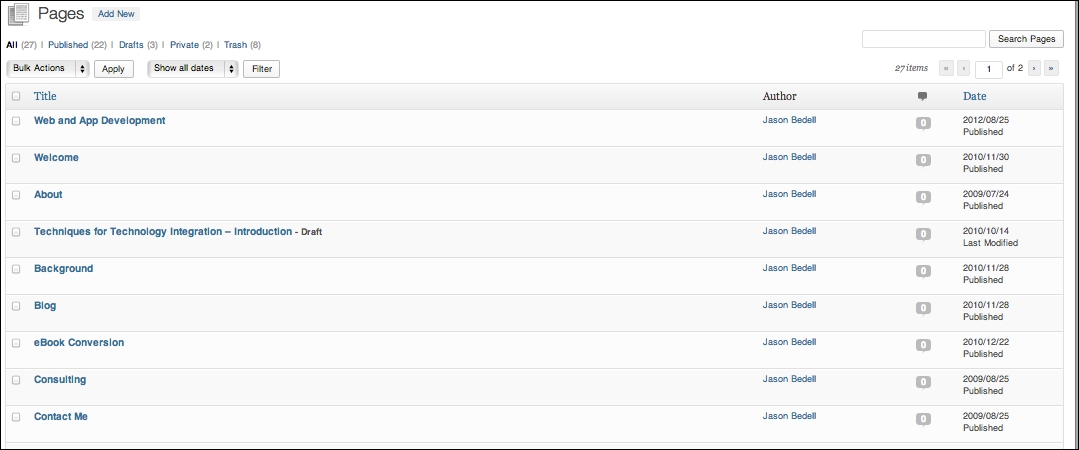
Click on any column header (Title, Author, Comments, and Date) to sort the pages by that criterion. A page can be any of several types: Published (anyone can see), Drafts, Private, Password Protected, or in the Trash. You can filter by those pages as well. You will only see the types of pages that you are currently using. For example, in the following screenshot, I have 3 Draft pages. If I had none, Drafts would not show as an option.

When you hover over a page, you are provided with several options, such as Edit, Quick Edit, Trash, and View.
View: This option shows you the actual live post, the same way that a reader would see it.
Trash: This deletes the page.
Edit: This brings you back to the main editing screen, where you can change the actual body of the page.
Quick Edit: This allows you to change some of the main options of the post: Title, Slug (the end of the URL to access the page), Author, if the page has a parent, and if it should be published. The following screenshot demonstrates these options:

Everything above about Pages also applies to Posts. Posts, though, have several additional options. It's also more common to use the additional options to customize Posts than Pages.
Right away, hovering over Posts, it shows two new links: Categories and Tags. These tools are optional, and serve the dual purpose of aiding the author by providing an organizational structure, and helping the reader to find posts more effectively. A Category is usually very general; on one of my educational blogs, I limit my categories to a few: technology integration, assessment, pedagogy, and lessons. If I happen to write a post that does not fit, I do not categorize it. Tags are becoming ubiquitous in many applications and operating systems.
They provide an easy way to browse a store of information thematically. On my educational blog, I have over 160 tags. On one post about Facebook's new advertising system, I added the following tags: Digital Literacy, Facebook, Privacy. Utilizing tags can help you to see trends in your writing and makes it much easier for new readers to find posts that interest them, and regular readers to find old posts that they want to re-reference.
Let's take a look at some of the advanced features. When adding or editing a post, the following features are all located on the right-hand side column:
Publish: The Publish box is necessary any time you want to remove your Post (or Page) from the draft stage, and allow readers to be able to see it. Most new bloggers simply click on Publish/Update when they are done writing a Post, which works fine. It is limited though. People often find that there are certain times of day that result in higher readership. If you click on Edit next to Publish Immediately, you can choose a date and time to schedule the publication. In addition, the Visibility line also allows you to set a Post as private, password protected, or always at the top of the page (if you have a post you particularly want to highlight, for example).
Format: Most of the time, changing the format is not necessary, particularly if you run a normal, text driven blog. However, different formats lend themselves to different types of content. For example, if publishing a picture as a Post, as is often done on the microblogging site Tumblr, choosing Image would format the post more effectively.
Categories: Click on + Add New Category, or check any existing categories to append them to the Post.
Tags: Type any tags that you want to use, separated by commas (such as writing, blogging, Edublogs).
Featured Image: Uploading and choosing a feature image adds a thumbnail image, to provide a more engaging browsing experience for the viewer.
All of these features are optional, but they are useful for improving the experience, both for yourself and your readers.
While for most people, the heart of a blog is the actual writing that they do. Media serves help to both make the experience more memorable and engaging, as well as to illustrate a point more effectively than text would alone. Media is anything other than text that a user can interact with; primarily, it is video, audio, or pictures. As teachers know, not everyone learns ideally through a text-based medium; media is an important part of engaging readers just as it is an important part of engaging students.
There are a few ways to get media into your posts. The first is through the Media Library. On a free account, space is limited to 32 MB, a relatively small account. Pro accounts get 10 GB of space.
Click on Media from the navigation menu on the left; it brings up the library. This will have a list of your media, similar to that which is used for Posts and Pages. To add media, simply click on Add New and choose an image, audio file, or video from your computer. This will then be available to any post or page to use. The following screenshot shows the Media Library page:

If you are already in a post, you have even more options. Click on the Add Media button above the text editor, as shown in the following screenshot:
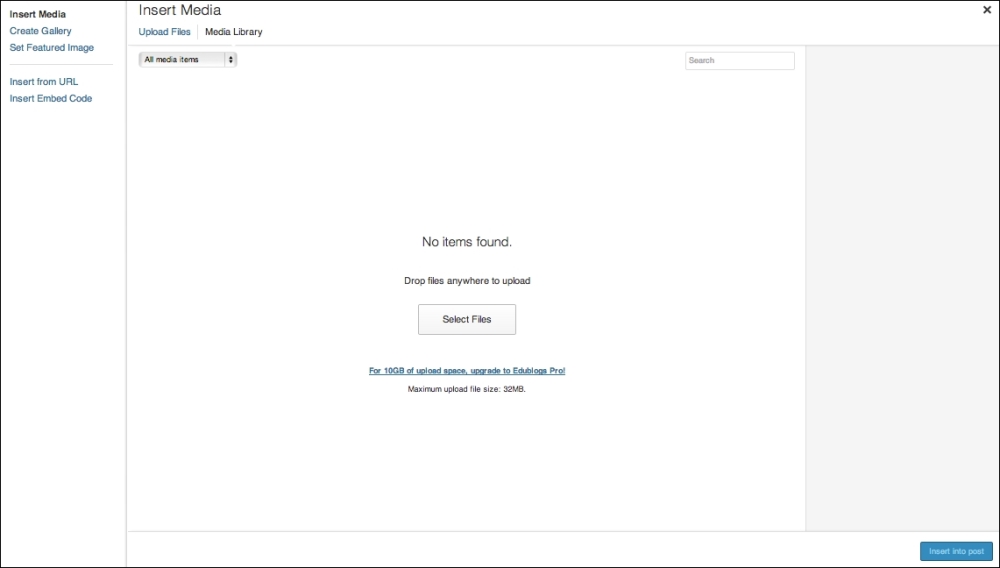
Following are some of the options you have to embed media:
Insert Media: This allows you to directly upload a file or choose one from the Media Library.
Create Gallery: Creating a gallery allows you to create a set of images that users can browse through.
Set Featured Image: As described above, set a thumbnail image representative of the post.
Insert from URL: This allows you to insert an image by pasting in the direct URL. Make sure you give attribution, if you use someone else's image.
Insert Embed Code: Embed code is extremely helpful. Many sites provide embed code (often referred to as share code) to allow people to post their content on other websites. One of the most common examples is adding a YouTube video to a post. The following screenshot is from the Share menu of a YouTube video. Copying the code provided and pasting it into the Insert Embed Code field will put the YouTube video right in the post, as shown in the following screenshot. This is much more effective than just providing a link, because readers can watch the video without ever having to leave the blog. Embedding is an Edublogs Pro feature only.

Utilizing media effectively can dramatically improve the experience for your readers.