

When you boot into the shell and have the Ethernet connected, hopefully the Pi will have connected to your home network and acquired an IP address from your router. If this is the case, you should see the IP address that has been issued just before the login prompt, as shown in the following screenshot:
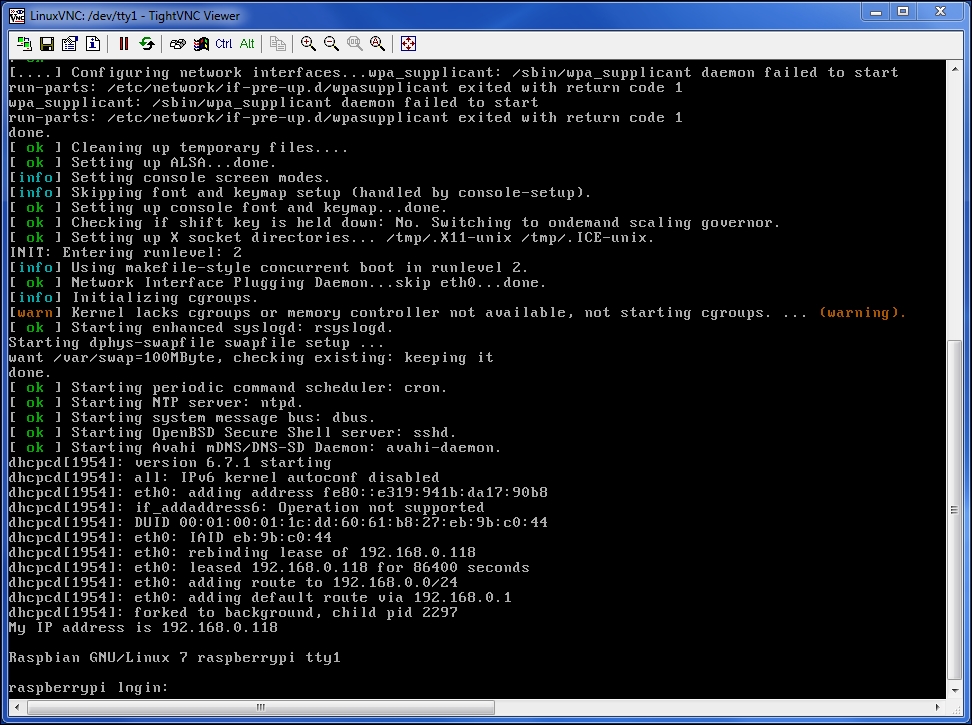
As you can see from my screenshot, it's given me the IP address, 192.168.0.118. This is good because I can now access the Pi remotely, using a secure shell (SSH) client to connect to it from the comfort of my laptop. This is particularly useful when my Pi is in the office and I want to sit on my sofa in front of the telly but still work on it, which I often do when I'm feeling lazy.
Tip
Downloading the example code
You can download the example code files from your account at http://www.packtpub.com for all the Packt Publishing books you have purchased. If you purchased this book elsewhere, you can visit http://www.packtpub.com/support and register to have the files e-mailed directly to you.
To do this, download PuTTY: a utility that allows you to connect to shell terminals remotely over the network. You can download it from http://www.putty.org.
Install and launch PuTTY and you're ready to connect to your Pi remotely from the comfort of your sofa.
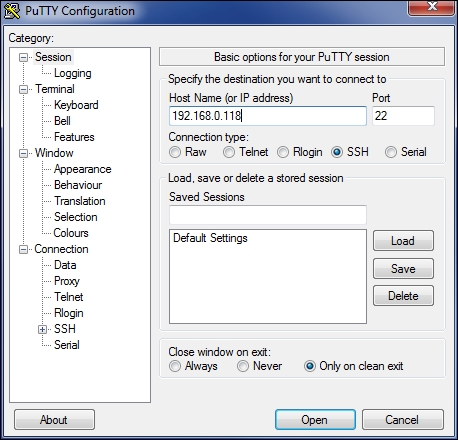
Type the IP address of the Raspberry Pi into the Host Name box and click on Open. You'll be connected to your Pi in a remote terminal window. Once you've logged in, you can do pretty much everything on your Pi, as if you were sitting in front of it.
We'll assume from now on that most of the work we do will be through a remote shell session, unless highlighted otherwise.
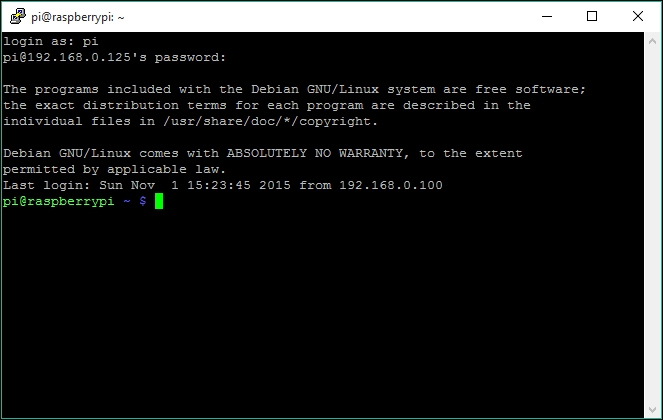
If you want to use the command line to launch the Raspberry Pi remote shell—for example, from another Linux system—use the following command from your terminal window:
# ssh [email protected]
You'll then be prompted for the Pi's password and taken into a shell session.
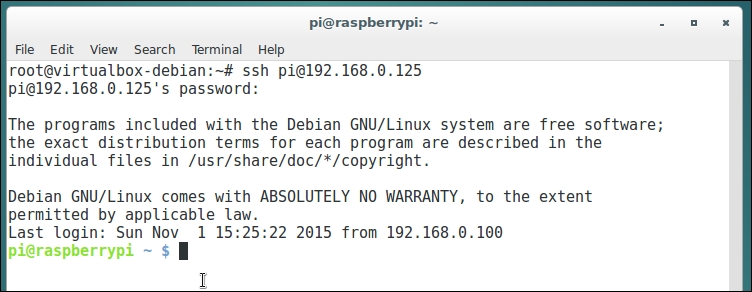
The Pi shell session launched from a Debian desktop terminal window
Something that you should get into the habit of doing is updating the operating system regularly; even though you may have the latest image installed, it's very likely that there are updated packages available. To update your OS, enter the following command:
$ sudo apt-get update
After this, enter the following one:
$ sudo apt-get dist-upgrade
This may take a while, depending on the number of updates required.
The Raspberry Pi doesn't have on-board real-time clock hardware. This is one of the deliberate omissions to keep the cost of the board down. Instead, the Pi gets its time when it boots up from time servers on the Internet using the Network Time Protocol (NTP). However, if there is no Internet connection at the time of booting up, then the time will be wrong.
Note
In our security system, it's important that the time is kept accurate so that timestamps on log files and images are correct.
The fake-hwclock package is included in the latest Raspbian distributions, but in other past versions it wasn't. If you need to install it, use the command that follows:
$ sudo apt-get install fake-hwclock
fake-hwclock is used by the Raspberry Pi to try and keep time when there is no network connection. It will regularly save the current time and restore it at boot-up. The obvious problem with this is that if the Pi has been switched off a few days, then the time will be set to the last time that it was on, using fake-hwclock.
If you want to see what time it last logged, type the following command:
$ cat /etc/fake-hwclock.data
The Network Time Protocol (NTP) is used when there is an Internet connection available and it can request the latest most accurate time from one or more time servers on the Internet.
By default, the ntp service is enabled on the latest Raspbian distribution, but it will initially get its time at boot-up from fake-hwclock if there is no Internet connection. There may be times when it's necessary to force the ntp service to update from the Internet—for example, if the Internet connection is restored sometime after boot-up.
To force the ntp service to update from the Internet, use the following commands:
$ service ntp stop
$ ntpd –gq
$ service ntp start
There's no point in having a security system if the system itself is not secure. So, now we'll change the default password for the pi user.
From the prompt, type the following command:
$ sudo passwd pi
pi@raspberrypi ~ $ sudo passwd pi
Enter new UNIX password:
Retype new UNIX password:
passwd: password updated successfully
You'd have noticed that we've been putting sudo at the start of each command that we run in the terminal window. This is so that commands are run as the root user—the highest security level. This elevated security is required to perform many operations. sudo actually means super do.
If you can't be bothered to type sudo every time, then you can switch to the super user by typing the following:
$ sudo su
You'll see that the prompt changed from a $ to a #, which indicates that you are now running as the root user.
So, this might be a good time to change the root user password too! To do this, type the following:
# passwd
root@raspberrypi:/home/pi# passwd
Enter new UNIX password:
Retype new UNIX password:
passwd: password updated successfully
root@raspberrypi:/home/pi#
You can also connect your Raspberry Pi to your network using Wi-Fi by plugging a USB dongle into it. There are additional configuration steps required to make this work, which are beyond the scope of this chapter, but there are many resources available covering this subject.
Note
You can find recipes for connecting your Raspberry Pi using Wi-Fi in the Raspberry Pi Networking Cookbook by Rick Golden, published by Packt Publishing (https://www.packtpub.com/hardware-and-creative/raspberry-pi-networking-cookbook).