

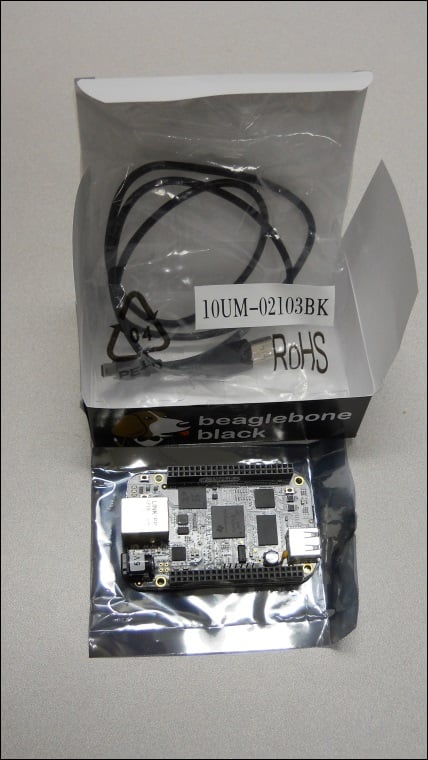
The board has finally arrived. Here is what should come with the standard package:
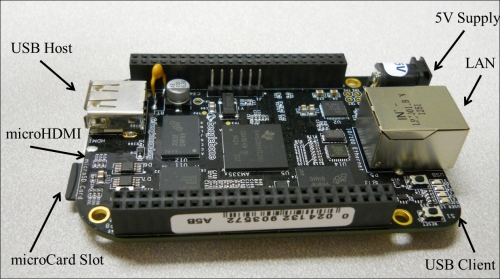
Before plugging anything in, inspect the board for any issues that might have occurred during shipping. This is normally not a problem, but it is always good to do a quick visual inspection. You should also acquaint yourself with the different connections on the board. Here they are, labeled for your information:
So let's get started. You need to power the board, but you also need to hook up a way to interact with the board and see the results of your interaction. The first thing you'll notice is that there is no cable that fits the 5V DC connector. What's with that? Am I already hung up without ever powering on the board? Well, fortunately no, but you do need to talk about power for a moment. There are two ways to power the board. The first is through the USB client connection. This is done by:
Connecting the micro-USB connector end of the cable to the board
Connecting the standard sized USB connector to either a PC or a compatible DC power source that has such a connection
If you are going to use a DC power source, make sure the unit can supply at least one ampere. This is not optional. Although the board might not always draw this much current, if it senses that the unit cannot supply the required current, it will shut down.
There is another option to power the board: simply supply 5V DC to the connector. Make sure that the plug is 5.5 x 2.1 mm (centre positive) and that the unit can supply at least one ampere. As mentioned earlier, this is not optional.
Even if you are going to choose a DC power source for your board, initially let's connect the board via the provided USB cable. Almost all of the different projects you work on here will need to supply power from a battery pack anyway, and if you supply the board through the USB port and micro-USB connector, you can use your external computer to communicate with the board and ensure that it is up and working.
When you plug the board in, the PWR LED, located by the 5V input, should light blue on the board. Here is a close up of the LED locations, just so that you're certain which one to look for:

The other four indicators on the right-hand side of the LAN connection will eventually begin to flash blue. The one on the far right will eventually flash as a heartbeat indicator, letting you know that your processor is working by flashing twice quickly, approximately once per second.
Now you can use some computer software (SW) to make sure your board is operating correctly. When you first plug the board into a Windows PC, you'll see the indicator at the lower-right indicating that new HW is being installed. Eventually—and this may take a bit—you'll get the indication that your device is ready to use. If you are using Windows 7, you can view the device in your Devices and Printers display (select this from the Start menu). You should see this:
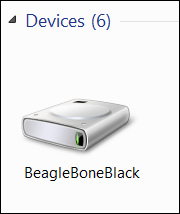
If you see this and the farthest right LED flashing in a heartbeat fashion, you've successfully connected your board. If you can't reach this point, see the following Classified intel section.
Once you've connected, you can actually communicate with your board via the USB connection. Open a Firefox or Chrome browser and type in the address 192.168.7.2. You should see the following in your browser:
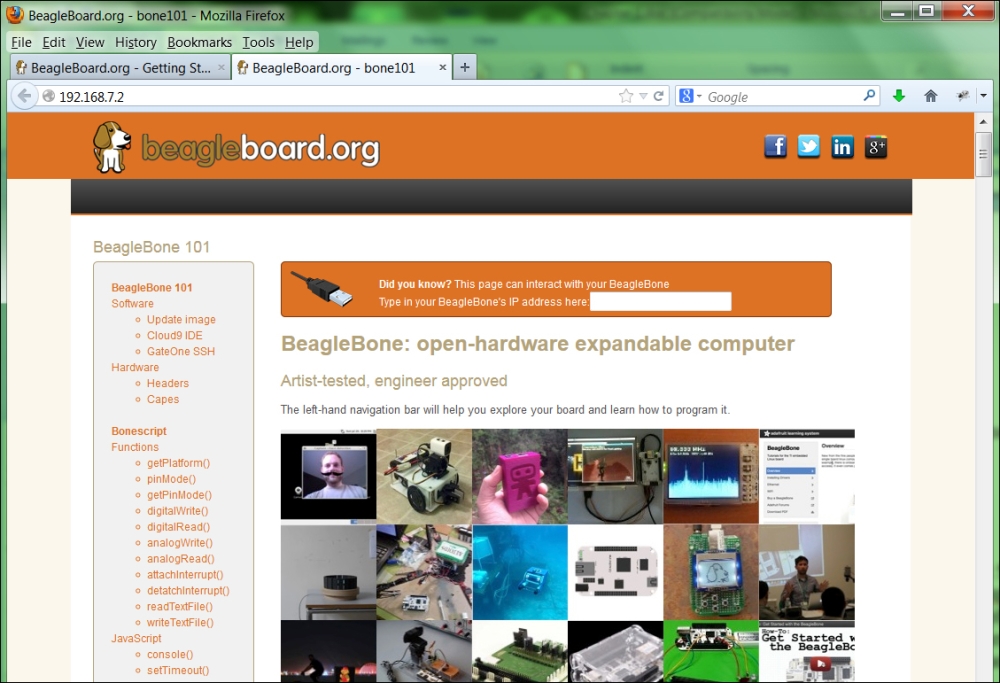
If you've reached this point, congratulations! You are now communicating with your BeagleBone Black as the web pages are being served by the on-board web server. You're ready for the next step. Don't continue with directions on this page; you're going to take a different route in updating your BeagleBone Black. If you're having problems, the folks at beagleboard.org have a rich set of forums that can help you work through any of the problems you might be having unpacking the board.
Powering the board can be a bit challenging, since the board requires at least 500 mA of current, and many USB cables and ports are limited by design to less than 500 mA. When attempting to power up with these cables on a power supply that cannot supply enough current, the unit will begin to power on, the blue LEDs will begin to flash, and then everything will turn off. This was a more significant problem with early units than the units that are currently shipping.
Also, if you are struggling to connect to the board, you may need to download drivers. These are available on the beagleboard.org site.