

In the last recipe of this chapter, we are actually going to use everything we learned so far in this chapter and apply it to a simple project: sending data to a cloud server, so it can be stored there. This is something that we are going to do many times in this book, but I wanted to give you a short overview first.
For this recipe, you will need the same configuration that we used in the recipe Interacting with basic sensors, but ? with a photocell connected to the Arduino board. Please refer to this recipe to know how to assemble the hardware for the project.
Let's now see the sketch that we will use for this chapter. It is actually very similar to the code for the previous chapter, so I will just highlight the important parts here.
As before, we define the server to which we want to connect the board. Here, we will use the dweet.io service:
char server[] = "dweet.io";
We also define an interval on which we will send data to the dweet.io servers:
unsigned long lastConnectionTime = 0;
const unsigned long postingInterval = 10L * 1000L;
In the loop() function, we check if it is time to send data. If so, we measure the reading from the sensor, and send this to a function that will send the data:
if (millis() - lastConnectionTime > postingInterval) {

    // Measure light level
    int sensorData = analogRead(A0);

    // Send request
    httpRequest(sensorData);
  }
Let's now see the details of this function:
void httpRequest(int sensorData) {

  // Close existing connection
  client.stop();

  // Connect & send request
  if (client.connect(server, 80)) {

    Serial.println("connecting...");

    // Send the HTTP PUT request:
    client.println("GET /dweet/for/myarduino?light=" + String(sensorData) + " HTTP/1.1");
    client.println("Host: dweet.io");
    client.println("User-Agent: ArduinoWiFi/1.1");
    client.println("Connection: close");
    client.println();

    // Note the time that the connection was made:
    lastConnectionTime = millis();
  }
  else {
    // if you couldn't make a connection:
    Serial.println("connection failed");
  }
}
As you can see, the function is very similar to what we did in the previous recipe. The main difference is that we pass the measured data as an argument when calling the dweet.io server.
You can now grab the code from the GitHub repository of this book, and upload it to the board.
Then, open the Serial monitor, and this is what you should see:
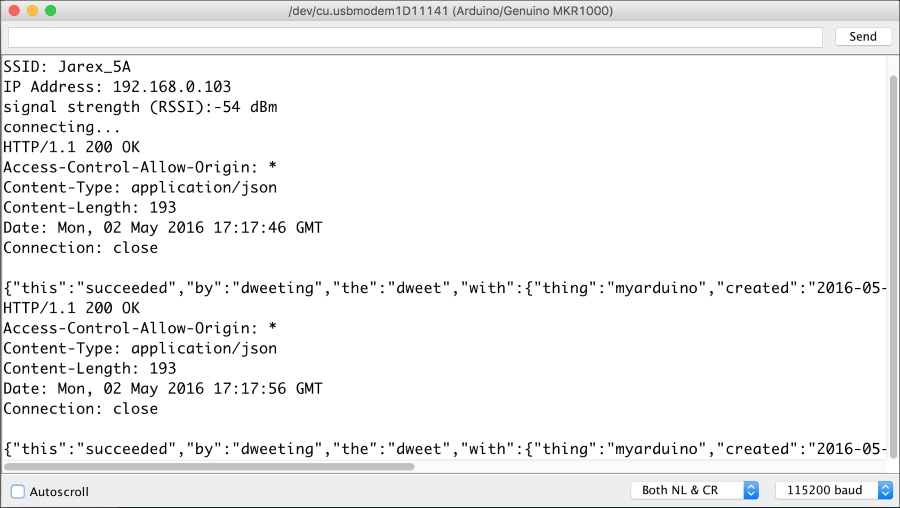
If you can see the 'succeeded' message, it means that the data has been correctly stored on the server.
To check that it was actually recorded, you can now go to the following URL:
https://dweet.io/get/latest/dweet/for/myarduino
You should see the answer in JSON format, meaning data was recorded from your board.
