Book Image

Internet of Things with Arduino Cookbook

By : Marco Schwartz
Book Image

Internet of Things with Arduino Cookbook

By: Marco Schwartz

Overview of this book

Arduino is a powerful and very versatile platform used by millions of people around the world to create DIY electronics projects. It can be connected to a wide variety of sensors and other components, making it the ideal platform to build amazing Internet of Things (IoT) projects on—the next wave in the era of computing. This book takes a recipe-based approach, giving you precise examples on how to build IoT projects of all types using the Arduino platform. You will come across projects from several fields, including the popular robotics and home automation domains. Along with being introduced to several forms of interactions within IoT, including projects that directly interact with well-known web services such as Twitter, Facebook, and Dropbox we will also focus on Machine-to-Machine (M2M) interactions, where Arduino projects interact without any human intervention. You will learn to build a few quick and easy-to-make fun projects that will really expand your horizons in the world of IoT and Arduino. Each chapter ends with a troubleshooting recipe that will help you overcome any problems faced while building these projects. By the end of this book, you will not only know how to build these projects, but also have the skills necessary to build your own IoT projects in the future.
Table of Contents (14 chapters)
Internet of Things with Arduino Cookbook
Credits
About the Author
About the Reviewer
www.PacktPub.com
Preface
Index

Building a digital candle


In this recipe, we are going to learn how to make a digital version of a candle using Arduino. We'll see how to control a multicolor LED to emulate the behavior of a real candle. It's just the perfect project for Valentine's Day, Christmas, and other celebrations.

Getting ready

For this project, the only thing you will need is an Adafruit NeoPixel, which is a smart RGB LED that can be easily controlled via Arduino.

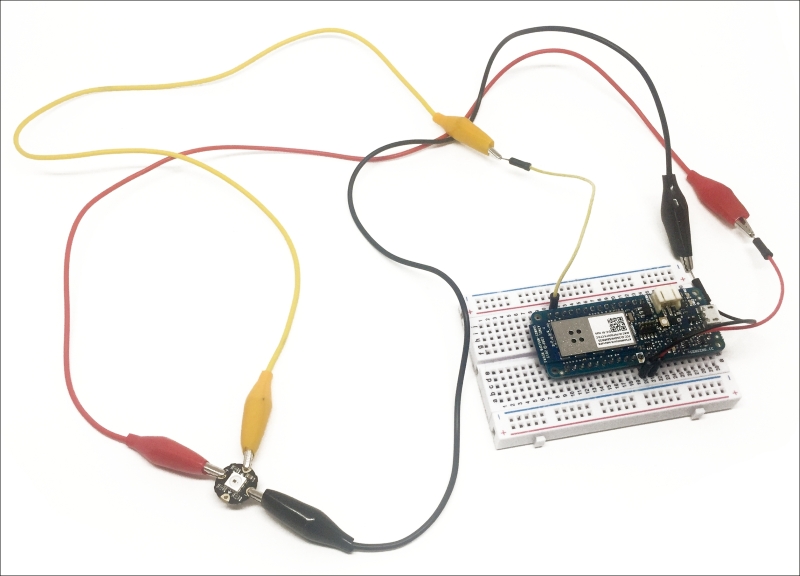
I also used some alligator clips to connect the Arduino board to the NeoPixel.

Assembling the project is really easy – you just need to connect the NeoPixel input pin to Arduino pin 5, GND to GND, and VCC to VCC of the Arduino board.

This is the final result:

On the software side, the only thing you need is to install the Adafruit_NeoPixel library, which you can install from the Arduino library manager.

How to do it...

Let's now see how to configure the project. The first step is to include the required library, and declare that the NeoPixel is connected to pin...