

Now that we completed building the chassis (most of it at least), we can move on to the electrical part of the project. This involves connecting all the servos to the Arduino MEGA; this is exactly what this part entails. "However, didn't we already do this in the previous section?" Yes, but to be more effective, we are going to firstly label the servos and create a circuit that drastically decreases the number of wires that we need.
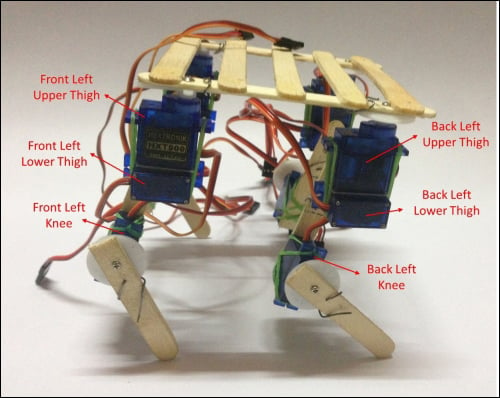
Just before connecting all the servos together to the MEGA, let us make the life of our future selves easier. Let us label each servo so that later we can easily identify what servo wires connect to what servo. To gain an understanding of this, take a look at the following image:
A symmetric labeling will follow on the right-hand side. We will use the following chart to label each servo. The number of (bands refer to the thin strips of the insulation tape that is used as a type of identification):
|
Servo location |
Color ... |
|---|