Book Image

Building Smart Homes with Raspberry Pi Zero

By : Marco Schwartz
Book Image

Building Smart Homes with Raspberry Pi Zero

By: Marco Schwartz

Overview of this book

The release of the Raspberry Pi Zero has completely amazed the tech community. With the price, form factor, and being high on utility—the Raspberry Pi Zero is the perfect companion to support home automation projects and makes IoT even more accessible. With this book, you will be able to create and program home automation projects using the Raspberry Pi Zero board. The book will teach you how to build a thermostat that will automatically regulate the temperature in your home. Another important topic in home automation is controlling electrical appliances, and you will learn how to control LED Lights, lamps, and other electrical applications. Moving on, we will build a smart energy meter that can measure the power of the appliance, and you’ll learn how to switch it on and off. You’ll also see how to build simple security system, composed of alarms, a security camera, and motion detectors. At the end, you will integrate everything what you learned so far into a more complex project to automate the key aspects of your home. By the end, you will have deepened your knowledge of the Raspberry Pi Zero, and will know how to build autonomous home automation projects.
Table of Contents (17 chapters)
Building Smart Homes with Raspberry Pi Zero
Credits
About the Author
About the Reviewer
www.PacktPub.com
Preface
Index

Creating several lamps from the cloud


In the second project of this chapter, we are going to apply what we learned earlier and control several lamps from the cloud using a single dashboard.

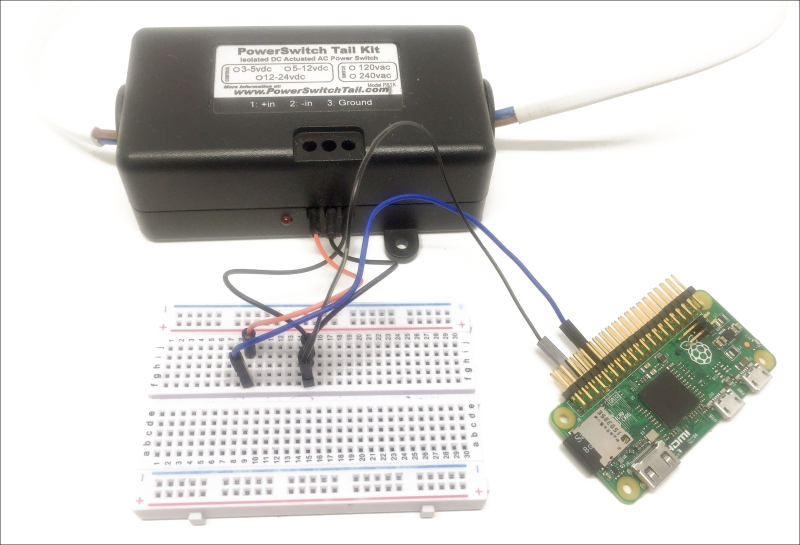
To actually assemble the project, I recommend checking Chapter 4, Control Appliances from the Raspberry Pi Zero where we saw how to connect the PowerSwitch Tail Kit to the Raspberry Pi Zero. You need to connect the PowerSwitch to GPIO14 of the Raspberry Pi board.

This is how one module looks like:

Now, configure each board with the exact same code as in the previous section and give a different ID to each board. I also recommend changing the name of the boards inside the code; for example, to know where you placed them in your home (bedroom, living room, and so on).

Then, go back to the website where we created a cloud dashboard and create a new dashboard:

In there, create a new On/Off element for each lamp you want to control, on pin 14:

This is how your dashboard should look like at the end:

You can now try...