Book Image

Internet of Things with ESP8266

By : Marco Schwartz
Book Image

Internet of Things with ESP8266

By: Marco Schwartz

Overview of this book

The Internet of Things (IoT) is the network of objects such as physical things embedded with electronics, software, sensors, and connectivity, enabling data exchange. ESP8266 is a low cost WiFi microcontroller chip that has the ability to empower IoT and helps the exchange of information among various connected objects. ESP8266 consists of networkable microcontroller modules, and with this low cost chip, IoT is booming. This book will help deepen your knowledge of the ESP8266 WiFi chip platform and get you building exciting projects. Kick-starting with an introduction to the ESP8266 chip, we will demonstrate how to build a simple LED using the ESP8266. You will then learn how to read, send, and monitor data from the cloud. Next, you’ll see how to control your devices remotely from anywhere in the world. Furthermore, you’ll get to know how to use the ESP8266 to interact with web services such as Twitter and Facebook. In order to make several ESP8266s interact and exchange data without the need for human intervention, you will be introduced to the concept of machine-to-machine communication. The latter part of the book focuses more on projects, including a door lock controlled from the cloud, building a physical Bitcoin ticker, and doing wireless gardening. You’ll learn how to build a cloud-based ESP8266 home automation system and a cloud-controlled ESP8266 robot. Finally, you’ll discover how to build your own cloud platform to control ESP8266 devices. With this book, you will be able to create and program Internet of Things projects using the ESP8266 WiFi chip.
Table of Contents (20 chapters)
Internet of Things with ESP8266
Credits
About the Author
About the Reviewer
www.PacktPub.com
Preface
Index

Adding alert LEDs to the ticker


We did the hardest project so far: we built a physical Bitcoin ticker that indicates the price of Bitcoin in real time.

We're now ready to add little improvements to the project to make it even better. For example, we are going to add two LEDs, one red and one green, to indicate whether the Bitcoin price is going up or down.

We are going to flash the red LED when the price is going down, and the green one when it's going up.

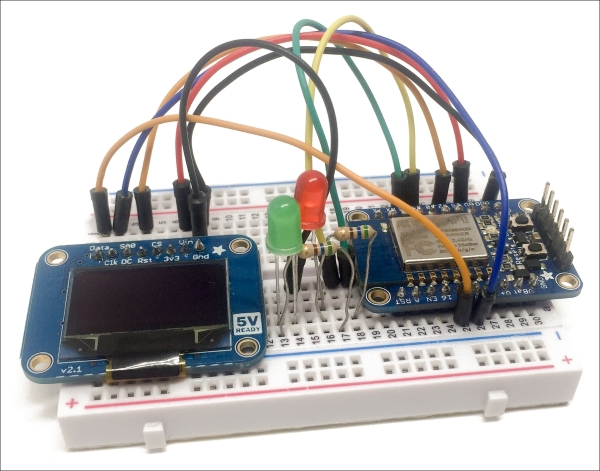
But first, we need to add the hardware to the project. Simply place the LEDs in series with the 330 Ohm resistors on the breadboard, and then connect them as we saw in earlier chapters. Make sure to connect the red LED to pin 5, and the green LED to pin 4, of the ESP8266 board.

This is the final result for this part:

Let's now see how to configure this project. I will only detail here what changed compared to the previous project:

  1. We first need to define the pins to which the LEDs are connected:

    #define LED_PIN_UP 4
    #define LED_PIN_DOWN 5
  2. Then...