Book Image

Hands-On Robotics with JavaScript

By : Kassandra Perch
Book Image

Hands-On Robotics with JavaScript

By: Kassandra Perch

Overview of this book

JavaScript has an effective set of frameworks and libraries that provide support for embedded device programming and the robotics ecosystem. You’ll be able to put your JavaScript knowledge to work with this practical robotics guide. The book starts by guiding you in setting up an environment to program robots with JavaScript and Rasberry Pi 3. You will build beginner-level projects, such as a line-following robot, and then upgrade your robotics skills with a series of projects that help you get to grips with the Johnny-Five library. As you progress, you’ll learn how you can improve your projects by enabling advanced hardware components and programming concepts. You’ll even build an advanced AI-enabled robot, connect its NodeBots to the internet, create a NodeBots Swarm, and explore Message Queuing Telemetry Transport (MQTT). By the end of this book, you will have enhanced your robot programming skills by building a range of simple to complex projects.
Table of Contents (19 chapters)
Title Page
Dedication
Packt Upsell
Contributors
Preface
Index

Project – light meter with the servo


Let's build a project where our servo servos as a light meter that sweeps between 0 and 180 degrees based on the reading from the light sensor.


Adding in the light sensor

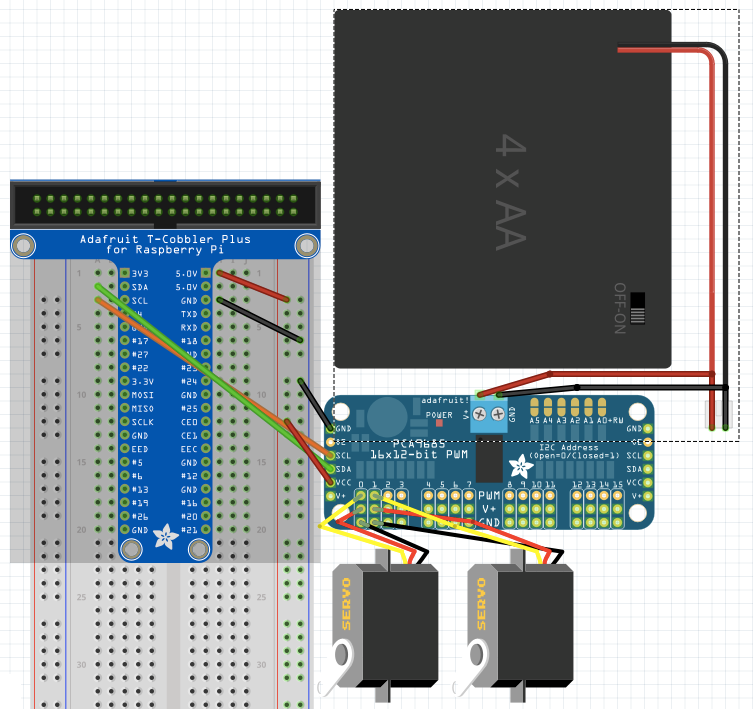
First, we need to wire the light sensor to the board. Remember, I2C devices can share an SDA and SCL pin as long as they have different addresses (which the TSL2591, at 0x29, and the PWM hat, at 0x40, do). 

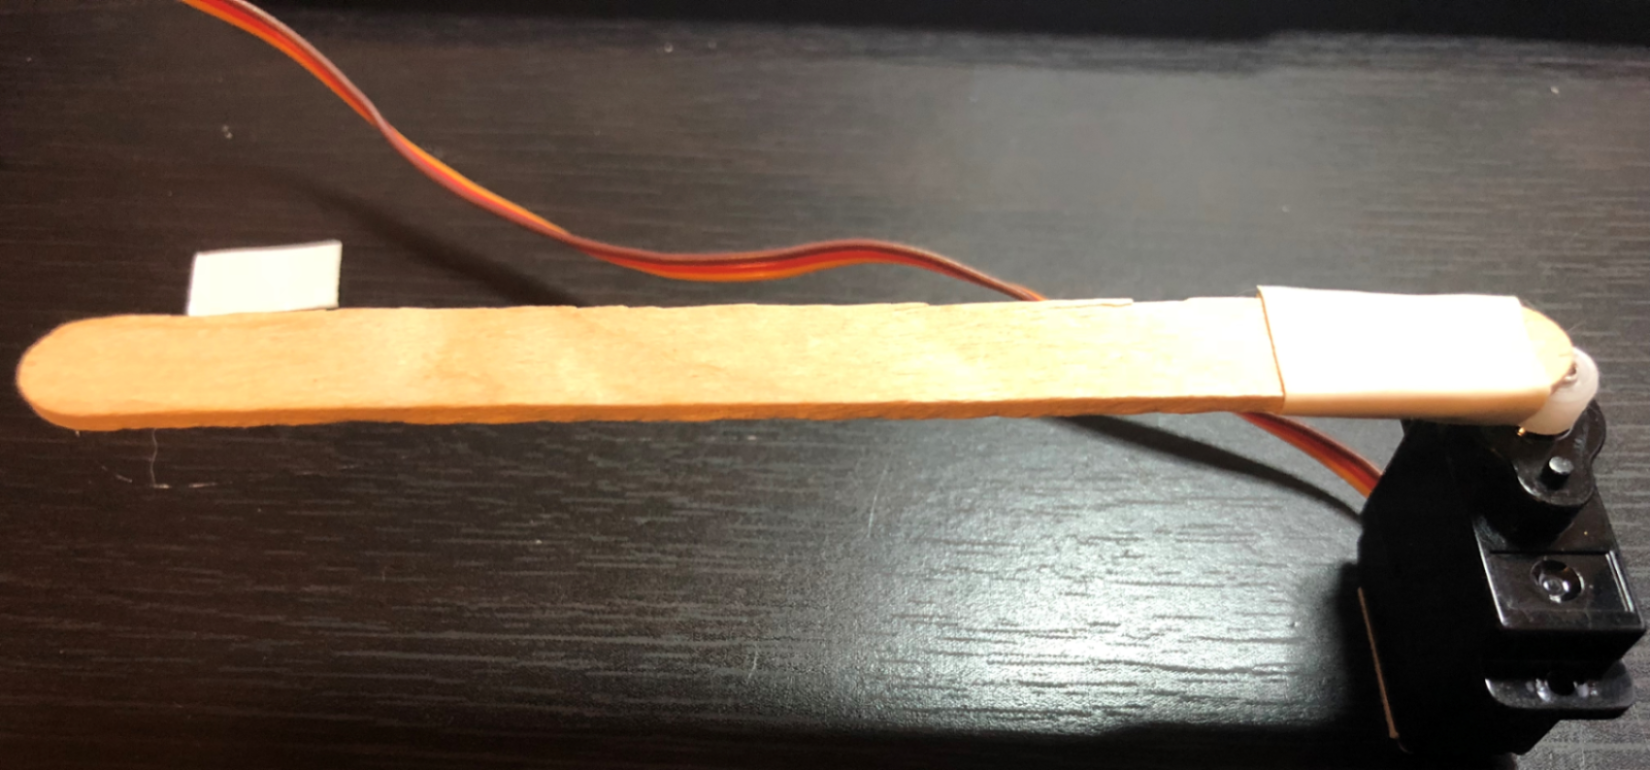
Now that we've wired up the sensor, we'll take on the (optional) task of modifying our servo to look more like a meter.


Making the servo into a meter

Take the servo horn and, with the center of the horn facing away from you, move it as far to the left as possible (0 degrees). Do not use a lot of force or you'll strip the gears. Then, use the tape to tape your stick to the servo horn to make it appear longer. then, you can tape it down to a desk or onto a wall, with your meter pointing left. You can see my attempt in the following diagram:

Now that we have our light sensor wired up and...