Book Image

Blender 3D Printing by Example

By : Vicky Somma
5 (1)
Book Image

Blender 3D Printing by Example

5 (1)
By: Vicky Somma

Overview of this book

Blender is an open-source modeling and animation program popular in the 3D printing community. 3D printing brings along different considerations than animation and virtual reality. This book walks you through four projects to learn using Blender for 3D Printing, giving you information that you need to know to create high-quality 3D printed objects. The book starts with two jewelry projects-- a pendant of a silhouette and a bracelet with custom text. We then explore architectural modeling as you learn to makes a figurine from photos of a home. The final project, a human hand, illustrates how Blender can be used for organic models and how colors can be added to the design. You will learn modeling for 3D printing with the help of these projects. Whether you plan to print at-home or use a service bureau, you’ll start by understanding design requirements. The book begins with simple projects to get you started with 3D modeling basics and the tools available in Blender. As the book progresses, you’ll get exposed to more robust mesh modeling techniques, modifiers, and Blender shortcuts. By the time you reach your final project, you’ll be ready for organic modeling and learning how to add colors. In the final section, you’ll learn how to check for and correct common modeling issues to ensure the 3D printer can make your idea a reality!
Table of Contents (16 chapters)

Exporting your work for 3D printing

Our final step is to export the model into a format for the slicer and 3D printer. Currently, there are a few file formats that work well. The most common format is Stereolithography. You can think of it as a Standard Triangle Language (STL) as it will convert all your faces into a series of triangles for the slicer to read.

The steps to export your pendant for 3D printing are:

  1. If necessary, switch to Object Mode and right-click your object to select it. Make sure everything you want is highlighted in yellow.
  2. In the menu at the top of your screen, select File | Export | Stl (.stl):
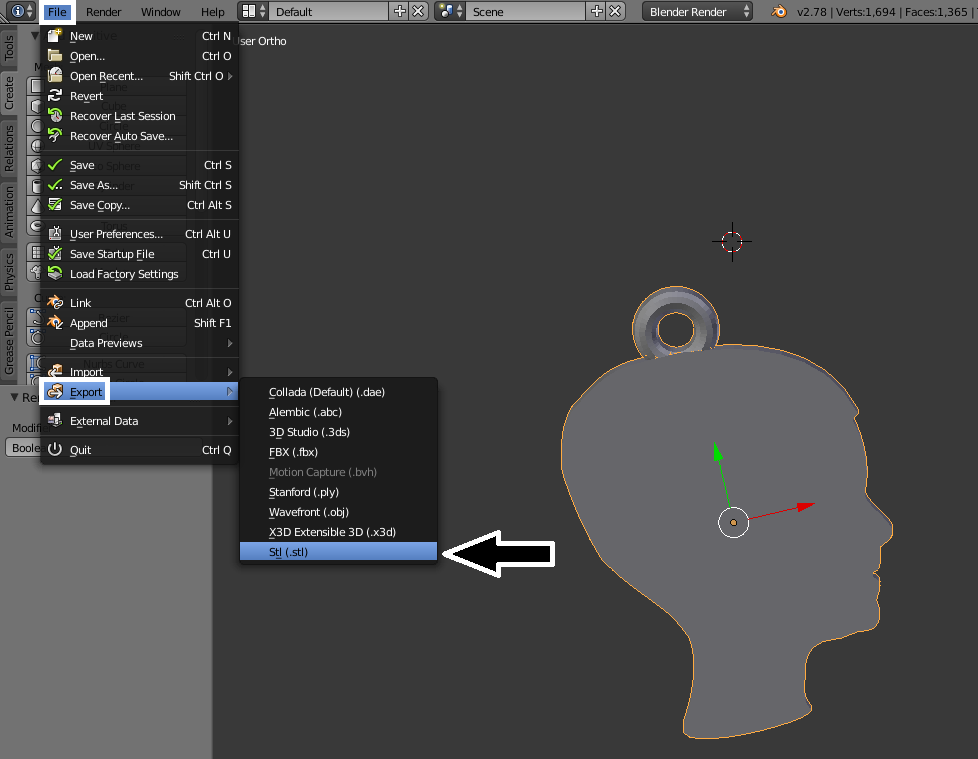
Exporting the model to an STL file.
  1. You can click on the folder icon and the white up arrow to browse your computer's folder structure to pick where you want to save the file.
  2. By default, the STL will be named the same as your .blend project. You can customize...