

The Arduino can be powered in one of three ways: through the VIN/GND pins, the DC Supply Input port or the USB port.
Powering the Arduino
Using the VIN/GND pins to power the Arduino
The VIN and GND pins in the power and external reset header can be used to power the Arduino with an external battery. Powering the Arduino in this way is mainly used when we wish to connect a battery, in series, with a switch to turn the power to the Arduino on and off. The following photograph illustrates this:

It is not recommended that we power the Arduino in this manner unless we are looking for the most expensive and short-lived way to power the Arduino. We could use six AA batteries in series, which will provide the same voltage as the 9V battery in the preceding photograph but would give us approximately four times the capacity. It is still not recommended that we power the Arduino in this manner as it would be fairly expensive.
Unless there is a specific need to use a battery to power the Arduino, I would avoid using them.
Using the DC supply input to power the Arduino
The DC supply input connector can be used with an AC-to-DC power adapter or a battery to power the Arduino. The connector has a female 2.1 mm center-positive plug. While the Arduino operates at 5 volts a maximum input of 20 volts can be used; however, as was stated earlier, it is recommended to not use more than 12V.
We can use an AC-to-DC adjustable power adapter like the one shown in the following photograph to power the Arduino using the DC supply input connector:
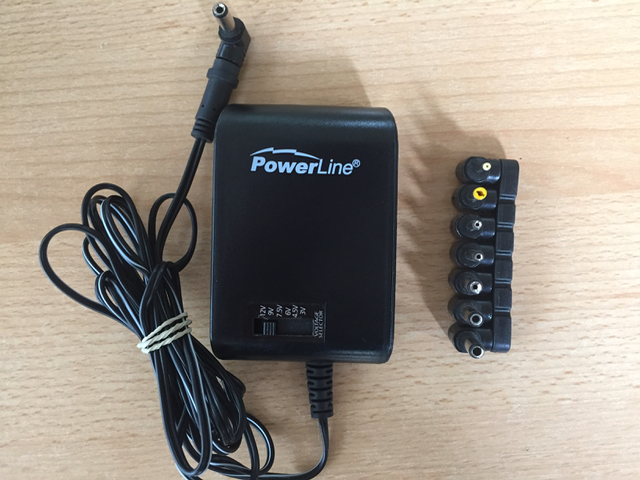
With this adapter, you can adjust the output power to the desired voltage. You can find power supplies similar to this online or at most stores that sell electronic items.
Using the USB connector to power the Arduino
Using the USB connector to power the Arduino is the way that I usually power it. It is by far the easiest and safest way to power the Arduino and the least expensive. You can power the Arduino directly from the USB port on your computer or from a USB rechargeable power bank like the one shown in the following photograph:

This is a very affordable and simple way to power the Arduino. It can also be used for robotic or similar projects that need the mobility to move around; however, we do need to be careful when we connect shields or other accessories to the Arduino that the USB connector can draw enough power. As an example, later in this book, we will look at the MOVI speech synthesizing and voice recognition shield that draws too much power for the Arduino to be powered by the USB connector while the shield is connected.
Now that we have mentioned Arduino shields, let's look at what they are and see the types of functionality they can provide.