

Building traffic lights
We know how to light up a single LED, and we also know how to light up an LED using a button input. The next step is to build a circuit using three LEDs and to write the code to light them up in the correct order.
Building the circuit
To build the circuit, we need the following components:
- Three LEDs (preferably red, yellow, and green)
- Three 220 Ohm resistors
- Seven jumper wires
We start by first setting up the components using the following steps:
- Connect GND from the Arduino to any ground port on the power bus.
- Place the first (red) LED with the cathode in G12 and the anode in G13.
- Place the second (yellow) LED with the cathode in G15 and the anode in G16.
- Place the third (green) LED with the cathode in G18 and the anode in G19.
- Connect F13 with D13 using a 220 Ohm resistor.
- Connect F16 with D16 using a 220 Ohm resistor.
- Connect F19 with D19 using a 220 Ohm resistor.
- Connect F13 to Ground on the power bus using a jumper wire.
- Connect F16 to Ground on the power bus using a jumper wire.
- Connect F19 to Ground on the power bus using a jumper wire.
- Connect port D13 to A12 using a jumper wire.
- Connect port D16 to A12 using a jumper wire.
- Connect port D19 to A12 using a jumper wire.
Your circuit should now look similar to the following figure:
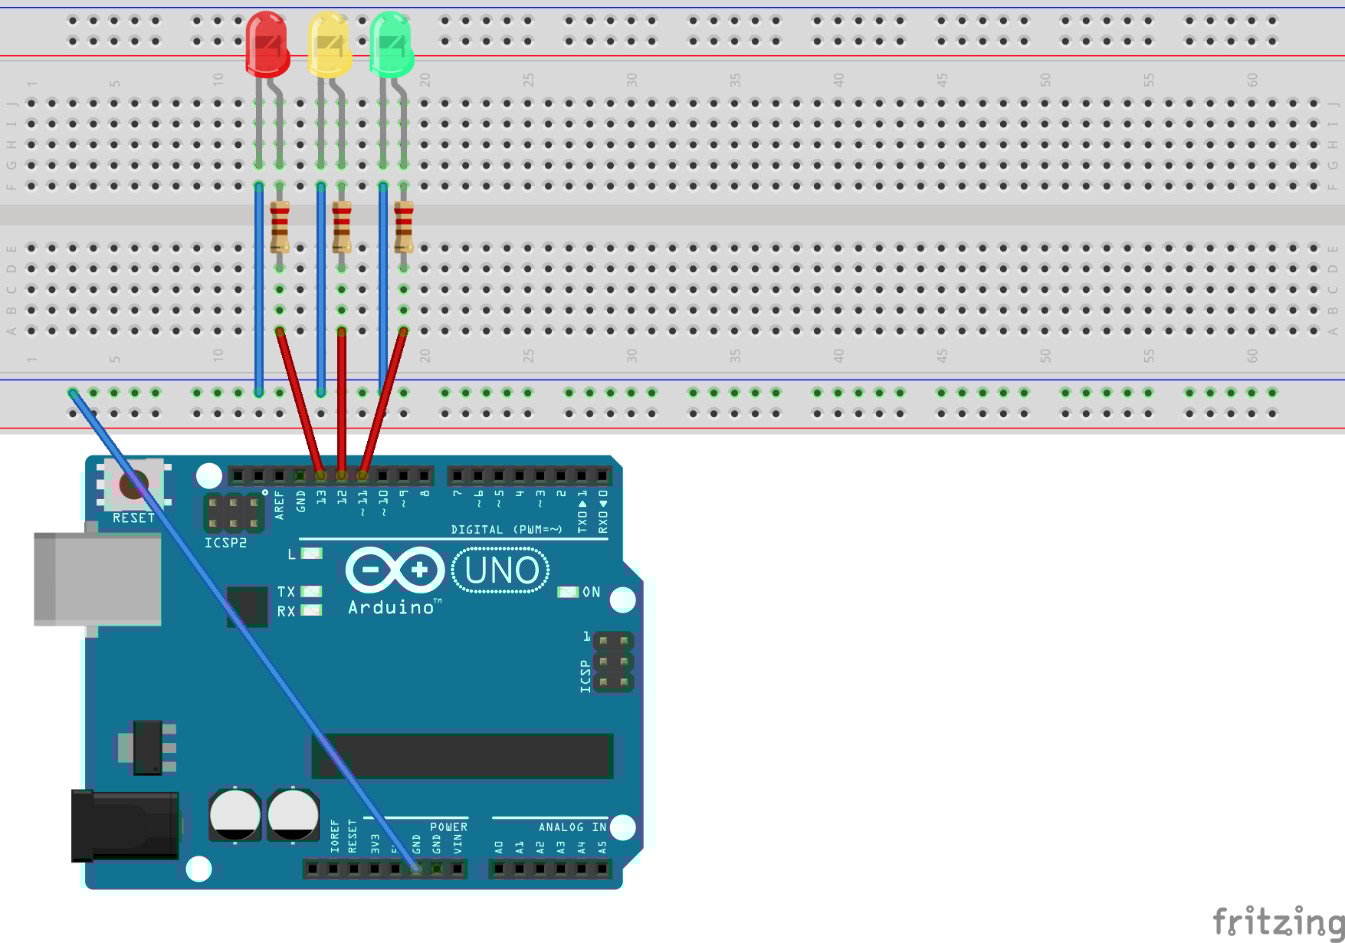
Figure 2.6 – The traffic lights circuit – image taken from Fritzing
We have now successfully set up the circuit. Now we can continue to write some code to control the LEDs.
Creating a folder structure
We start off by creating a new folder named traffic-lights-simple inside the Chapter02 folder. Also, we create a main.go file inside the new folder and start off with an empty main function. Your project structure should now look like this:
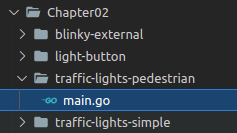
Figure 2.7 - Folder structure for the circuit
Writing the logic
We have successfully set up our project structure to continue. We are going to implement the following flow:
RED -> RED-YELLOW -> GREEN -> YELLOW -> RED
This is a typical flow for traffic lights with three bulbs.
We are going to configure three pins as output, and afterward, we want to endlessly loop and light up the LEDs in this flow.
Inside the main function, we write the following:
- Initialize a new variable named
outputConfigasPinConfigusing thePinOutPutmode:outputConfig := machine.PinConfig{Mode: machine. PinOutput} - Initialize a new variable named
redLEDwith the valuemachine.D13and configure it as output:redLED := machine.D13 redLED.Configure(outputConfig)
- Initialize a new variable named
yellowLEDwith the valuemachine.D12and configure it as output:yellowLED := machine.D12 yellowLED.Configure(outputConfig)
- Initialize a new variable named
greenLEDwith the valuemachine.D11and configure it as output:greenLED := machine.D11 greenLED.Configure(outputConfig)
We have now initialized our variables to act as output pins. The next step is to light up the LEDs in the correct order. We basically have four phases, which just need to repeat in order to simulate a real traffic light. Let's go through these one by one:
- We are going to handle the phases in an endless loop:
for { - For RED-Phase, turn on the red LED and wait for a second:
    redLED.High()
    time.Sleep(time.Second)
- For RED-YELLOW-Phase, turn on the yellow LED and wait for a second:
    yellowLED.High()
    time.Sleep(time.Second)
- For GREEN-PHASE, turn off the yellow and red LEDs and turn on the green LED and wait for a second:
    redLED.Low()
    yellowLED.Low()
    greenLED.High()
    time.Sleep(time.Second)
- For YELLOW-Phase, turn off the green LED and turn on the yellow LED, then wait for a second and turn off yellow again, so we can start cleanly with RED-Phase again:
    greenLED.Low()
    yellowLED.High()
    time.Sleep(time.Second)
    yellowLED.Low()
}
The complete content of the function is available at the following URL:
Note
Don't forget to import the time and machine packages.
We have now assembled and programmed a complete traffic lights flow. The next step is to combine everything we have built to complete our project.