
Writing the code
You will be writing two programs for this build. The first program will allow the robot to move autonomously without any help from its human companion. The second program will be a program that will allow you to control the robot using the remote-control feature of the app.
Connecting sensors and motors to the ports
Before we get into the programming, let's make sure all motors and sensors are properly plugged into the Intelligent Hub. The two motors for the tail should be plugged into ports A and E. The two-wheel motors will be plugged into ports B and F. The left wheel will be in port B and the right wheel will be plugged into port F.
For the sensors, you will plug the distance sensor into port C. Finally, the color sensor will plug into port D.
Check all connections using the Port View in the software.
This view is reproduced here:
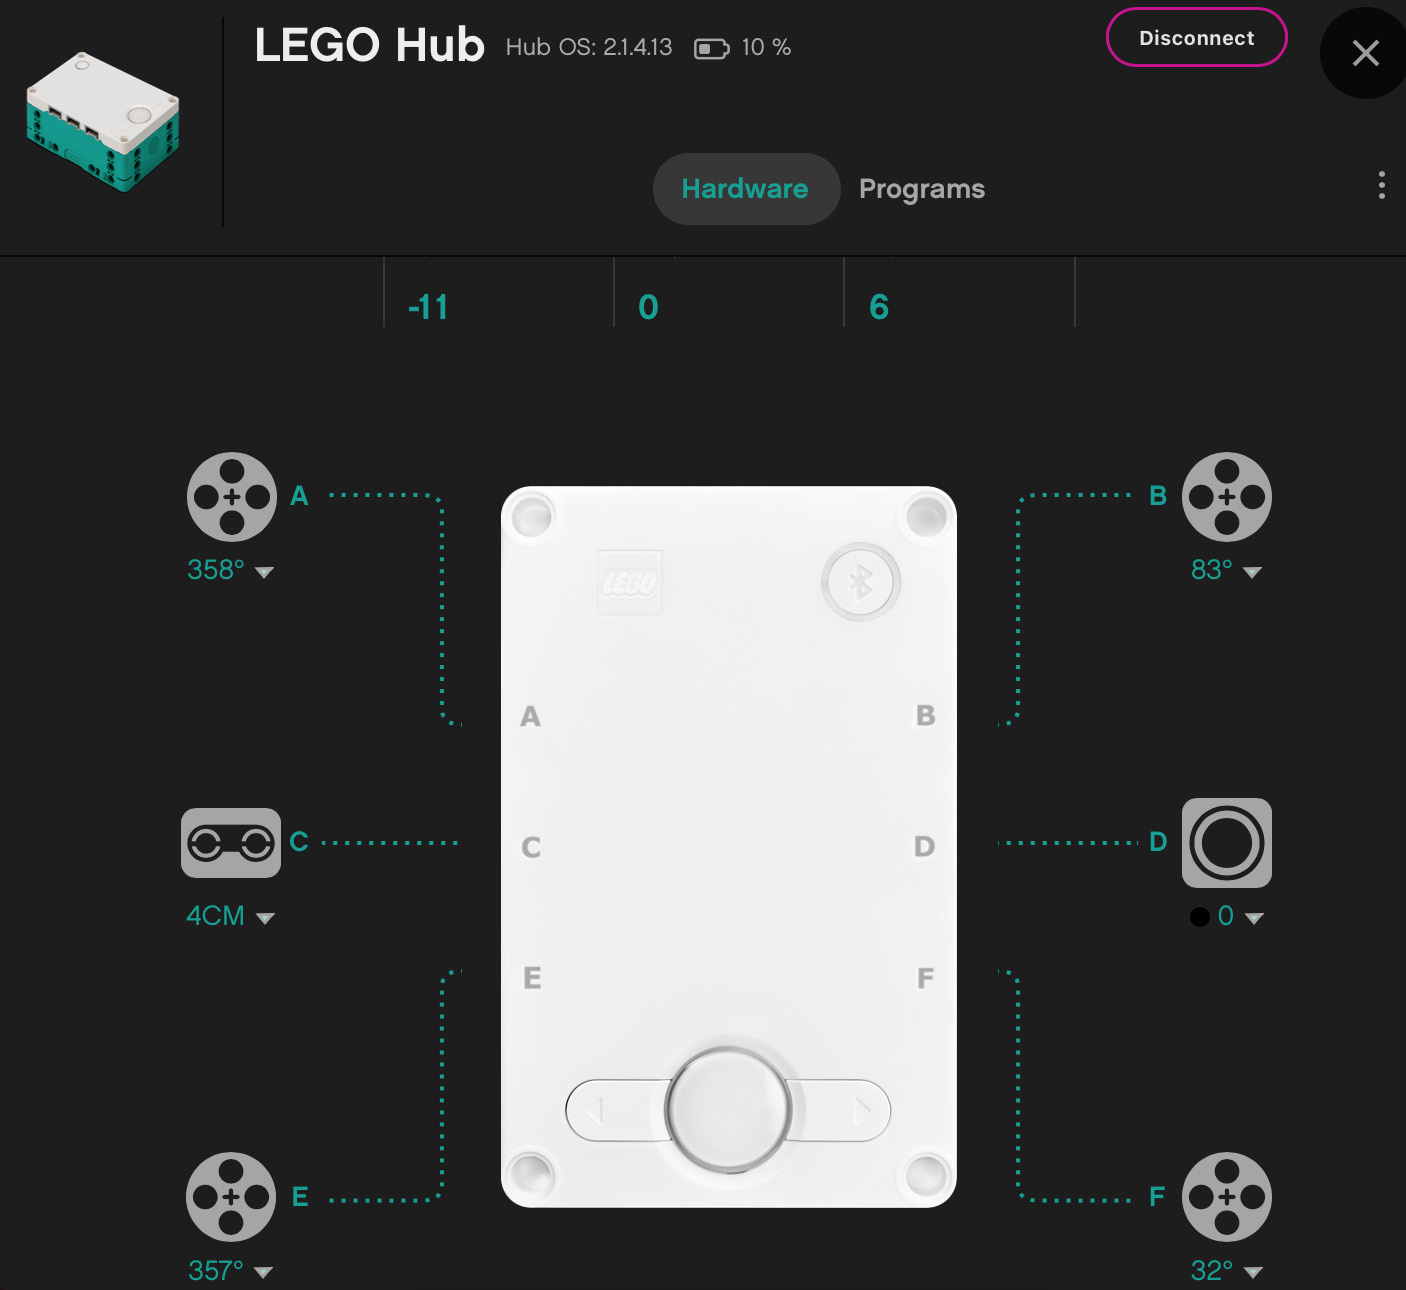
Figure 5.74 – Port View in the MINDSTORMS software