
Implementing the "Hello World!" example
In this section, we will discuss a hello world example. In any programming language, the first coding exercise is to print "Hello World" to the screen. We will discuss this example using MicroPython and CircuitPython.
Reset button for the Pico (optional)
The Pico does not come with a reset button. In order to reset the Pico, you would have to disconnect and reconnect the USB cable, which can be tedious. This can be overcome by adding a reset button between pin numbers 28 and 30 (note the extra button right next to the microcontroller), as shown in the following image (you can get this button fixture from this link: https://bit.ly/3w8AmO2):

Figure 1.13 – Reset button on the Pico
The reset button makes it easier to restart the program during development. Adding a reset button is optional and it is not recommended if you are not comfortable with soldering. In the next section, we will be writing our first program for the Pico.
MicroPython
We will be using Thonny IDE (IDE stands for integrated development environment) for this example. Thonny IDE can be downloaded from https://thonny.org. The IDE is available for Windows, Mac, and Linux operating systems.
If you use a Raspberry Pi for your programming needs, it comes pre-installed with Thonny. You can launch Thonny from Menu | Programming and scroll down the drop-down button to find Thonny Python IDE, as illustrated in the following screenshot:
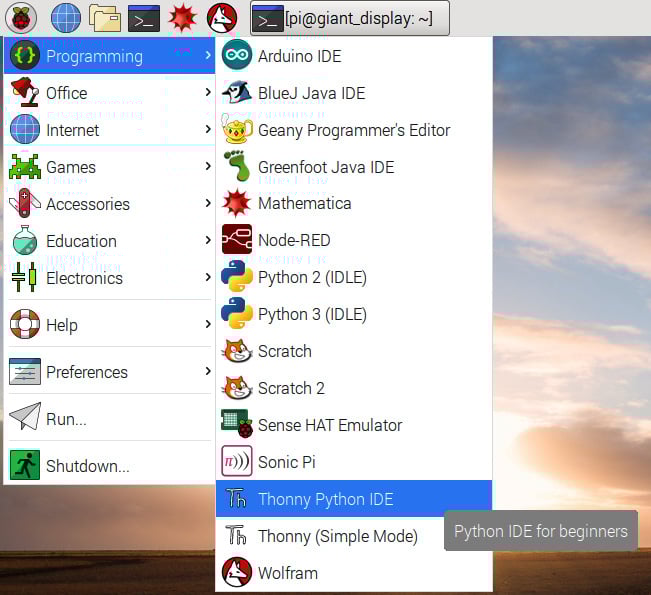
Figure 1.14 – Thonny IDE location on the Raspberry Pi Desktop
Now, let's prepare the Pico by flashing the MicroPython binary.
Flashing the MicroPython binary
The Pico needs to be connected to the computer in a specific manner to flash the banner. The steps to flash the binary are outlined here:
- The first step is to download the binary from https://bit.ly/31nBMFW.
- Press and hold the BOOTSEL button shown in the following screenshot as you connect a MicroUSB cable to your Pico. Ensure that the other end of the USB cable is connected to the computer.
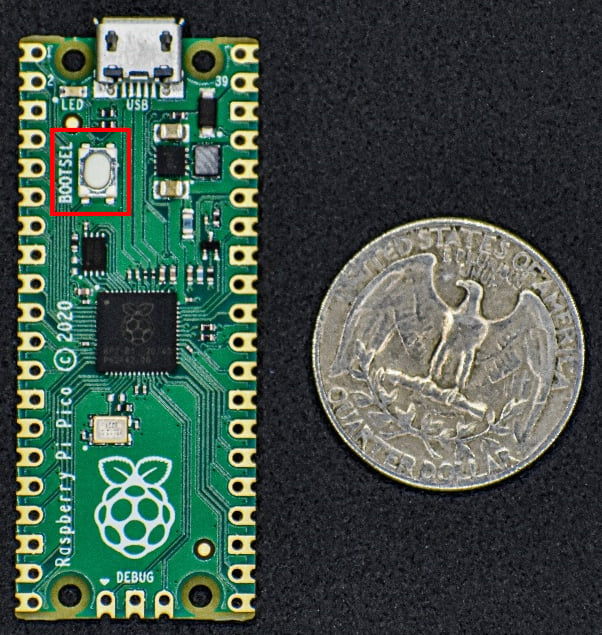
Figure 1.15 – Pico BOOTSEL button
- The Pico should enumerate as a storage device on your computer, which should look like something similar to this:
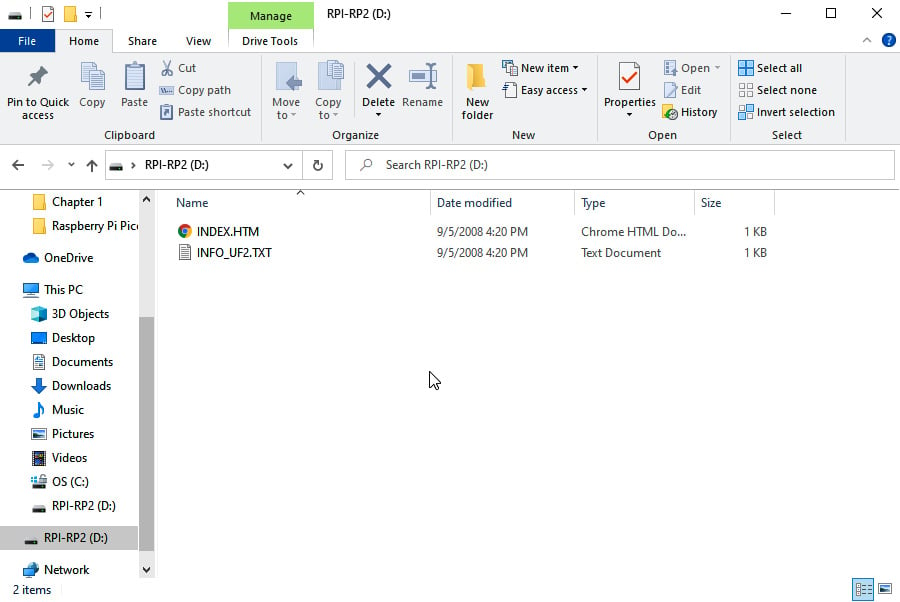
Figure 1.16 – Raspberry Pi Pico enumerated as a storage device
- Next, copy over the binary onto the storage drive. The Pico will reset itself and we are ready to write programs in MicroPython.
Now, we are ready to write our first program in MicroPython!
Writing our first program
Let's launch Thonny and take it for a test drive! You will need to take the following steps:
- Launch Thonny and you should see a window, as shown in the following screenshot:
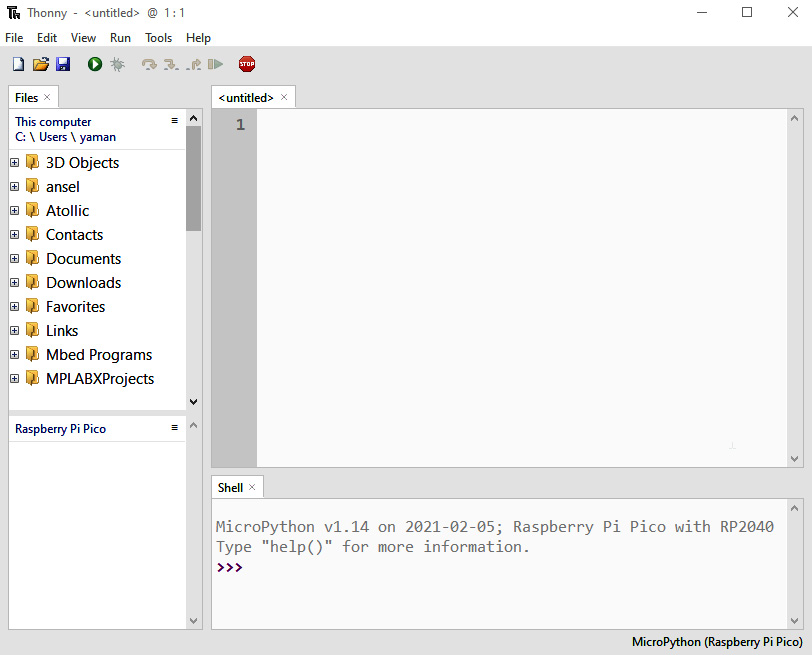
Figure 1.17 – Thonny IDE
- We are going to be running our first program using the interpreter running on your Pico. If you are not familiar with Python interpreters, they enable the testing of your code as you write them. Go to Run, and then click on Select Interpreter. From here, you will select the following options, as shown in Figure 1.18:
- MicroPython (Raspberry Pi Pico)
- < Try to detect port automatically >
These options can be seen in the following screenshot:
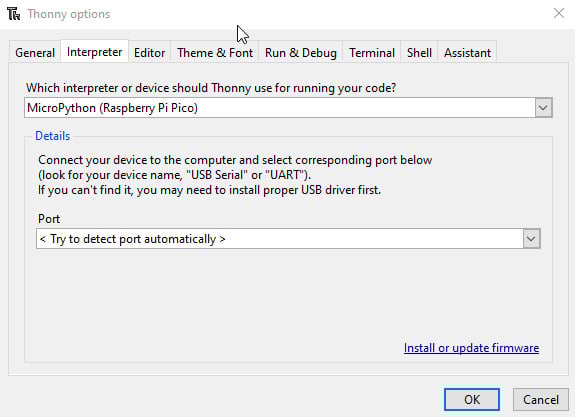
Figure 1.18 – Selecting the Python interpreter
- Now, you should see the Python interpreter, as shown in the following screenshot. This is the MicroPython interpreter running on the Pico. Let's take it for a test drive.
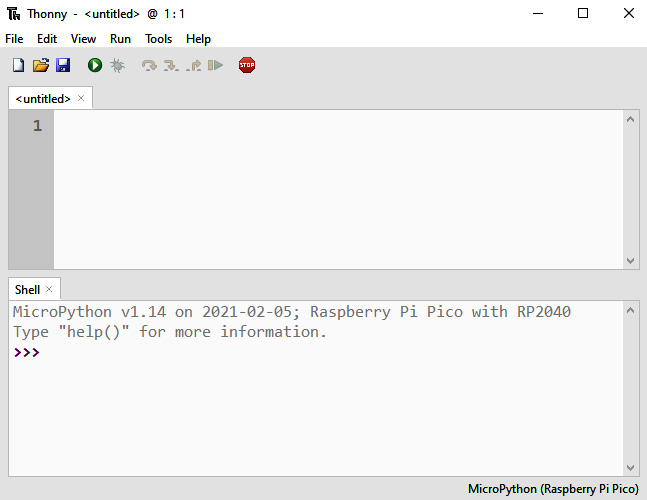
Figure 1.19 – Python interpreter
You should see the following output:
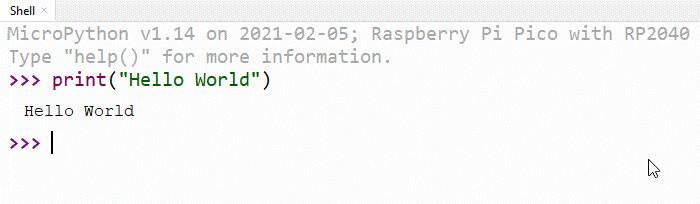
Figure 1.20 – Interpreter output
You have just finished writing your first program on your Raspberry Pi Pico! In the next example, we will write a script that starts running continuously when the Pico is powered by a USB cable.