

Getting started with a new project in the Project view
The Project view is the view that most programmers will spend their time in. While the Portal view has its advantages in simplicity, the Project view is a necessity and offers methods to do almost everything that the Portal view can do.
With this in mind, creating a brand-new project in the Project view may be easier for people new to TIA Portal as it follows similar steps to other development platforms.
Note
Remember, on a clean install with default options, TIA Portal will open in the Portal view. In order to get into the Project view, click the text (Project view) in the bottom left of the screen to change modes.
This shows the view that will be switched to when clicked, not the current view.
Starting a new project
When in the Project view, TIA expects a project to be available in order to show anything project-related. At this point, though, no project is available, as none has been created.
A new project can be started by clicking the New project icon in the toolbar at the top of the window, as illustrated in the following screenshot:
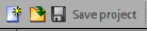
Figure 1.5 – New project in the Project view
Once the New project icon has been clicked, the following dialog box is presented:
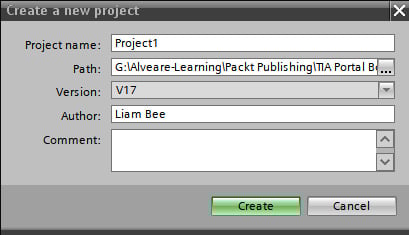
Figure 1.6 – Create a new project dialog box
This allows the setting of the project name, save path, and author, as well as some comments about the project.
Once the Create button has been clicked, TIA Portal will create (and save) the new project.
Changes to the project tree
Now that a project has been loaded into TIA (the one just created), the project tree is updated with additional objects that relate to the project, as shown in the following screenshot:
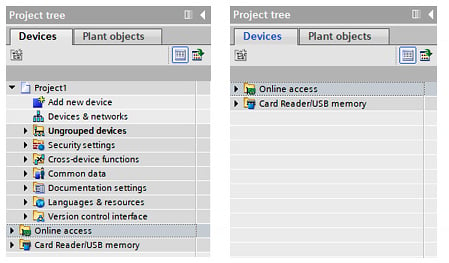
Figure 1.7 – Project tree differences when a device is added (left) compared to no device added (right)
These objects relate only to this project and may affect any devices or further objects that are added to the project (Security Settings, for example).
Adding devices
In the Project view (once a project has been opened), a device such as a PLC can be added by double-clicking the Add new device option in the project tree.
By double-clicking the Add new device option, a new dialog box will open, allowing the selection of supported devices. This is illustrated in the following screenshot:
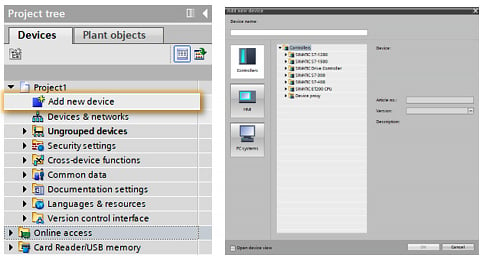
Figure 1.8 – Add new device
Once a suitable device has been selected and a name assigned, the OK button can be clicked, and the new PLC (or other hardware) will appear in the project tree, as illustrated in the following screenshot:

Figure 1.9 – Project tree with new device expanded
If the new device is expanded, all of the available child objects that are relative to the device are displayed.
Note
This is a necessary step to complete before software programming takes place.
The Programming Blocks object (where software such as ladder logic is written) is not available until a device has been added.
Configuration of devices
Every device that is added in TIA Portal will require some basic level of configuration, such as setting the network Internet Protocol (IP) address or adding slave modules.
This can be accessed by right-clicking the new device in the project tree. The Properties item will be available at the bottom of the context menu.
The Properties dialog will open—this is where the configuration of the device can take place, as illustrated in the following screenshot:
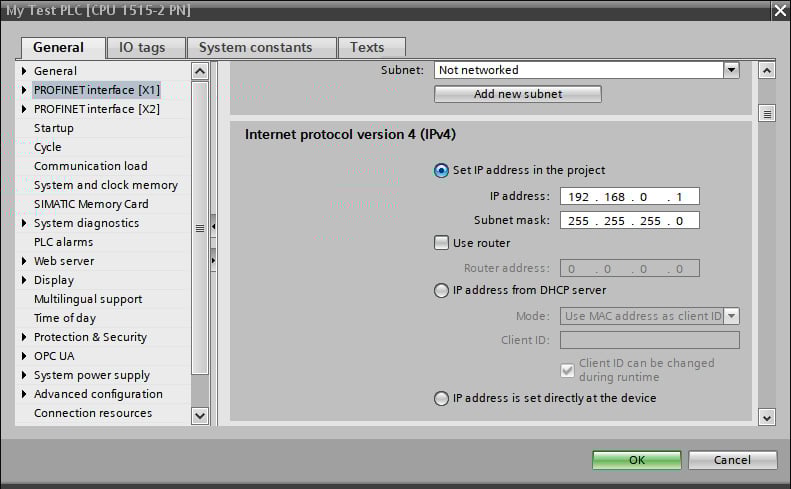
Figure 1.10 – Configuration dialog
The same configuration settings can also be accessed by opening the device configuration from the project tree. Once the Device view opens, the properties are displayed in the Properties, Info, and Diagnostics pane, as illustrated in the following screenshot:
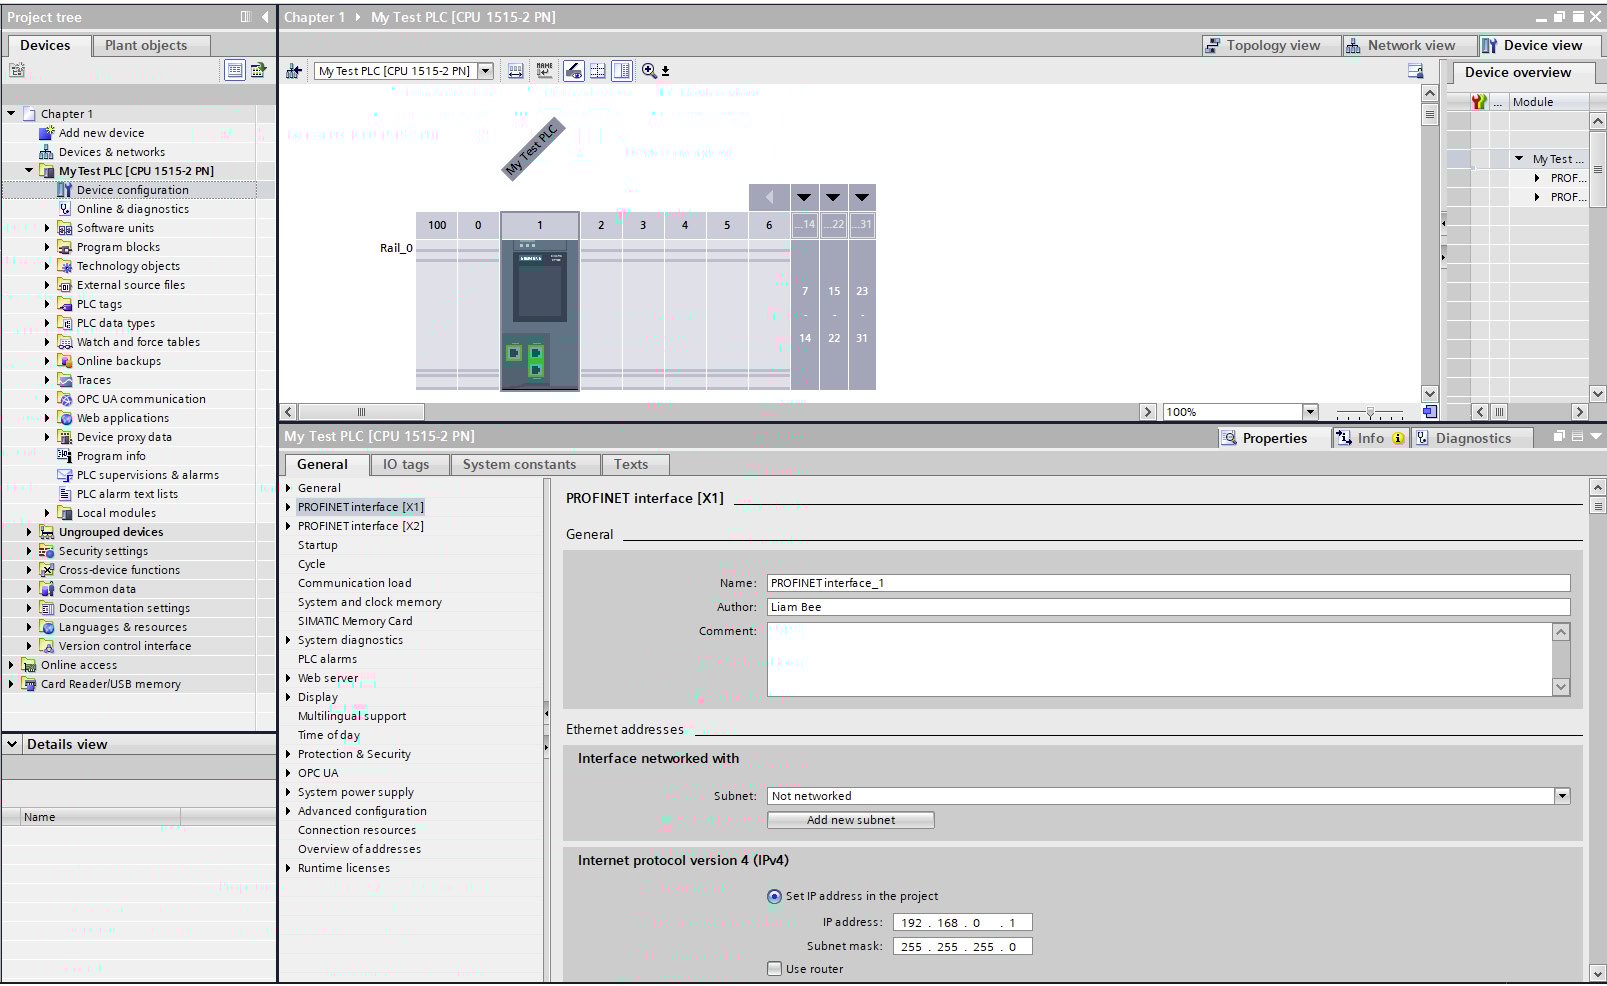
Figure 1.11 – Configuration dialog via the Device view
This pane then allows for the configuration of the device's properties and options.