Book Image

ROS Robotics Projects - Second Edition

By : Ramkumar Gandhinathan
Book Image

ROS Robotics Projects - Second Edition

By: Ramkumar Gandhinathan

Overview of this book

Nowadays, heavy industrial robots placed in workcells are being replaced by new age robots called cobots, which don't need workcells. They are used in manufacturing, retail, banks, energy, and healthcare, among other domains. One of the major reasons for this rapid growth in the robotics market is the introduction of an open source robotics framework called the Robot Operating System (ROS). This book covers projects in the latest ROS distribution, ROS Melodic Morenia with Ubuntu Bionic (18.04). Starting with the fundamentals, this updated edition of ROS Robotics Projects introduces you to ROS-2 and helps you understand how it is different from ROS-1. You'll be able to model and build an industrial mobile manipulator in ROS and simulate it in Gazebo 9. You'll then gain insights into handling complex robot applications using state machines and working with multiple robots at a time. This ROS book also introduces you to new and popular hardware such as Nvidia's Jetson Nano, Asus Tinker Board, and Beaglebone Black, and allows you to explore interfacing with ROS. You'll learn as you build interesting ROS projects such as self-driving cars, making use of deep learning, reinforcement learning, and other key AI concepts. By the end of the book, you'll have gained the confidence to build interesting and intricate projects with ROS.
Table of Contents (14 chapters)

Introduction to Docker

Docker is a piece of free software and the name of the company that introduced it to open source community. You might have heard of virtual environments in Python, where you can create isolated environments for your projects and install dedicated dependencies that do not cause any trouble with other projects in other environments. Docker is similar, where we can create isolated environments for our projects called containers. Containers work like virtual machines but aren't actually similar to virtual machines. While virtual machines need a separate OS on top of the hardware layer, containers do not and work independently on top of the hardware layer, sharing the resources of the host machine.

This helps us consume less memory and it is often speedier than virtual machines. The best example to show the difference between both is shown here:

Differences between a virtual machine and Docker

Now that we know the difference between a virtual machine and Docker, let's understand why we use Docker.

Why Docker?

In ROS, a project may consist of several metapackages that contain subpackages, and those would need dependencies to work on. It could be quite annoying for a developer to set up packages in ROS as it is quite common that different packages would use different or the same dependencies of different versions and those could lead to compilation issues. The best example would be when we want to use OpenCV3 with ROS Indigo while working with vision algorithms or gazebo_ros_controller packages with different plugin versions, causing the famous gravity error (https://github.com/ros-simulation/gazebo_ros_pkgs/issues/612). By the time the developer tries to rectify them, he/she might end up losing other working projects due to replaced packages or dependency version changes. While there might be different ways to handle this problem, a practical way to go about this problem in ROS would be to use Docker containers. Containers are fast and can start or stop, unlike any process in an OS in a matter of seconds. Any upgrades or updates on the OS, or packages would not affect the containers inside or other containers in place.

Installing Docker

Docker can be installed in two ways: using the Ubuntu repositories or using the official Docker repository:

  • If you would just like to explore and save a couple of minutes with just a single line installation, go ahead and install from the Ubuntu repository.
  • If you would like to explore more options with Docker other than what is intended in this book, I would suggest that you go ahead and install from official Docker repositories as they will have the most stable and bug-fixed packages with added features.
Before going ahead with either of the following installations, ensure you update the apt package index using $ sudo apt-get update.

Installing from the Ubuntu repository

To install Docker from the Ubuntu repository, use the following command:

$ sudo apt-get install docker.io

If you've changed your mind and would like to try out installing from the Docker repository or if you wish to remove the Docker version you installed via the preceding step, move on to the next step.

Removing Docker

If you're not interested in the old Docker version and want to install the latest stable version, remove Docker using the following command and install it from the Docker repository:

$ sudo apt-get remove docker docker-engine docker.io containerd runc 
The preceding is a general command to remove Docker, docker-engine, docker.io (as these are the older version names), and runtime containers, if any were pulled or created.

Installing from the Docker repository

To install Docker from the official repository, follow these steps:

  1. First, we use the following command:
$ sudo apt-get install apt-transport-https ca-certificates curl gnupg-agent software-properties-common 
  1. Then, we add the official GPG key from Docker:
$ curl -fsSL https://download.docker.com/linux/ubuntu/gpg | sudo apt-key add - 
  1. Set up the Docker repository using the following command:
$ sudo add-apt-repository "deb [arch=amd64] https://download.docker.com/linux/ubuntu bionic stable" 
There are three types of update channels called the stable, nightly, and test channels. The test channel provides the prereleases that are ready for testing before availability, the nightly channel is the work in progress or beta version, and stable is the finalized bug-fixed channel. The best suggestion from the Docker team is the stable channel; however, you're free to test either channels by replacing the term stable with either nightly or test.
  1. Update the apt package index once again:
$ sudo apt-get update
  1. Now, install the Docker package using the following command:
$ sudo apt install docker-ce
  1. After installing via either method, you could check the versions of Docker for both types of installation using the following command:
$ docker --version

The current version that is available in the Ubuntu repository is 17.12, while the latest release version at the time of writing this book is 18.09 (stable version).

Docker can only be run as a root user by default. Hence, add your username to the Docker group using the following command:

$ sudo usermod -aG docker ${USER}

Ensure you reboot the system for the preceding to take effect; otherwise, you will face a permission denied error, as shown here:

Permission denied error

A quick fix to the preceding error would be to use sudo before any Docker commands.

Working with Docker

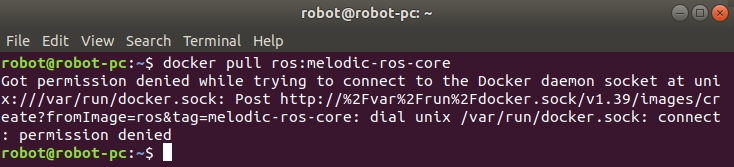
Containers are built from Docker images and these images can be pulled from Docker Hub (https://hub.docker.com/). We can pull ROS containers from the ros repository using the following command:

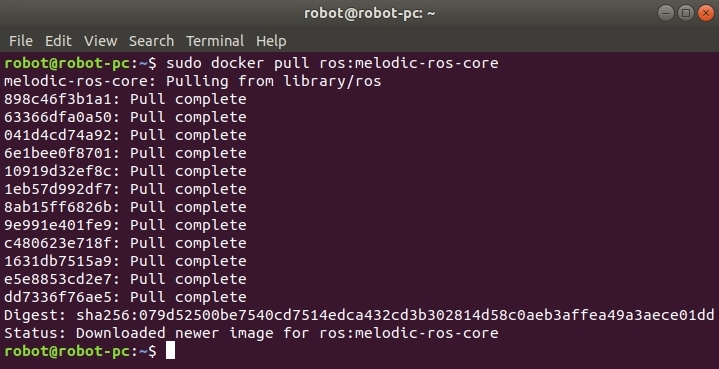
$ sudo docker pull ros:melodic-ros-core

If everything is successful, you see the output shown here:

Successful Docker pull

You can choose the specific version of ROS you want to work with. The best suggestion for any application is to start with melodic-core, where you would continue to work and update the container related to your project goal and not have other unnecessary components installed. You can view Docker images using this command:

$ sudo docker images

By default, all of the containers are saved in /var/lib/docker. Using the preceding command, you can identify the repository name and tag. In my case, for the ros repository name, my tag was melodic-ros-core; hence, you could run the ros container using the following command:

$ sudo docker run -it ros:melodic-ros-core

Other information the $ docker images command gives is the container ID, which is 7c5d1e1e5096 in my case. You will need it when you want to remove the container. Once you're inside Docker, you can check the ROS packages that are available using the following command:

$ rospack list

When you run and exit Docker, you would've created another container, so for beginners, it's quite common to create a list of containers unknowingly. You could use $ docker ps -a or $ docker ps -l to view all active/inactive containers or the latest container and remove containers using $ docker rm <docker_name>. To continue working in the same container, you could use the following command:

$ sudo docker start -a -i silly_volhard

Here, silly_volhard is the default name created by Docker.

Now that you've opened the same container, let's install an ROS package and commit changes to the Docker. Let's install the actionlib_tutorials package using the following command:

$ apt-get update
$ apt-get install ros-melodic-actionlib-tutorials

Now, when you check the ROS packages list once again, you should be able to view a few extra packages. Since you have modified the container, you would need to commit it to experience the modifications while reopening the Docker image. Exit the container and commit using the following command:

$ sudo docker commit 7c5d1e1e5096 ros:melodic-ros-core

Now that we have installed ROS on Ubuntu and VirtualBox, let's learn how to set up the ROS workspace.