
The Android SDK provides everything we need to easily create a new emulator Android Virtual Device (AVD):
Open Android SDK Manager from a terminal by running the following command:
androidGo to Tools | Manage AVDs.... Alternatively, click on the dedicated Android Virtual Device Manager button in the main toolbar of Eclipse.
Then, click on the New button to create a new Android emulator instance. Fill the form with the following information and click on OK:

The newly created virtual device now appears in the Android Virtual Device Manager list. Select it and click on Start....
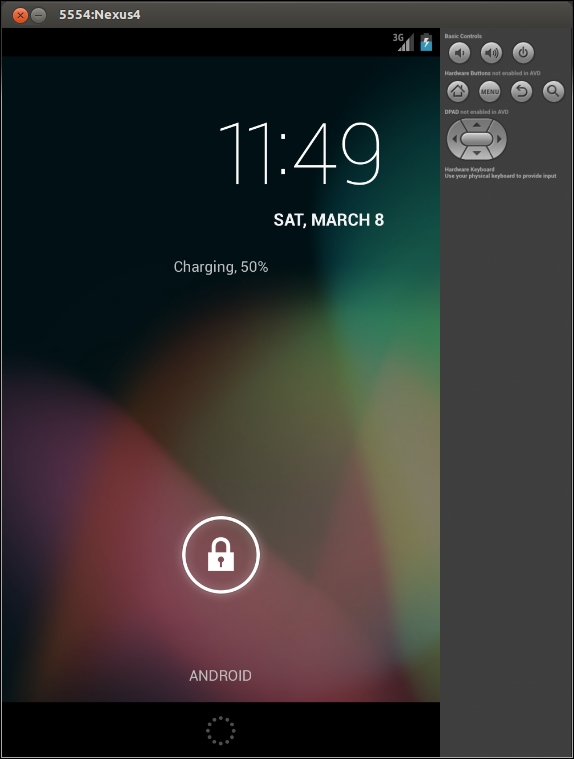
The Launch Options window appears. Tweak the display size depending on your screen size if needed and then click on Launch. The emulator starts up and after some time, your virtual device is loaded:
By default, the emulator SD card is read only. Although this is optional, you can set it in write mode by issuing the following command from a prompt:
adb shell
su
mount -o rw,remount rootfs /
chmod 777 /mnt/sdcard
exit
Android emulators can be easily managed through the Android Virtual Device manager. We are now able to test the applications we will develop in a representative environment. Even better, we can now test them in several conditions and resolutions without requiring a costly device. However, if emulators are useful development tools, take into account that emulation is not always perfectly representative and lacks some features, especially hardware sensors, which can be partially emulated.
Android Virtual Device manager is not the only place where we can manage emulators. We can also use the command-line tool emulator provided with the Android SDK. For example, to launch the Nexus4 emulator created earlier directly from a terminal prompt, enter the following:
emulator -avd Nexus4
While creating the Nexus4 AVD, acute readers might have been surprised to see we set CPU/ABI to Intel Atom (x86), whereas most Android devices run on ARM processors. Indeed, since Windows, OS X, and Linux all run on x86, only x86 Android emulator images can benefit from hardware and GPU acceleration. On the other hand, ARM ABI can run rather slow without it, but it may be more representative of the devices your application may run on.
Tip
To benefit from full hardware acceleration with an X86 AVD, you will need to install the Intel Hardware Accelerated Execution Manager (HAXM) on your Windows or Mac OS X system. On Linux, you can install KVM instead. These programs can work only if your CPU benefits from a Virtualization Technology (which is the case most of the time nowadays).
Acuter readers may be even more surprised that we have not selected the latest Android platform. The reason is simply that x86 images are not available for all Android platforms.
Note
The Snapshot option allows saving the emulator state before closing it. Sadly, this open is incompatible with GPU acceleration. You have to select either one.
As a final note, know that customizing additional options, such as the presence of a GPS, camera, and so on, is also possible when creating an AVD to test an application in limited hardware conditions. The screen orientation can be switched with Ctrl + F11 and Ctrl + F12 shortcuts. For more information on how to use and configure the emulator, check out the Android website at http://developer.android.com/tools/devices/emulator.html.
Although emulators can be of help, they are obviously nothing compared to a real device. So, take your Android device in hand, switch it on and let's try to connect it to our development platform. Any of the following steps may change depending on your manufacturer and phone language. So, please refer to your device documentation for specific instructions.