Book Image

Hybrid Mobile Development with Ionic

By : Gaurav Saini
Book Image

Hybrid Mobile Development with Ionic

By: Gaurav Saini

Overview of this book

Ionic is an open source, front-end framework that allows you to develop hybrid mobile apps without any native-language hassle for each platform. It offers a library of mobile-optimized HTML, CSS, and JS components for building highly interactive mobile apps. This book will help you to develop a complete, professional and quality mobile application with Ionic Framework. You will start the journey by learning to configure, customize, and migrate Ionic 1x to 3x. Then, you will move on to Ionic 3 components and see how you can customize them according to your applications. You will also implement various native plugins and integrate them with Ionic and Ionic Cloud services to use them optimally in your application. By this time, you will be able to create a full-fledged e-commerce application. Next, you will master authorization, authentication, and security techniques in Ionic 3 to ensure that your application and data are secure. Further, you will integrate the backend services such as Firebase and the Cordova iBeacon plugin in your application. Lastly, you will be looking into Progressive Web Applications and its support with Ionic, with a demonstration of an offline-first application. By the end of the book, you will not only have built a professional, hybrid mobile application, but will also have ensured that your app is secure and performance driven.
Table of Contents (9 chapters)

Ionic CLI tasks

Ionic is improving day by day and many new features are coming to the platform.

Local development with Ionic serve

During the development process we need continuous testing. With Hybrid development you have the advantage that you can test your application in multiple ways:

  • In desktop browsers
  • iOS/Android simulators
  • Mobile browsers
  • Installing as a Native application

So for development purposes, testing in a desktop browser is the quickest and easiest. Many moving parts can be tested on desktop browsers. For running on desktop browsers, the Ionic CLI provides a command for it:

    $ ionic serve [options]
$ ionic serve --lab

Adding platforms

The ionic platform command adds and removes platforms:

    $ ionic cordova:platform <action> <PLATFORM> 
[options]

$ ionic cordova:platform add android
$ ionic cordova:platform remove ios
Running applications on devices

Running application on devices

The ionic run command helps in running the application with the connected device:

    $ ionic cordova:run [options] <PLATFORM>
$ ionic cordova:run android
There is also an option of Emulate. Emulate an
Ionic
project on a simulator or emulator.

$ ionic cordova:emulate [options] <PLATFORM>

The list of available tasks has been increasing in Ionic CLI. The best way to get in touch with all the latest tasks with extended details can be found by using ionic --help:

       $ ionic--help

This will list all the tasks with options and flags for each. You can easily try them all on a test project and this will help you understanding them more closely.

Uploading and sharing Ionic application

While developing the application you now have features to share your application with a testing team or friends for reviewing. The Ionic platform provides this feature and the best part is that you don't even need to build locally and then send everyone APK files. Uploading and sharing an application is not just some easy steps. Ionic for organization is another service available for collaboration between employees of an organization.

Ionic upload

Ionic upload is used for uploading new snapshot of your app to your Ionic account. Before this command you need to run ionic link which will add app_id and create an application on Ionic Cloud:

    $ ionic upload

Arguments or flags for the upload command:

  • [--deploy]: Deploy snapshot to specific channel
  • [--note]: The note to signify the upload description

Generating components

The ionic generate command create new pipes, components, pages, directive and providers. Also, this will create entry inside you app.module.ts for example if you create have created a provider it will be imported in app.module.ts and injected in providers. Once you create any of the page, component, directive, or pipe you will see a folder create with it TypeScript file where you can now start writing your logic:

$ ionic generate [type] [name]
  • [--type]: Type of generator such as page, directive, and pipe
  • [--name]: Name of the component generated
// Some example commands
$ ionic generate pipe NumberPipe
$ ionic generate page About

Ionic share

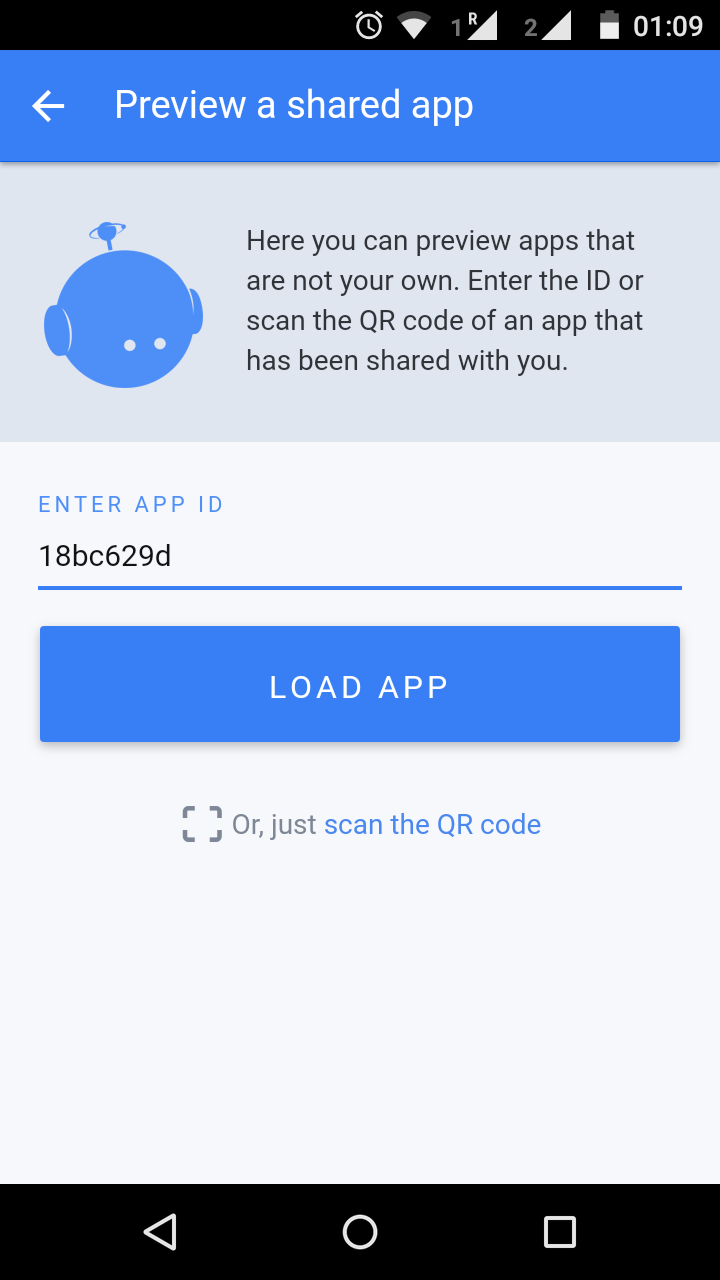
While you are building your application, you can directly test it on the Ionic View application where you can mention the app ID and it will automatically download your application from the ionic.io server where you uploaded your application:

    $ ionic share <email>

After you are done with uploading and sharing your application with users with specific e-mail addresses, the person you sent the invitation to will get an e-mail with a link to view the app. You can also test your application directly on the Ionic View application, which is available on Google Play Store and Apple Store. You can also directly share your app ID to enter building your application, so you can directly test it on the Ionic View application. The preceding screenshot shows how you can add an app ID and test the application.