Book Image

Swift 3 New Features

By : Keith Elliott
Book Image

Swift 3 New Features

By: Keith Elliott

Overview of this book

Since Swift was introduced by Apple in WWDC 2015, it has gone on to become one of the most beloved languages to develop iOS applications with. In the new version, the Swift team aimed to take its adoption to the next level by making it available for new platforms and audiences. This book will very quickly get you up to speed and productive with Swift 3. You will begin by understanding the process of submitting new feature requests for future versions of Swift. Swift 3 allows you to develop and run your applications on a Linux machine. Using this feature, you will write your first Linux application using the debugger in Linux. Using Swift migrator, you will initiate a conversion from Swift 2.2 to Swift 3. Further on, you will learn how to interact with Cocoa libraries when importing Objective C to Swift. You will explore the function and operator changes new to Swift 3, followed by Collection and Closure changes. You will also see the changes in Swift 3 that allow you write tests easier with XCTest and debug your running code better with new formats as well. Finally, you will have a running server written completely in Swift on a Linux box. By the end of the book, you will know everything you need to know to dive into Swift 3 and build successful projects.
Table of Contents (16 chapters)
Swift 3 New Features
Credits
About the Author
About the Reviewer
www.PacktPub.com
Preface
5
Function and Operator Changes – New Ways to Get Things Done

Migrating with Xcode's Swift migration tool


Once you've done your pre-work, it's time to migrate your code. For our purposes, we are going to use a simple Tic Tac Toe project that you can download from the Packt website:

  1. Launch Xcode 8 and open the Tic Tac Toe project: On first launch, Xcode will ask you if you want to migrate your Swift 2.2 project to use the latest SDKs. Choose Convert to start the migration.

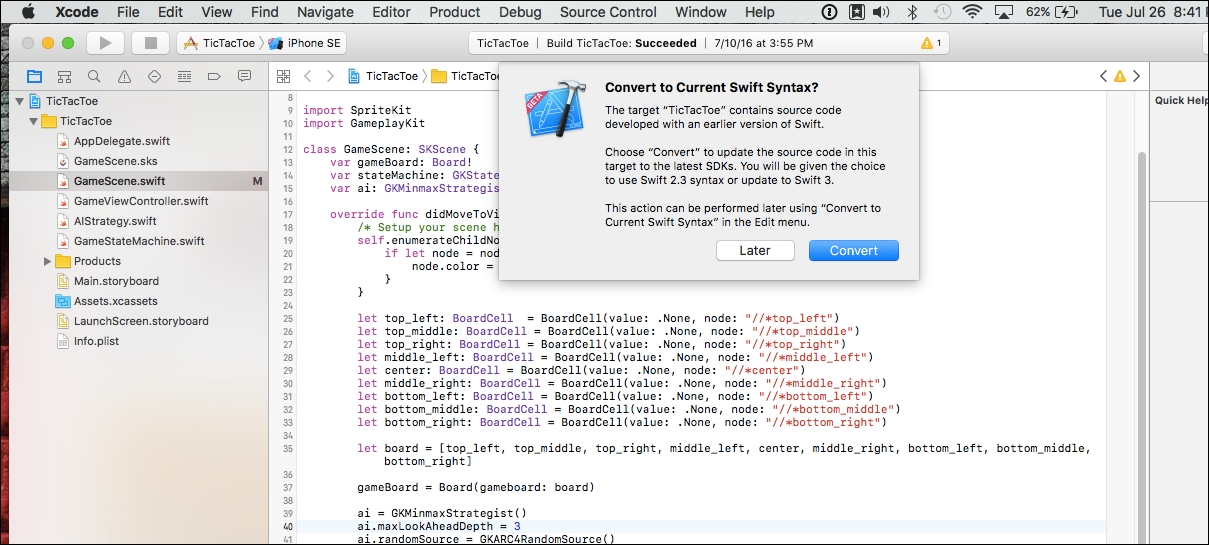
  2. Choose either Swift 2.3 or Swift 3: After choosing to convert, you will be prompted with another screen that basically lets you know that Xcode is going to modify your files. You are also told that, once the migration is over, you will be given the option to accept the changes or dismiss them without permanently changing your project's files. The modal dialog also gives you a disclaimer that the Swift Migrator isn't perfect and you might have to make additional changes once the migration has completed. Press Next and then choose Swift 3.

  3. Choose the targets to convert: If you have...