
An upgrade will install the next major version of the OS. For example, if you are running OS X Mavericks, an upgrade will install the latest major release, such as Mojave or Catalina, and there will be no loss of data or user settings.
You can use three methods to upgrade macOS:
- Through an automatic download
- Through a manual download
- Through the internet
Let's now see how to configure automatic downloads.
Automatic upgrades
You can configure upgrades to download automatically in the background through System Preferences for the OS or the App Store preferences (available from macOS X El Capitan and later) for apps.
Perform the following steps to configure this behavior:
- Open the System Preferences screen. You can access System Preferences from the Apple menu (
 ) at the top left of your screen or through the gear icon,
  , in the Dock.
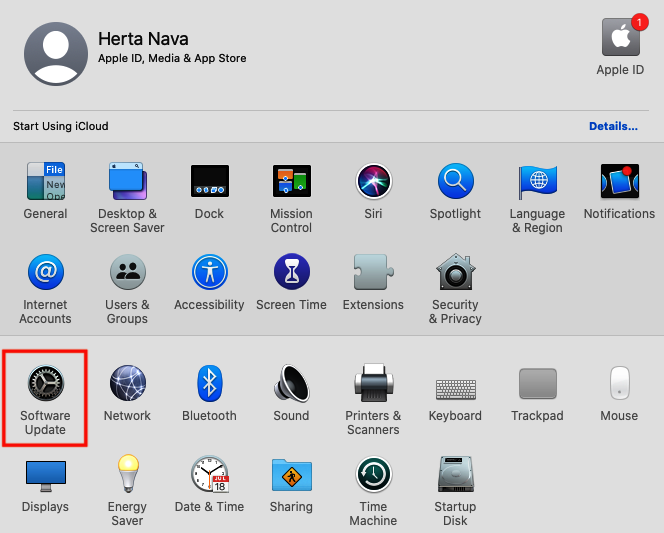
 - In System Preferences, click on the Software Update icon, as shown in Figure 2.5:
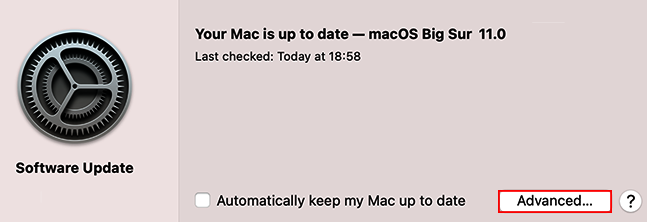
- Click the Advanced button, as shown in the following screenshot:
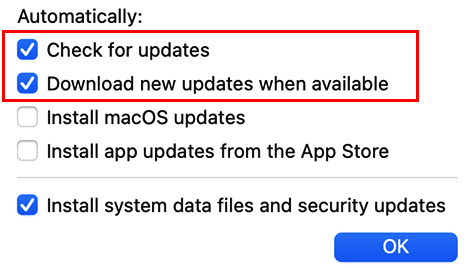
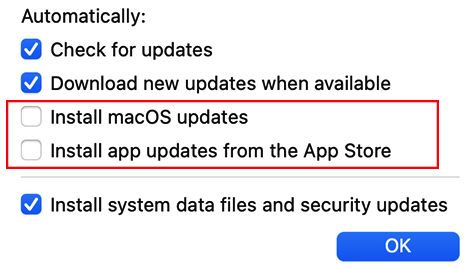
- Make sure the Check for updates and Download new updates when available options are selected, as shown in the following screenshot:
- With this configuration, you will see a notification indicating that a macOS upgrade is ready to be installed. This is because you need to check compatibility and other requirements prior to upgrading to a major version. Therefore, the upgrade won't be done until you click the Install button (Figure 2.8). On the other hand, you can program updates to the currently installed version at a later time by clicking Later or immediately by clicking on the Install button:

- If you want the system to verify the requirements on its own and attempt to install macOS updates/upgrades, then you should check the other two boxes (Figure 2.9). However, this is not recommended since this prevents you from checking whether all your software is ready for the update, and it can render certain apps incompatible with the new update/upgrade:
We have seen how to download and install automatic updates/upgrades. However, you can also do this manually, as we will see in the next section.
Manual upgrades
You can always verify whether upgrades are available through the App Store and install them manually. We will see how that works in macOS Catalina and macOS Big Sur next.
Manual upgrades to macOS Big Sur
Perform the following steps to download and install the latest version of macOS:
- Check the system and hardware requirements as well as the pre-verification steps, as explained in the Technical requirements and Installing macOS sections earlier in this chapter.
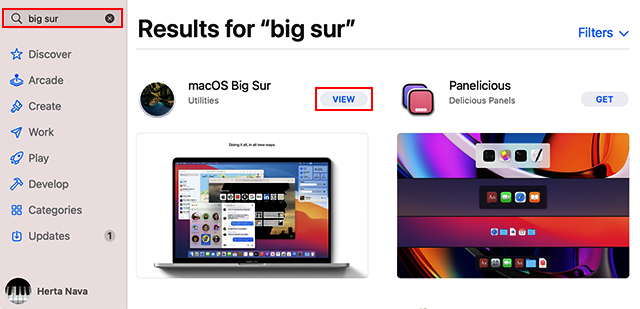
- Open the App Store. You will probably see the latest macOS available at the top of the list, or you can use the search box in the left-hand section to locate it.
- In Figure 2.10, we used the search box to locate the macOS Big Sur installer. Click on the installer name or the VIEW button to enter the details page:
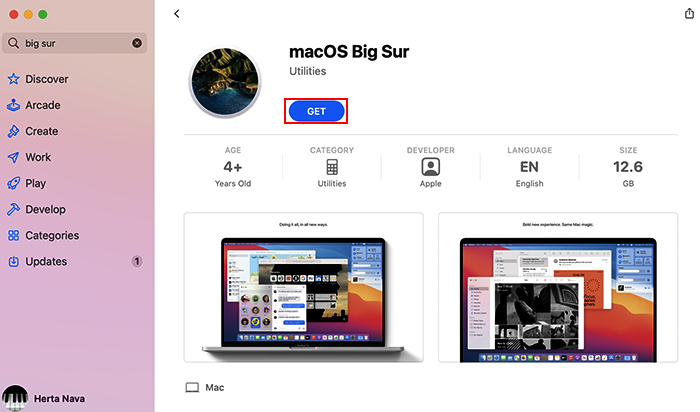
- Once on the details page, click the GET button to download the installer, as shown in the following screenshot:
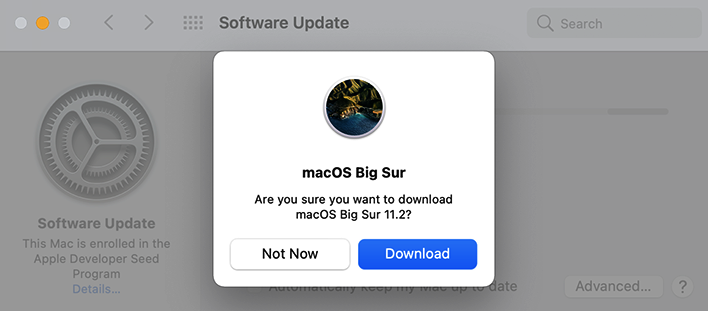
- This action will open the Software Update tool and ask you whether you want to download the upgrade. As soon as you click on the Download button (Figure 2.12), the download will start, and you can monitor its progress:
- Once the download is complete, you will see an Upgrade Now button. Click on it to start the process.
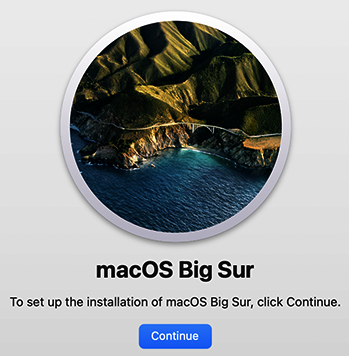
- Then, the installer will open automatically, as can be seen in the following screenshot:
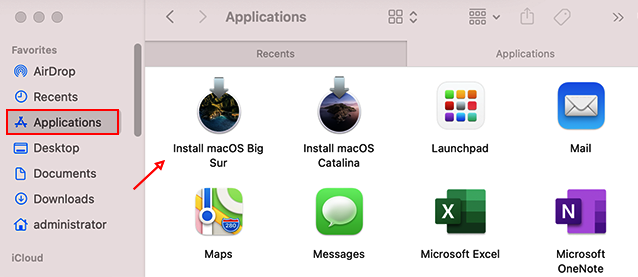
Note: If you expect to do more installations, it's a good idea to save a copy of the installer in another location. The installer will be downloaded by default into the Applications folder, but it will be removed as soon as your installation is complete. If you don't save a copy elsewhere and later need to reinstall or create a bootable disk, you will have to download it again. To save a copy, just go to the Applications folder before initiating the installation (Figure 2.14), and then copy the installer into another location. Also, take into account that installers have an expiration date, so if using an old installer you saved doesn't work, chances are it has probably expired, and you will need to acquire a new copy.
- Navigate back to the installer and then click Continue (Figure 2.13) to initiate the installation.
- Accept the Software License Agreement.
- You will see the window to select the destination volume for the installation. If you only have the default volume available (usually named Macintosh HD), only that volume will appear, which is the case for this example (Figure 2.15), or you can click Show All Disks... to see more available disk options. Select the volume and then click Install or Continue:

- You may see a warning about 32-bit apps not supported by macOS (most likely to appear if you are upgrading to macOS Catalina). If that is the case, take note of the incompatible software, if any, and then click Continue.
- Administrator privileges are required. Therefore, enter your admin password to continue.
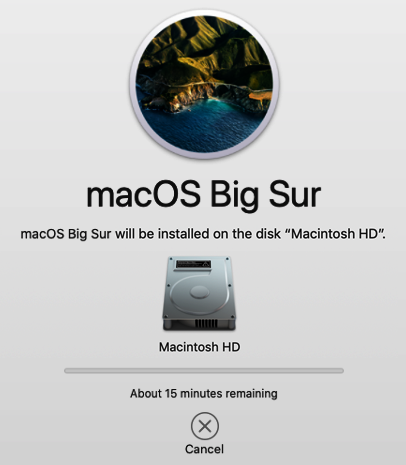
- The installation will start, and the time remaining will be shown in the progress bar, as seen in the following screenshot:
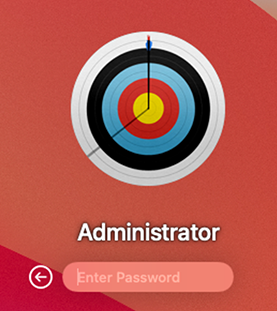
- Once the installation is complete, you will see a login screen. Since we are upgrading to macOS Big Sur in this example, you will see a screen similar to the one shown in Figure 2.17:
- Once you log in, you will be taken through a quick setup process. Take into account the fact that the screens you see will depend on your current configuration; for example, whether you have an Apple ID linked to your account. We will see a complete setup process in the The Setup Assistant process section at the end of the chapter.
And that's it! You now have the latest version of macOS. Let's now check the third way to upgrade: through the internet.
Through the internet
The final method that can be used to upgrade your macOS is through the internet. However, since this is also a reinstall method, this procedure will be covered in full in the Reinstalling macOS via internet recovery section, included in the next part of this chapter.