

Once you have downloaded the image, you will need to have certain VMware software to run the image; you can get the software from www.vmware.com. VMware Player is smaller with fewer options, although VMware Workstation contains many features. Both versions have a trial version available, and it is recommended that you select one and try it out. For this book, we are using VMware Workstation Version 9 as that is the latest version as of this writing. To access the software downloads page, go to http://www.vmware.com/products/workstation/index.html. VMware software allows you to perform many functions in a virtual environment, and this can be an additional security measure for you. If you are using a Mac, you will need to download VMware Fusion for that; refer to http://www.vmware.com/products/fusion/overview.html. Also, if you want to use the ISO image to create a DVD and boot from that, you can do that too. The way in which we start BackTrack is the only thing that differs from the other distributions; once they start, they all require the same number of steps to be configured and used.
You may also want to note here that there are more virtualization products than VMware, and if you want to try others, you may; some of the popular, free ones are:
Hyper-V requires you to have either Windows Server 2008 or Windows Server 2012 installed. There are two reasons why we are using VMware Workstation in this book:
It has fantastic documentation and support
The image from BackTrack has the tools installed, and this makes for much better user experience
As always, software is a matter of personal preference and taste, so try different versions and see which one works best for you.
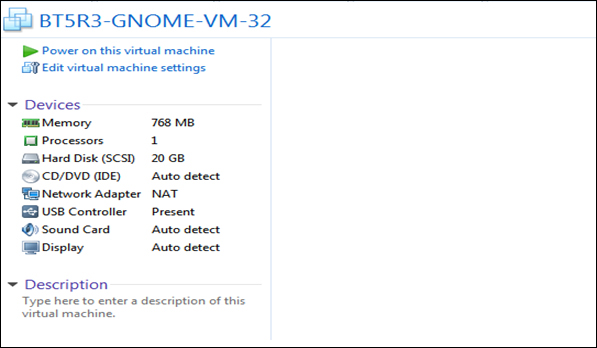
The procedure for starting the tool once you have downloaded the virtual machine is pretty straightforward. Open the image in the virtual machine tool you are using and check the settings. You should see a screen similar to the one shown in the next screenshot. You want to check that there is a network adapter present, and that the RAM is set to a value that you can support on your host machine. As a reminder, 2 GB of RAM is recommended. An example is shown in the next image where the RAM is not sufficient and would need to be changed; you do this by clicking on Edit virtual machine settings. Once you have configured this, click on Power on this virtual machine. If you are prompted before the VM boots up, leave the default settings, as they are and let the machine boot.
Once the machine has booted, you will need to log in with root as the ID and a password of toor (root in reverse). This will bring you to the shell interface of BackTrack. We want to start up the windowing environment, but before we do that, we want to check and verify that our network has started. Enter ifconfig; you should see a result similar to in the next screenshot:
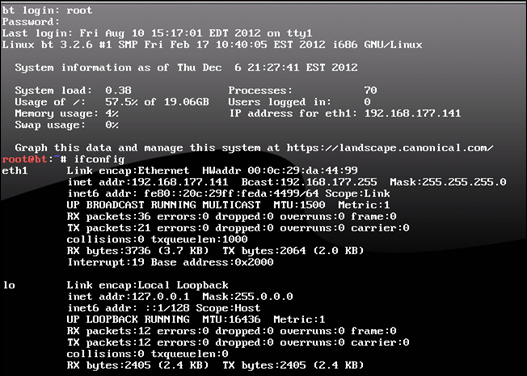
In some versions of the BackTrack distribution, you might not have an interface named eth1. If you only have the lo (loopback) interface, you have to start the network; the way to do this is by using /etc/init.d/networking start. This will start your network.
root@bt:~# /etc/init.d/networking start
To avoid having to do this the next time you start BackTrack, enter the update-rc.d networking defaults command. This will change the configuration, and each time you start BackTrack, the network will be started for you.
root@bt:~# update-rc.d networking defaults
There is a possibility that when you restart, you will not get a network address; this is rare with the latest software, but just in case, you might want to enter the ifconfig command again.
root@bt:~# ifconfig
If you are not connected to the network, that is, if you don't have an IP address, you can enter dhclient.
root@bt:~# dhclient
Next, you want to start the XWindows environment; you do this by entering the startx command in the command shell.
root@bt:~# startx
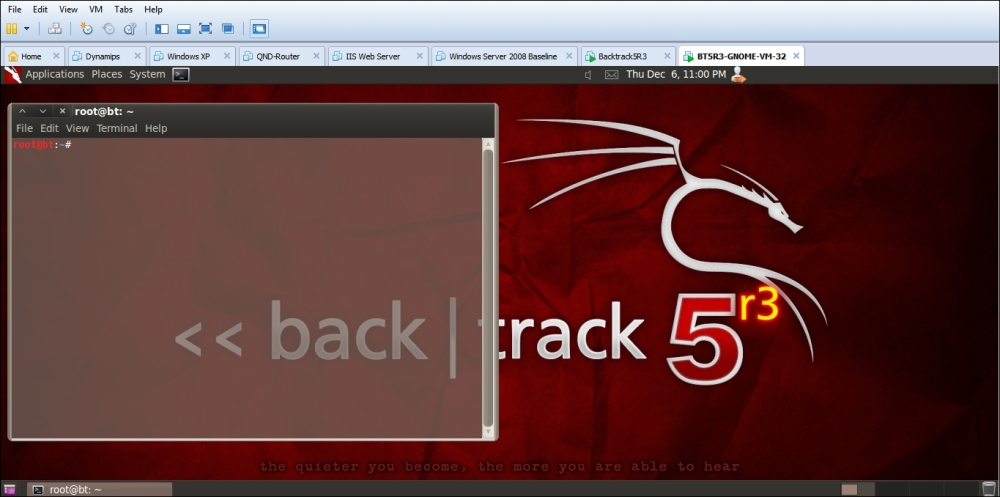
This will start the XWindows Gnome desktop. Once the window comes up, the first thing you want to do is to open a shell on your desktop. You can accomplish this by going to Applications | Accessories | Terminal. The next thing you want to do is to fix your display within the virtual environment inw the VMware Workstation menu at the top of the screen. Navigate to View | Fit Guest Now to correct the display; your screen should now be in fullscreen mode, as shown in the following screenshot:
Next, you want to change the password from the default value of toor, which is not a strong password. And to be honest, everyone knows it; so let us change it now. In your command shell terminal window, enter passwd.
root@bt:~# passwd
This will start the password change process. Enter a password of your choice; it will not echo on the screen as you type it in, and you will be requested to re-enter your password to confirm it. Make sure you do not forget your password, as it can be a challenge to recover it; it is not impossible, but it is a challenge nonetheless and is beyond the scope of this book.
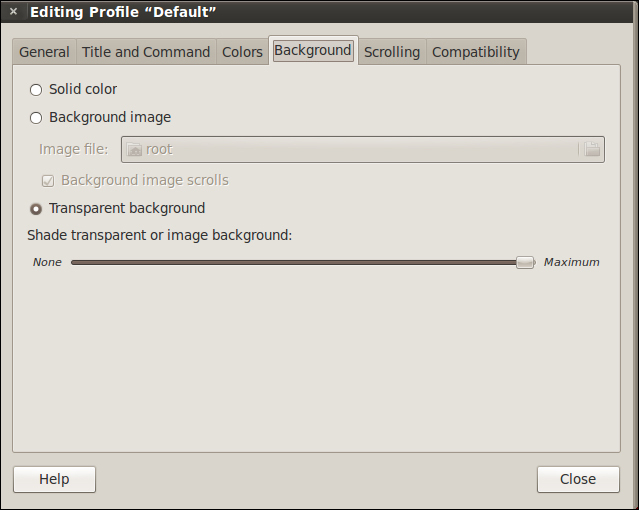
As you can see from the previous screenshot, there is a transparent background in the shell. There is a simple procedure to customize your shell, and we will do that now. I prefer to have a white background with black text, which we will now configure. In the title of the terminal window, navigate to Edit | Profile Preferences. Once the window opens, you want to click on Background; this is where you will set the transparency of the shell window. My preference is to have no transparency, click on Transparent Background, then drag the slider to the right and set it to Maximum as shown in the next screenshot:
The next thing we will set is the actual colors of the terminal windows. We do this by clicking on Colors and then setting the colors for the terminal as identified in the following screenshot:

Once you have set the colors and transparency for the terminal, you should have a shell with the colors that you prefer and customized in your profile, so that each time you open a terminal window it will be configured to your preferences.