
The operating environment that we will use throughout this book is Kali Linux version 2.0. This is a Debian-based distribution that has been purpose-built for the security professional. It is preloaded with many of the applications that are commonly used during a penetration test and also includes a set of drivers that enable the advanced functionality of wireless adapters. The process of finding, patching, and compiling wireless drivers on generic Linux platforms to support the monitor mode, injection, and deauthentication can be very cumbersome if you choose to venture out on your own. However, Kali has precompiled drivers for the wireless adapters we discussed in the previous section and others that have been tested to ensure that the adapters will work in a plug-and-play fashion.
In the next section, we will show how to download and install Kali for use during our penetration test as a Virtual Box image. The benefits of utilizing a virtual image for Kali are that it can run as a co-resident with your other operating system and applications, but in a protected environment, this can be dedicated to your penetration testing environment.
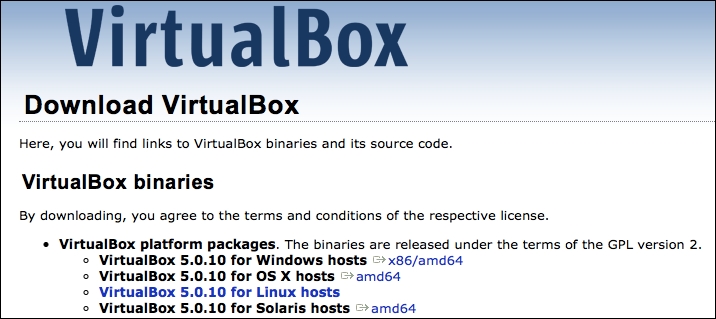
In this example, we will be downloading the components required to run Kali Linux in VirtualBox, a virtual machine environment that can run on top of Windows, Mac OSX, Linux, or Solaris hosts. It is available from https://virtualbox.org as an Open Source Software package distributed under GPL (GNU General Public Licensing).
Browse to https://virtualbox.org and pull down the distribution for the host operating system you will be running it on.
Run through the installation wizard for your operating system, typically accepting the defaults when prompted. Any configuration changes will be noted as we install Kali into the virtual environment and map the local host resources to the virtual environment.
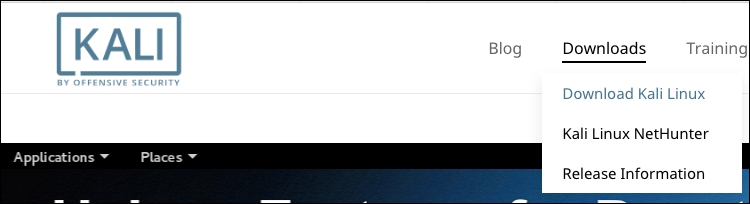
After VirtualBox is installed, you will need to download Kali 2.0 from https://kali.org.
Kali Linux is distributed in a number of different formats for various operating environments and devices. For our VirtualBox deployment, you can either choose to download the .ISO file and build your virtual machine as you would for other operating systems, or you can use a prepackaged distribution that is specific to VirtualBox. In this example, we will be choosing the route that enables us to get started sooner with our pentest, which is the prebuilt image. Follow these steps:
Browse to http://www.offensive-security.com/kali-linux-vmware-arm-image-download/ and look for the prepackaged VirtualBox images. You should see something like what is shown in the following screenshot:

Note
There are two 32-bit images available and one 64-bit image. Of the two 32-bit images, the one denoted as Kali Linux 32-bit VBox PAE designates that this version is running a kernel with the Physical Address Extension memory enhancement enabled, which can allow the 32-bit architecture to reference physical memory quantities greater than 4 GB. Either of these will work for all of the exercises in this book.
Download the image for your architecture and uncompress it to a folder. The resulting image will have a
.ovaextension.We will now import the new image into VirtualBox. Navigate to File | Import Appliance… from the VirtualBox application.

Choose the
.ovafile that you extracted and choose Continue.
Since we're importing from an
.ovafile, the software developer has chosen the configuration that is optimal for the running of the virtual machine and the applications that run on top of it. This saves us the headache of trying to determine the virtual resources and the settings we will need to configure in order to successfully install and run the distribution.
Once deployed, this image will require a minimum of 10 GB of disk space and 2 GB of physical memory dedicated to running the virtual machine. The Kali 2.0 image is deployed with a thin virtual disk that is actually configured for 30 GB; however, it will only use the amount of disk space that it has allocated. This deployment, after successful import, was around 8 GB of the used space.
Click on Import and wait for the virtual image to be deployed:

Now, you can start your newly deployed VirtualBox image by right-clicking on the image and navigating to Start | Normal Start, as shown in the following screenshot:

Choose the default selection, Kali GNU/Linux, from the GRUB launcher:

The default username and password for the new Kali instance should be
rootandtoor, respectively.
That concludes the deployment of the virtual machine into VirtualBox!
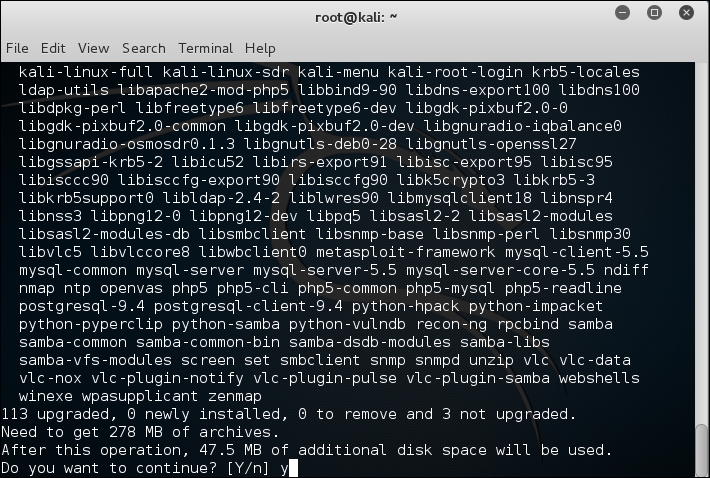
It is recommended that you update the apt repository and install updates to the distribution using the following commands:
#apt-get update
#apt-get upgrade
You should see the following as a result:
If you have chosen to use an external USB wireless adapter, you will need to get the device mapped through into the Kali virtual machine in order to allow you to use it. This is done through the VirtualBox menu by navigating to Devices | USB and then identifying the USB device that corresponds to your WiFi adapter:
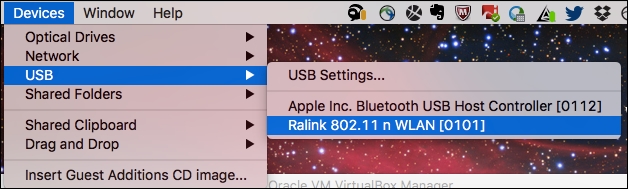
This simulates the plugging of the USB adapter directly into the operating system, and you will now be able to access it directly from Kali using either the command line or GUI tools. To begin validating that your wireless adapter is properly identified by Kali and supports all of the modes you will be using during your assessment, open up a terminal window and run the following commands:
#lsusb
#iwconfig
You should be able to see the following screen as a result:
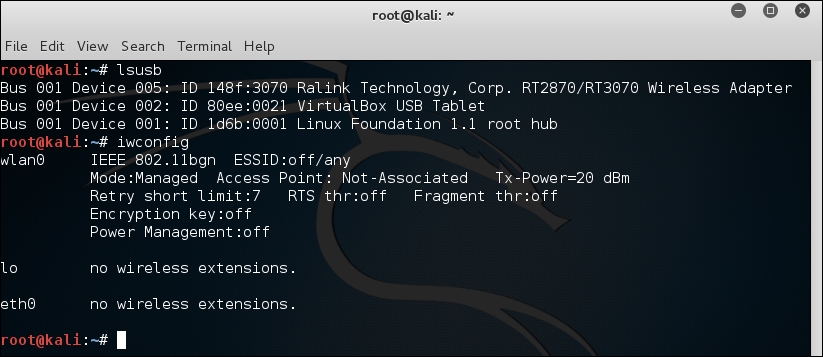
Let's understand what the earlier two commands are used for:
lsusb: This lists the devices that are connected to the USB bus. Here, you should be able to identify whether your wireless adapter is seen by the operating system, and if so, include a short description of the device. You should be able to identify the chipset that is present in the adapter; in this example, it is using the Ralink 3070 chipset.iwconfig: This is used to set and view the parameters of the wireless interfaces seen by the operating system. Here, you are able to bring the interfaces up and down and see which mode the interface is operating in. It is important to make note of the virtual interface that is assigned to this device as it will be used in nearly all of the exercises. Typically, this is wlan0, but it can also be wlan1, wlan2, and so on if you have more than one wireless adapter in the system.
Next, you will need to verify that all of the modes are supported by the hardware and drivers of your wireless adapter. This can be accomplished using the iw command in Kali:
#iw phy phy1 info
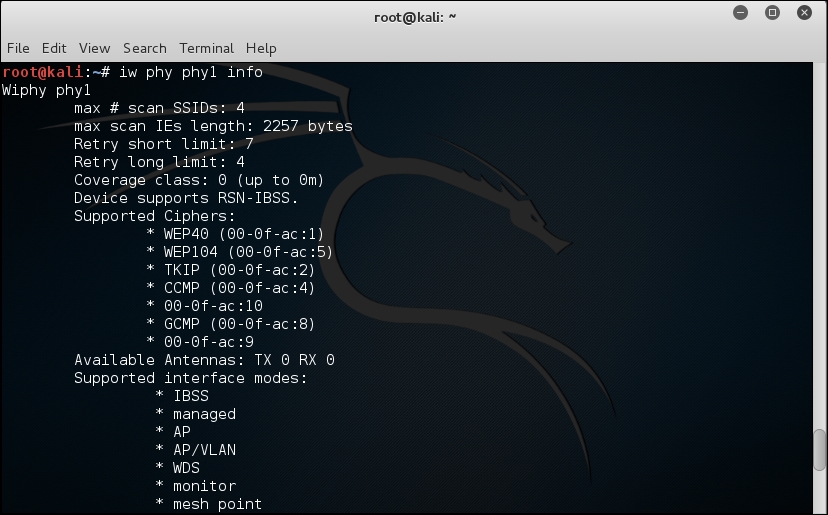
The iw command is used to show or manipulate wireless devices and their configurations. The phy option tells the command to select the interface by its physical address. This is followed by the physical device identifier, phy1 in this example. The trailing info command tells iw to print out all of the details associated with this particular wireless adapter.
A lot of information is returned by this command, so you may have to scroll back up through the list to identify which interface modes are supported by this wireless adapter. At the minimum, you should see managed and mesh, but the ones we are most interested in are AP and monitor. These correspond to master and monitor, the two modes that will be required to execute all of the procedures that will follow.
Depending on which part of the world you are in, you may encounter wireless networks operating on different frequencies across different channels. It is a good idea to validate that your wireless adapter is capable of scanning across all of these frequencies so that wireless networks are not missed during your penetration test. This can be accomplished by running iwlist:
#iwlist wlan0 channel
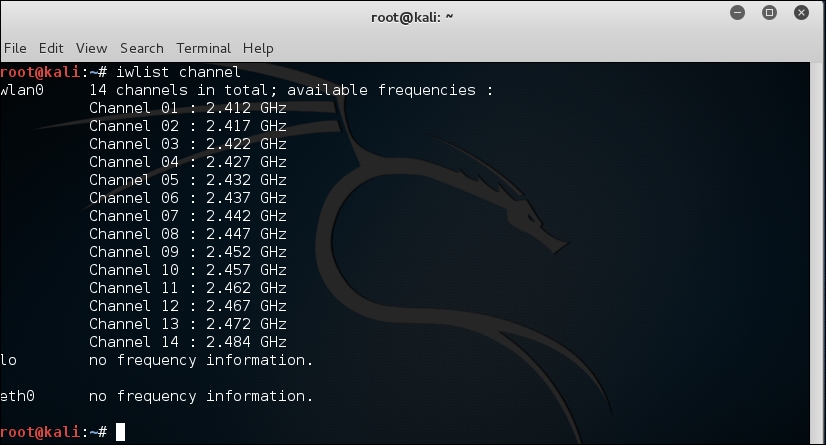
The iwlist command provides detailed information about the capabilities of the wireless adapter. This command allows you to enumerate many details about your wireless device, including encryption capabilities, transmission rate, keys in use, and power levels. The earlier option, channels, displays the available channels and the frequencies available to this wireless adapter. This example shows a 2.4 GHz adapter capable of operating across 14 channels.