Book Image

Implementing DevOps with Microsoft Azure

By : Mitesh Soni
Book Image

Implementing DevOps with Microsoft Azure

By: Mitesh Soni

Overview of this book

This book will teach you all about the Visual Studio Team Services and Microsoft Azure PaaS offerings that support Continuous Integration, Continuous Delivery, Continuous Deployment, and execution in the cloud with high availability, disaster recovery, and security. You will first be given a tour of all the concepts and tools that Microsoft Azure has to offer and how these can be used in situations to cultivate the DevOps culture. You’ll be taught how to use and manage Visual Studio Team Services (VSTS) and about the structure of the sample application used throughout the book. You will become familiar with the nitty gritty of Continuous Integration and Continuous Development with VSTS and Microsoft Azure Apps. You will not only learn how to create App service environments, but also how to compare Azure Web Apps and App Service Environments to deploy web applications in a more secure environment. Once you have completed Continuous Integration and created the Platform for application deployment, you will learn more about the final stepping stone in achieving end-to-end automation using approval-based Continuous Delivery and Deployment. You will then learn about Continuous Monitoring, using the monitoring and notification options provided by Microsoft Azure and Visual Studio Team Services.
Table of Contents (17 chapters)
Title Page
Credits
About the Author
Acknowledgment
About the Reviewer
www.PacktPub.com
Customer Feedback
Dedication
Preface
More from the Author

Managing the Git project in VSTS


In this section, we will cover how to manage the Git project in VSTS; however, the build definition and its execution is for self-exercise.

On the main page of VSTS account, go to the Projects section. Click on New Project.

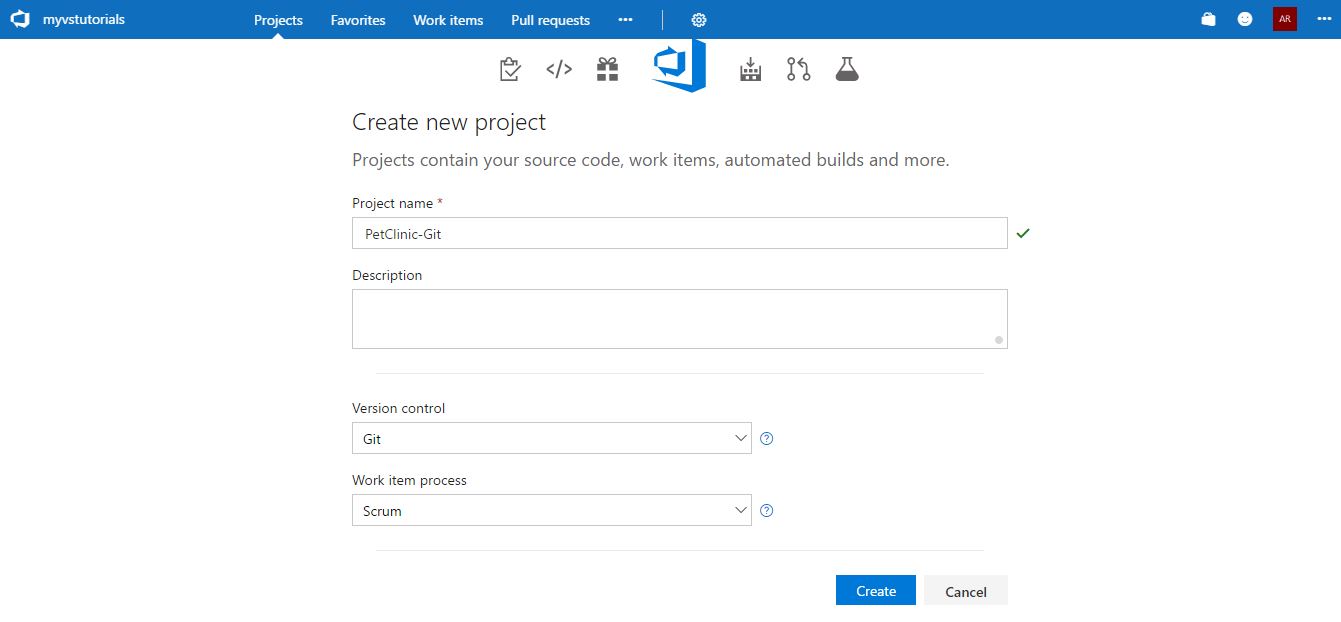
In Create new project, give Project name, select Scrum or Agile as the Work item process. Select Git as Version control. Click on Create:
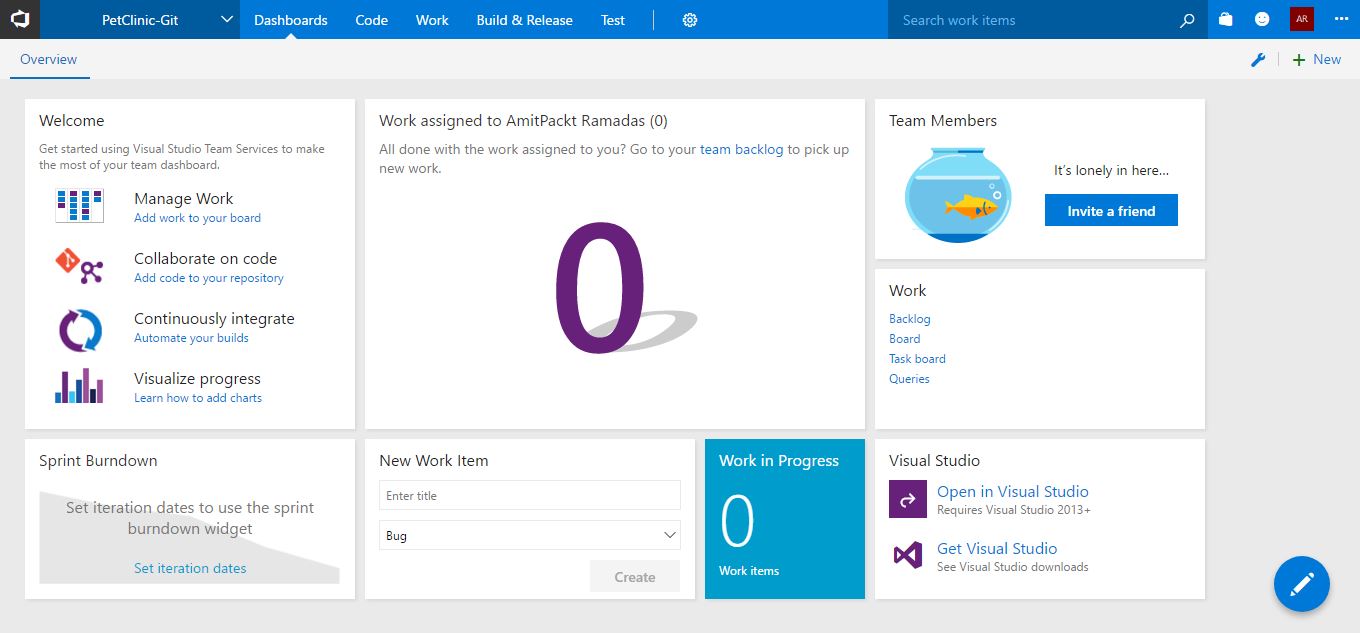
Wait till the project creation process completes in VSTS. Here is the screen for the newly created project:
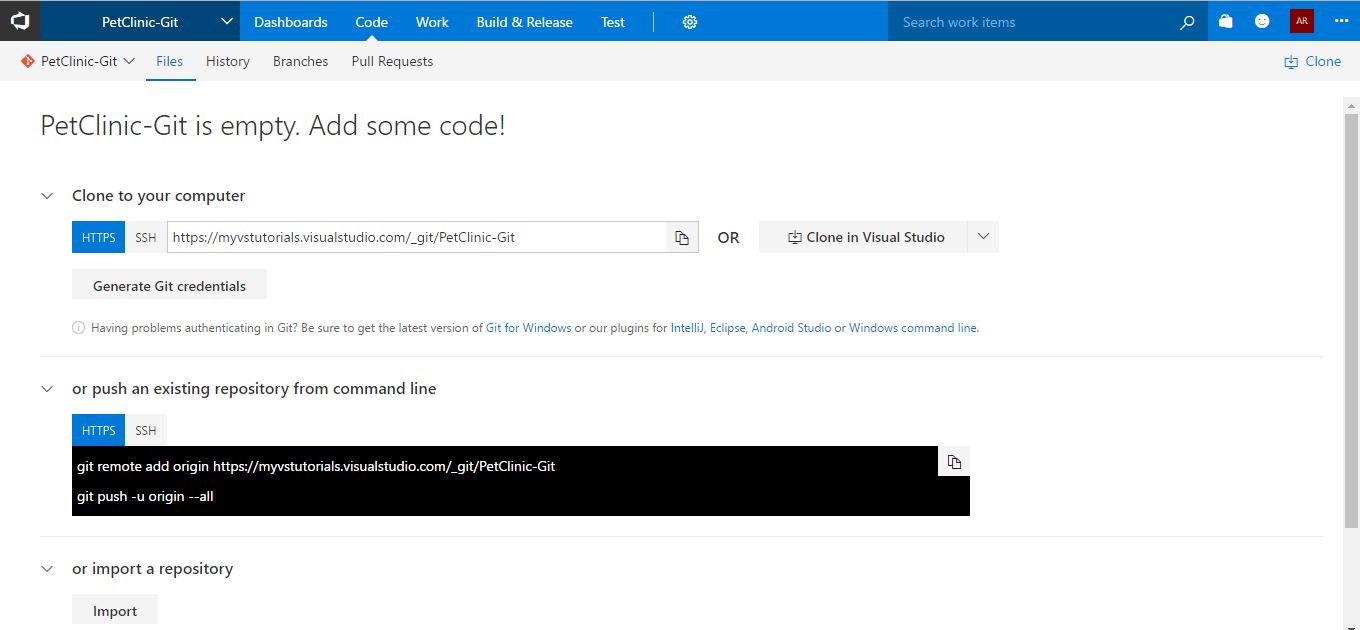
Click on the Code tab on the top bar and verify the details available in the Files section. Git related details are available:
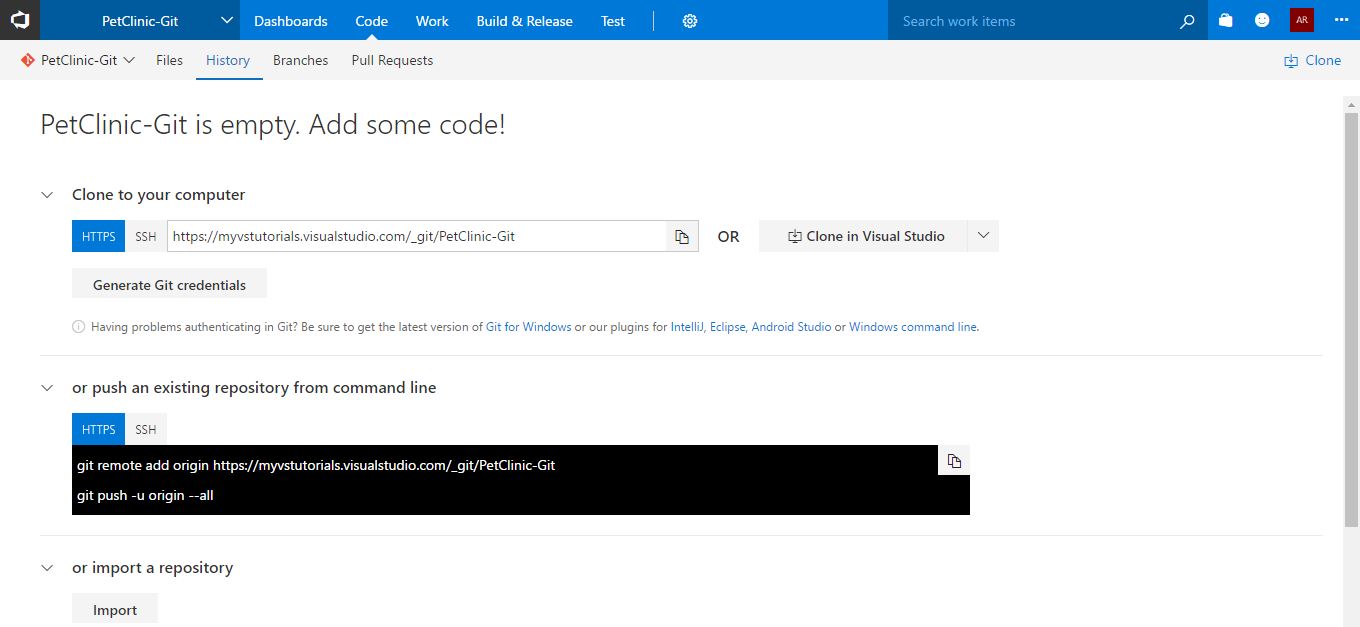
Verify the History tab as well. The repository is still empty as we haven't performed check-in:
We will try to check-in the PetClinic code from the local system to Git available in VSTS. Before that, click on Generate Git credentials so we can use it from our local system to check-in the code into the Git repository available here.

Enter User name (primary) and Password. Click...