Ubuntu Server is an easy-to-use Linux distribution that can be used to host network services and/or vulnerable software for testing in a security lab. Feel free to use other Linux distributions if you prefer; however, Ubuntu is a good choice for beginners because there are a lot of reference materials and resources publicly available.
Installing Ubuntu Server
Getting ready
Prior to installing Ubuntu Server in VMware, you will need to download the image disc (ISO file). This file can be downloaded from Ubuntu's website at http://www.ubuntu.com/server. For the purposes of this book, we will be using Ubuntu 16.10.
How to do it...
Now the virtual machine is ready, but first, we need to install Ubuntu on the VM. Follow along to install Ubuntu on the VM:
- After the image file has been loaded and the virtual machine has been booted from it, you will see the default Ubuntu menu, shown in the following screenshot. This includes multiple installation and diagnostic options. The menu can be navigated to with the keyboard. For a standard installation, ensure that the Install Ubuntu Server option is highlighted, and press the Enter key:

- Press the F6 key and check the following options: acpi=off, noapic, and nolapic. Once this is done, click on Install Ubuntu Server:

- When the installation process begins, you will be asked a series of questions to define the configurations of the system. The first two options request that you specify your language and country of residence. After answering these questions, you will be required to define your keyboard layout configuration, as shown in the following screenshot:

-
There are multiple options available to define the keyboard layout. One option is detection, in which you will be prompted to press a series of keys that will allow Ubuntu to detect the keyboard layout you are using. You can use keyboard detection by clicking on Yes. Alternatively, you can select your keyboard layout manually by clicking on No. This process is streamlined by defaulting to the most likely choice based on your country and language.
- After you have defined your keyboard layout, you are requested to enter a hostname for the system. If you will be joining the system to a domain, ensure that the hostname is unique. Next, you will be asked for the full name of the new user and a username. Unlike the full name of the user, the username should consist of a single string of lowercase letters. Numbers can also be included in the username, but they cannot be the first character. Have a look at the following screenshot:

- After you have provided the username of the new account, you will be requested to provide a password. Ensure that the password is something you can remember as you may later need to access this system to modify configurations. Have a look at the following screenshot:

- After supplying a password, you will be asked to decide whether the home directories for each user should be encrypted. While this offers an additional layer of security, it is not essential in a lab environment as the systems will not be holding any actual sensitive data. You will next be asked to configure the system clock, as shown in the following screenshot:

- Even though your system is on an internal IP address, it will attempt to determine the public IP address through which it is routing out and will use this information to guess your appropriate time zone. If the guess provided by Ubuntu is correct, select Yes; if not, select No to manually choose the time zone. After the time zone is selected, you will be asked to define the disk partition configurations, as shown in the following screenshot:

- If you have no reason to select differently, it is recommended you choose the default selection. It is unlikely that you will need to perform any manual partitioning in a security lab as each virtual machine will usually be using a single dedicated partition. After selecting the partitioning method, you will be asked to select the disk. Unless you have added additional disks to the virtual machine, you should only see the following option here:

- After selecting the disk, you will be asked to review the configurations. Verify that everything is correct and then confirm the installation. You will then be asked for the amount of the volume group to use for guided partitioning. This should be the full amount you specified for the drive, as shown in the following screenshot:

- Prior to the installation process, you will be asked to configure your HTTP proxy. For the purposes of this book, a separate proxy is unnecessary, and you can leave this field blank:

- You will then be asked how you want to manage upgrades on the system. Use the No automatic updates selection:

- Finally, you will be asked whether you want to install any software on the operating system, as shown in the following screenshot:

- To select any given software, use the spacebar. To increase the attack surface, I have included multiple services, only excluding virtual hosting and additional manual package selection. Once you have selected your desired software packages, press the Enter key to complete the process. You will be asked some questions about the software you selected to install. Just follow the prompts; for most cases, the default selections will be fine:

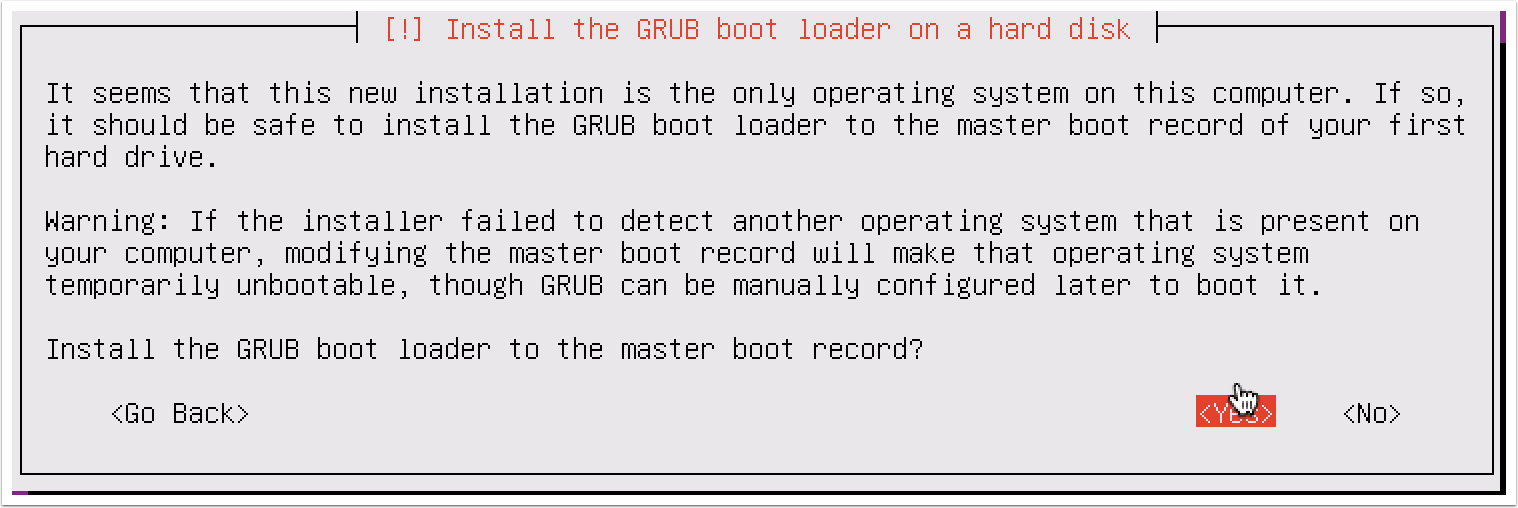
- Once the software is installed, you will be asked whether you want to install the GRUB bootloader on the hard disk. Select Yes, and your installation is complete.
How it works...
Ubuntu Server has no GUI and is exclusively command-line driven. To use it effectively,
I recommended you use SSH. To configure and use SSH, refer to the Configuring and
using SSH recipe later in this chapter.


