

To be able to communicate with our virtual server and client, we need to be in the same network segment; however, having virtual machines with known vulnerabilities in our local network may pose an important security risk. To avoid this risk, we will perform a special configuration in VirtualBox to allow us to communicate with both server and client virtual machines from our Kali Linux host without exposing them to the network.
Configuring virtual machines for correct communication
Getting ready
Before we proceed, open VirtualBox and make sure that the vulnerable server and client virtual machines are turned off.
How to do it...
VirtualBox creates virtual network adapters in the base system in order to manage DHCP and virtual networks. These adapters are independent from the ones assigned to virtual machines; we will create a virtual network and add the Kali and vulnerable virtual machines to it by using the following steps:
- In VirtualBox, navigate to File | Preferences... | Network.
- Select the Host-only Networks tab.
- Click on the plus (+) button to add a new network.
- The new network (vboxnet0) will be created and its details window will pop up.
- In this dialog box, you can specify the network configuration; if it doesn't interfere with your local network configuration, leave it as it is. You may change it and use some other address in the segments reserved for local networks (10.0.0.0/8, 172.16.0.0/12, 192.168.0.0/16).
- Now, go to the DHCP Server tab; here, we can configure the dynamic IP address assignation in the host-only network. We'll start our dynamic addressing at 192.168.56.10:
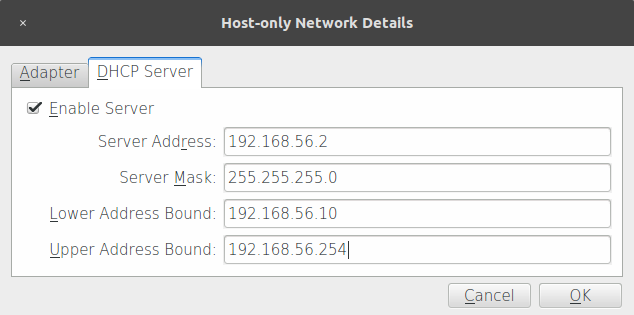
- After proper configuration is done, click OK.
- The next step is to configure the vulnerable virtual machine (vm_1). Select it and go to its Settings.
- Click Network and, in the Attached to: drop-down menu, select Host-only Adapter.
- In Name, select vboxnet0.
- Click OK.
- Follow steps 8 to 11 for the Kali virtual machine (Kali Linux 2018.1) and all of the testing machines you want to include in your lab.
- After configuring all virtual machines, let's test whether they can actually communicate. Let's see the network configuration of our Kali machine; open a Terminal and type:
ifconfig
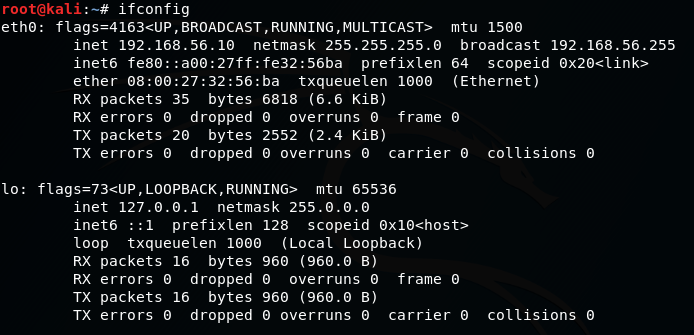
- We can see that we have a network adapter called eth0 and it has the IP address 192.168.56.10. Depending on the configuration you used, this may vary.
- For vm_1, the network address is displayed on the start screen, although you can also check the information by logging in and using ifconfig:
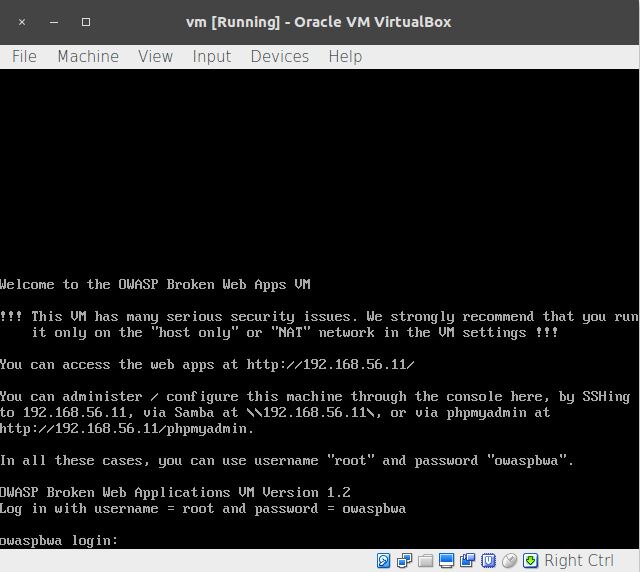
- Now, we have the IP addresses of our three machines: 192.168.56.10 for Kali Linux, and 192.168.56.11 for the vulnerable vm_1. Let's test the communication; we are going to ping vm_ 1 from our Kali Linux:
ping 192.168.56.11
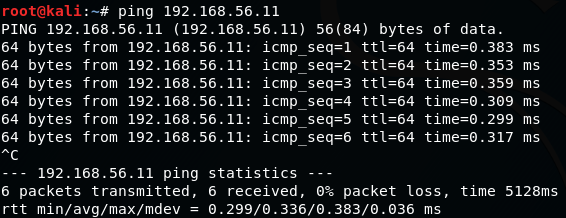
Ping sends an ICMP request to the destination and waits for the reply; this is useful to test whether communication is possible between two nodes in the network.
- We do the same to and from all of the virtual machines in our laboratory to check whether they can communicate with each other.
- Windows desktop systems, like Windows 7 and Windows 10, may not respond to pings; that's normal because Windows 7 is configured by default to not respond to ping requests. To check connectivity in this case, if you have Windows machines in your lab, you can use arping from the Kali machine:
arping -c 4 192.168.56.103
How it works...
A host-only network is a virtual network that acts as a LAN, but its reach is limited to the host that is running the virtual machines without exposing them to external systems. This kind of network also provides a virtual adapter for the host to communicate with the virtual machines as if they were in the same network segment.
With the configuration we just made, we will be able to communicate between the machine that will take the roles of client and attacking machine in our tests and the web server that will host our target applications.