Book Image

Mastering Machine Learning for Penetration Testing

By : Chiheb Chebbi
Book Image

Mastering Machine Learning for Penetration Testing

By: Chiheb Chebbi

Overview of this book

Cyber security is crucial for both businesses and individuals. As systems are getting smarter, we now see machine learning interrupting computer security. With the adoption of machine learning in upcoming security products, it’s important for pentesters and security researchers to understand how these systems work, and to breach them for testing purposes. This book begins with the basics of machine learning and the algorithms used to build robust systems. Once you’ve gained a fair understanding of how security products leverage machine learning, you'll dive into the core concepts of breaching such systems. Through practical use cases, you’ll see how to find loopholes and surpass a self-learning security system. As you make your way through the chapters, you’ll focus on topics such as network intrusion detection and AV and IDS evasion. We’ll also cover the best practices when identifying ambiguities, and extensive techniques to breach an intelligent system. By the end of this book, you will be well-versed with identifying loopholes in a self-learning security system and will be able to efficiently breach a machine learning system.
Table of Contents (13 chapters)

Machine learning development environments and Python libraries

At this point, we have acquired knowledge about the fundamentals behind the most used machine learning algorithms. Starting with this section, we will go deeper, walking through a hands-on learning experience to build machine learning-based security projects. We are not going to stop there; throughout the next chapters, we will learn how malicious attackers can bypass intelligent security systems. Now, let's put what we have learned so far into practice. If you are reading this book, you probably have some experience with Python. Good for you, because you have a foundation for learning how to build machine learning security systems.

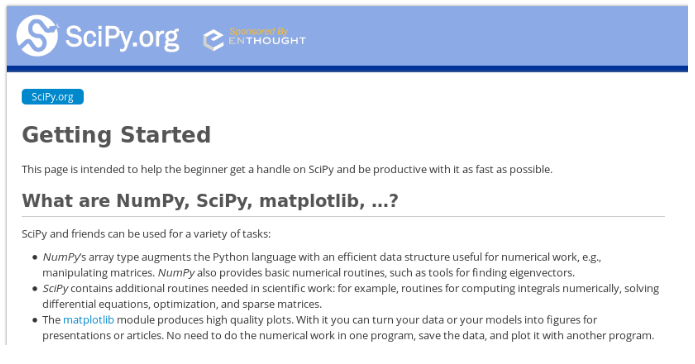
I bet you are wondering, why Python? This is a great question. According to the latest research, Python is one of the most, if not the most, used programming languages in data science, especially machine learning. The most well-known machine learning libraries are for Python. Let's discover the Python libraries and utilities required to build a machine learning model.

NumPy

The numerical Python library is one of the most used libraries in mathematics and logical operations on arrays. It is loaded with many linear algebra functionalities, which are very useful in machine learning. And, of course, it is open source, and is supported by many operating systems.

To install NumPy, use the pip utility by typing the following command:

#pip install numpy

Now, you can start using it by importing it. The following script is a simple array printing example:

In addition, you can use a lot of mathematical functions, like cosine, sine, and so on.

SciPy

Scientific Python (SciPy) is like NumPy—an amazing Python package, loaded with a large number of scientific functions and utilities. For more details, you can visit https://www.scipy.org/getting-started.html:

TensorFlow

If you have been into machine learning for a while, you will have heard of TensorFlow, or have even used it to build a machine learning model or to feed artificial neural networks. It is an amazing open source project, developed essentially and supported by Google:

The following is the main architecture of TensorFlow, according to the official website:

If it is your first time using TensorFlow, it is highly recommended to visit the project's official website at https://www.tensorflow.org/get_started/. Let's install it on our machine, and discover some of its functionalities. There are many possibilities for installing it; you can use native PIP, Docker, Anaconda, or Virtualenv.

Let's suppose that we are going to install it on an Ubuntu machine (it also supports the other operating systems). First, check your Python version with the python --version command:

Install PIP and Virtualenv using the following command:

sudo apt-get install python-pip python-dev python-virtualenv

Now, the packages are installed:

Create a new repository using the mkdir command:

#mkdir TF-project

Create a new Virtualenv by typing the following command:

 virtualenv --system-site-packages TF-project

Then, type the following command:

source  <Directory_Here>/bin/activate

Upgrade TensorFlow by using the pip install -upgrade tensorflow command:

>>> import tensorflow as tf
>>> Message = tf.constant("Hello, world!")
>>> sess = tf.Session()
>>> print(sess.run(Message))

The following are the full steps to display a Hello World! message:

Keras

Keras is a widely used Python library for building deep learning models. It is so easy, because it is built on top of TensorFlow. The best way to build deep learning models is to follow the previously discussed steps:

  1. Loading data
  2. Defining the model
  3. Compiling the model
  4. Fitting
  5. Evaluation
  6. Prediction

Before building the models, please ensure that SciPy and NumPy are preconfigured. To check, open the Python command-line interface and type, for example, the following command, to check the NumPy version:

 >>>print numpy.__version__

To install Keras, just use the PIP utility:

$ pip install keras

And of course to check the version, type the following command:

>>> print keras.__version__

To import from Keras, use the following:

from keras import [what_to_use]
from keras.models import Sequential
from keras.layers import Dense

Now, we need to load data:

dataset = numpy.loadtxt("DATASET_HERE", delimiter=",")
I = dataset[:,0:8]
O = dataset[:,8]
#the data is splitted into Inputs (I) and Outputs (O)

You can use any publicly available dataset. Next, we need to create the model:

model = Sequential()
# N = number of neurons
# V = number of variable
model.add(Dense(N, input_dim=V, activation='relu'))
# S = number of neurons in the 2nd layer
model.add(Dense(S, activation='relu'))
model.add(Dense(1, activation='sigmoid')) # 1 output

Now, we need to compile the model:

model.compile(loss='binary_crossentropy', optimizer='adam', metrics=['accuracy'])

And we need to fit the model:

model.fit(I, O, epochs=E, batch_size=B)

As discussed previously, evaluation is a key step in machine learning; so, to evaluate our model, we use:

scores = model.evaluate(I, O)
print("\n%s: %.2f%%" % (model.metrics_names[1], scores[1]*100))

To make a prediction, add the following line:

predictions = model.predict(Some_Input_Here)

pandas

pandas is an open source Python library, known for its high performance; it was developed by Wes McKinney. It quickly manipulates data. That is why it is widely used in many fields in academia and commercial activities. Like the previous packages, it is supported by many operating systems.

To install it on an Ubuntu machine, type the following command:

sudo apt-get install python-pandas

Basically, it manipulates three major data structures - data frames, series, and panels:

>> import pandas as pd
>>>import numpy as np
data = np.array(['p','a','c','k',’t’])
SR = pd.Series(data)
print SR

I resumed all of the previous lines in this screenshot:

Matplotlib

As you know, visualization plays a huge role in gaining insights from data, and is also very important in machine learning. Matplotlib is a visualization library used for plotting by data scientists. You can get a clearer understanding by visiting its official website at https://matplotlib.org:

To install it on an Ubuntu machine, use the following command:

sudo apt-get install python3-matplotlib

To import the required packages, use import:

import matplotlib.pyplot as plt
import numpy as np

Use this example to prepare the data:

x = np.linspace(0, 20, 50)

To plot it, add this line:

plt.plot(x, x, label='linear')

To add a legend, use the following:

plt.legend()

Now, let's show the plot:

plt.show()

Voila! This is our plot:

scikit-learn

I highly recommend this amazing Python library. scikit-learn is fully loaded, with various capabilities, including machine learning features. The official website of scikit-learn is http://scikit-learn.org/. To download it, use PIP, as previously discussed:

pip install -U scikit-learn

NLTK

Natural language processing is one of the most used applications in machine learning projects. NLTK is a Python package that helps developers and data scientists manage and manipulate large quantities of text. NLTK can be installed by using the following command:

pip install -U nltk

Now, import nltk:

>>> import nltk

Install nltk packages with:

> nltk.download()

You can install all of the packages:

If you are using a command-line environment, you just need to follow the steps:

If you hit all, you will download all of the packages:

Theano

Optimization and speed are two key factors to building a machine learning model. Theano is a Python package that optimizes implementations and gives you the ability to take advantage of the GPU. To install it, use the following command:

 pip install theano

To import all Theano modules, type:

>>> from theano import *

Here, we imported a sub-package called tensor:

>>> import theano.tensor as T

Let's suppose that we want to add two numbers:

>>> from theano import function
>>> a = T.dscalar('a')
>>> b = T.dscalar('b')
>>> c = a + b
>>> f = function([a, b], c)

The following are the full steps:

By now, we have acquired the fundamental skills to install and use the most common Python libraries used in machine learning projects. I assume that you have already installed all of the previous packages on your machine. In the subsequent chapters, we are going to use most of these packages to build fully working information security machine learning projects.