
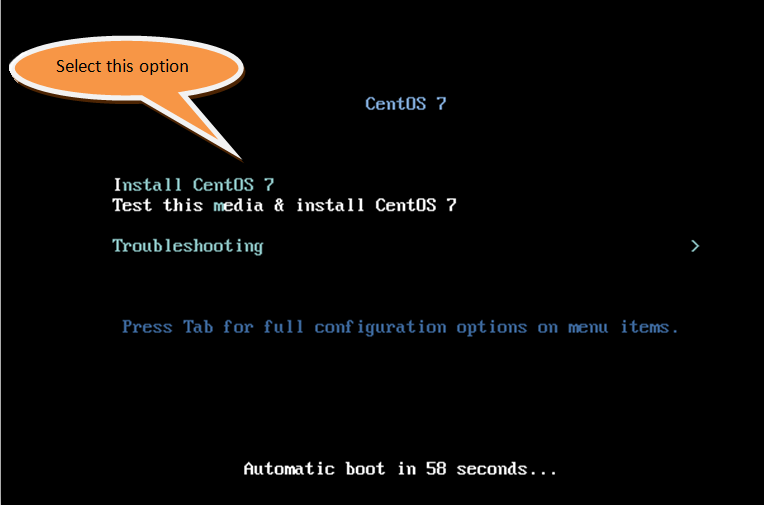
Nowadays, the fastest and easiest way to install CentOS is to use a bootable USB drive; however, in our case, I have chosen to use the DVD ISO image with a virtual machine. First, we need to boot the computer system/virtual machine using the DVD. On booting from the DVD, you will get a cool CentOS screen displaying the basic installation options, and testing the media and troubleshooting options. Once your system/virtual machine is up and running with a bootable DVD of CentOS 7, follow these steps to install CentOS on your system:
- We have to choose the Install CentOS 7 option and press Enter, as shown in the following screenshot. This will start the graphical installer and ask about the language to be used during the installation process:
- Now, you will see a WELCOME TO CENTOS 7 screen, prompting you to choose your language and keyboard settings. Choose your respective language and keyboard settings and click on the Continue button, as shown in the following screenshot. In my case, I have chosen English:

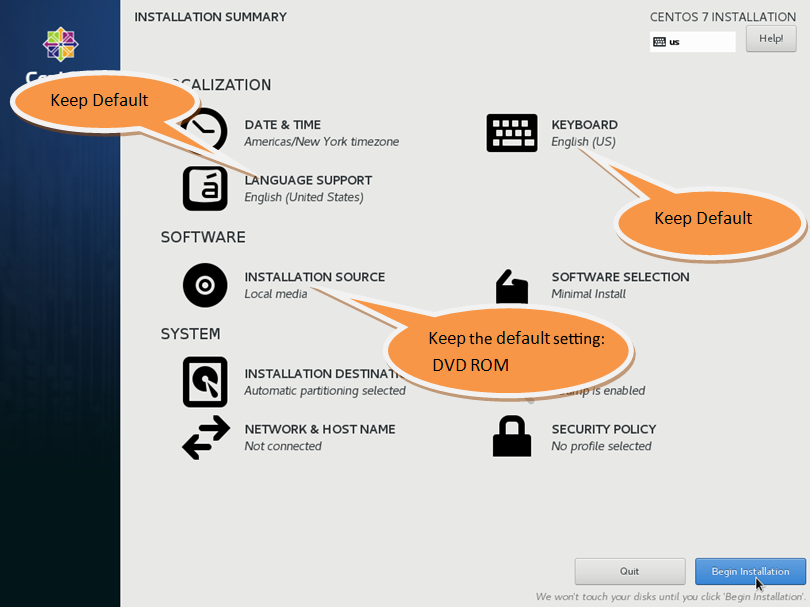
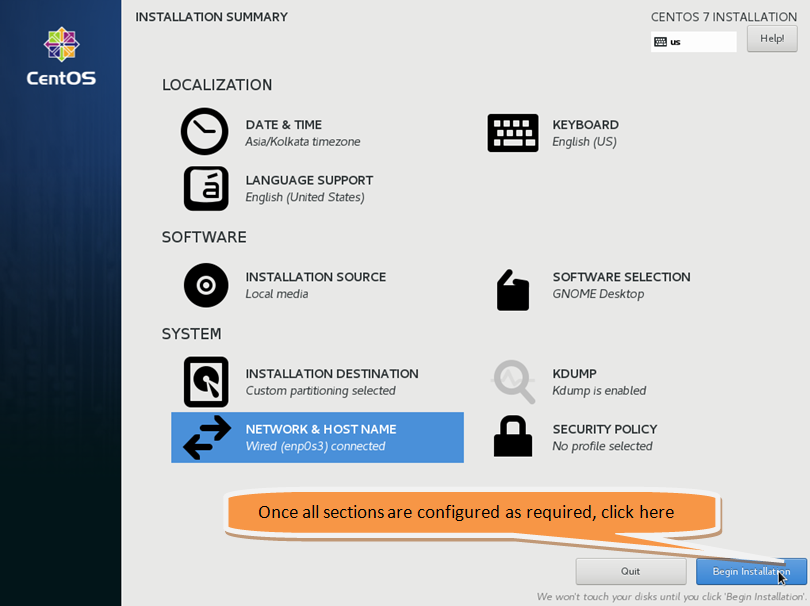
- After this, you will see an INSTALLATION SUMMARY screen. From this screen, you can specify the settings you want to use for the three different sections and their sub-sections, as shown in the following screenshot:
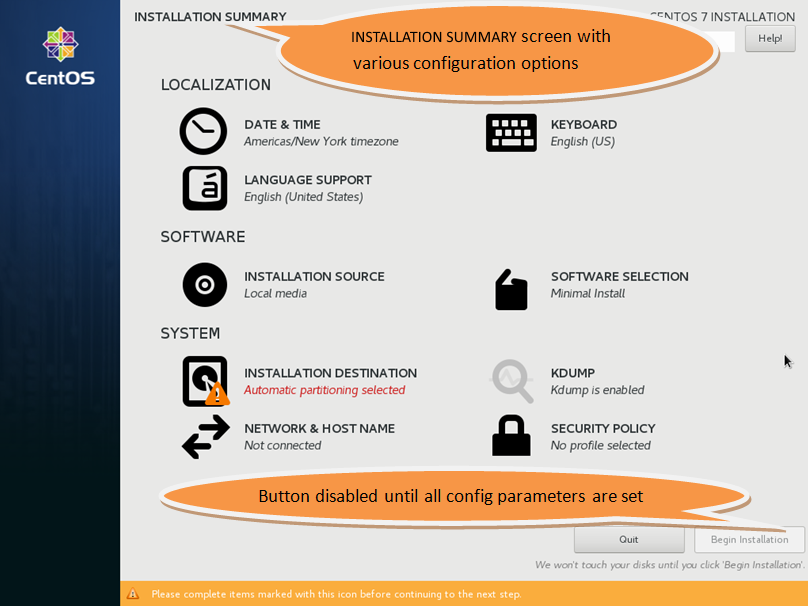
On this screen, the Begin Installation button will remain disabled as long as any setting from a section or subsection displayed on the INSTALLATION SUMMARY screen is still incomplete. If all the sections and subsections displayed on this screen are complete with minimum installation instructions, only then will the Begin Installation button be enabled.
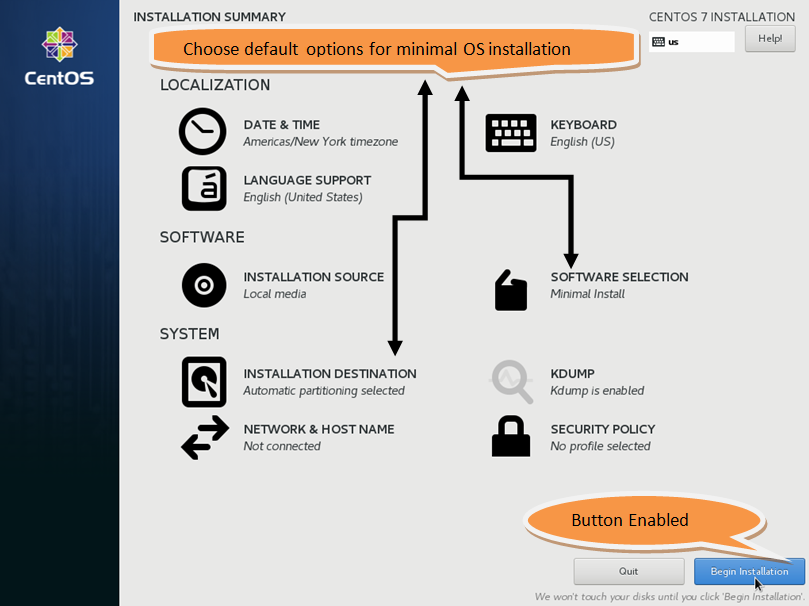
By default, the installer does automatic partitioning for our hard disk. If we want to use the default layout, then we must click on INSTALLATION DESTINATION, and then approve the disk device we want to use for automatic partitioning by clicking on the Done button on the next screen. Thereafter, the Begin Installation button will be enabled and we can install CentOS with a minimal configuration, as shown in the following screenshot:
- If you are a beginner and want to use CentOS 7 with a graphical user interface (GUI), then follow these installation instructions. In this step, we'll learn about the usage of CentOS and then modify certain options that need to be configured during installation. The INSTALLATION SUMMARY screen has three sections, as follows:
- LOCALIZATION
- SOFTWARE
- SYSTEM
These three sections are explained as follows:
- LOCALIZATION: This section further contains the following three sub-sections for configuration:
- DATE & TIME
- KEYBOARD
- LANGUAGE SUPPORT
Or these three, the DATE & TIME sub-section is often required to be configured. The other two we have already configured in the previous steps.
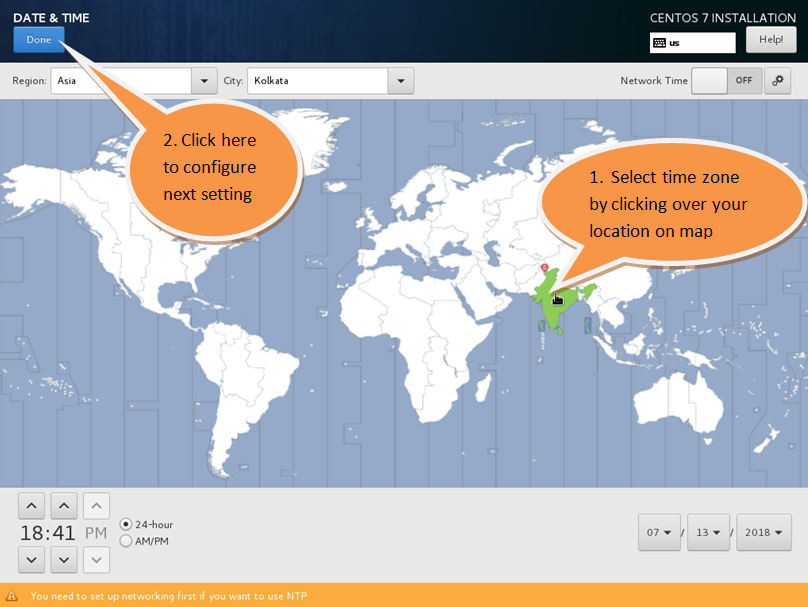
In the DATE & TIME option, select the time zone that you are in by clicking on your location on the world map. You can also configure your current specific DATE & TIME from this window, as shown in the following screenshot:
We leave the KEYBOARD and LANGUAGE SUPPORT settings at their defaults, and move to the next section to be configured—in this case, SOFTWARE.
- SOFTWARE: This section further contains two sub-sections for configuration:
- INSTALLATION SOURCE
- SOFTWARE SELECTION
Under the SOFTWARE section, we keep INSTALLATION SOURCE set to its default local media (DVD-ROM), as shown in the following screenshot:
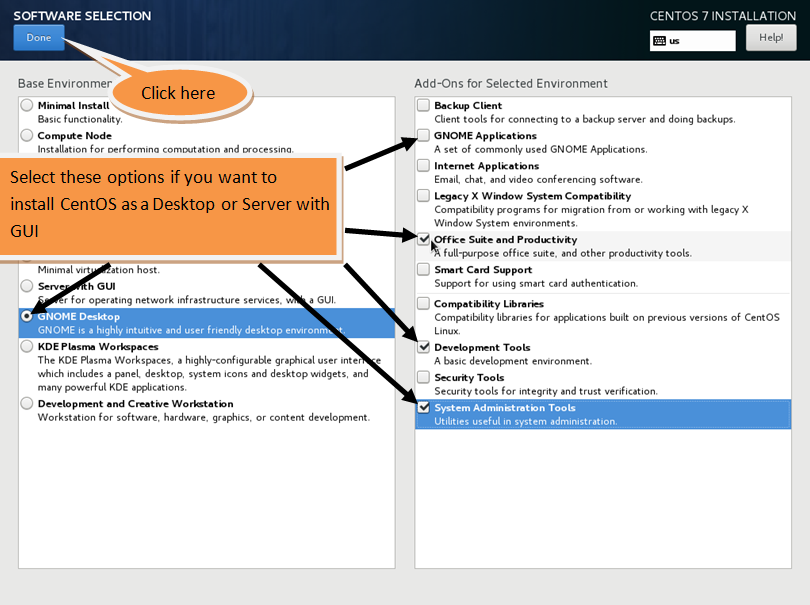
The next sub-section for configuration is SOFTWARE SELECTION. This forms an important part of the installation procedure. Click on this option and you will get the screen shown in the following screenshot. From here, you can choose the default base environment and add-ons that are available for the selected environment. For our practice demonstration, we will install the GNOME Desktop base environment with four add-ons: GNOME Applications, Office Suite and Productivity, Development Tools and System Administration Tools as shown in the following screenshot:
- SYSTEM: This section further contains four sub-sections for configuration:
- INSTALLATION DESTINATION
- KDUMP
- NETWORK & HOST NAME
- SECURITY POLICY
In this section, we keep the KDUMP and SECURITY POLICY sub-sections set to their default parameters, and configure the two remaining sub-sections as follows:
In the INSTALLATION DESTINATION sub-section, we specify where we want to install CentOS. Automatic partitioning is selected by default, but we can create a manual partitioning scheme of our own as per our requirements. As a bare minimum standard, we will create the following three partitions:
-
- Boot partition: This partition stores bootable files such as the kernel image, and so on.
- Swap partition: This is for swapping files and programs in and out of the RAM. It is generally twice the size of the RAM.
- Root (/) partition: This contains the Linux filesystem.
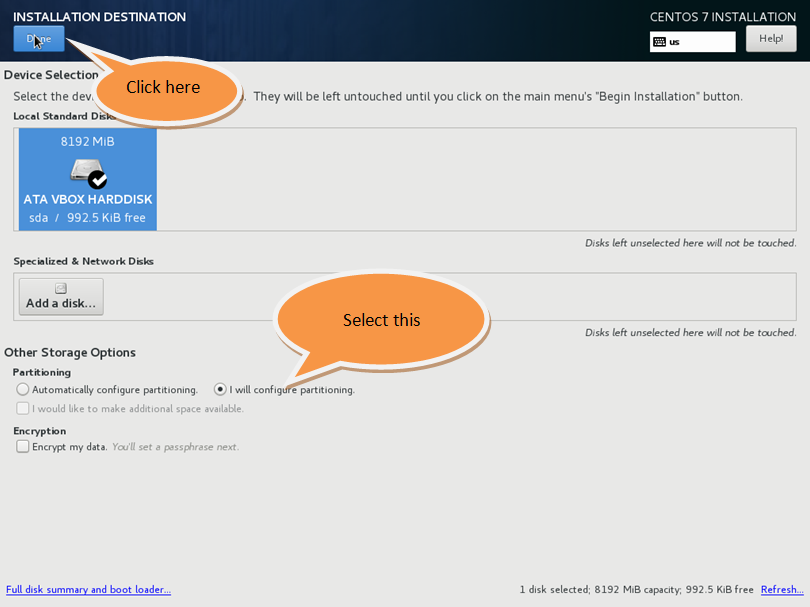
The following screenshot shows where to click to create manual partitions:
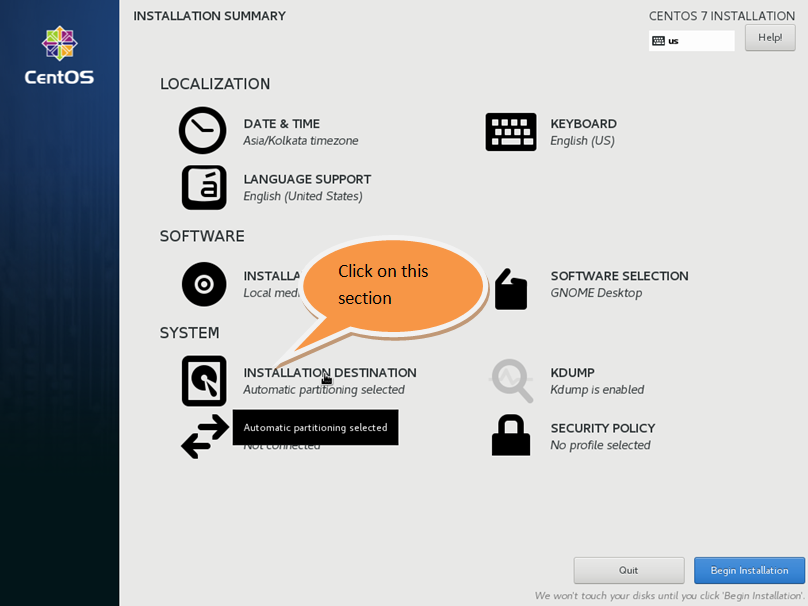
- Choose the device onto which to install the OS, and select I will configure partitioning. Finally, click on the Done button to proceed with the creation of multiple partitions as shown in the following screenshot:
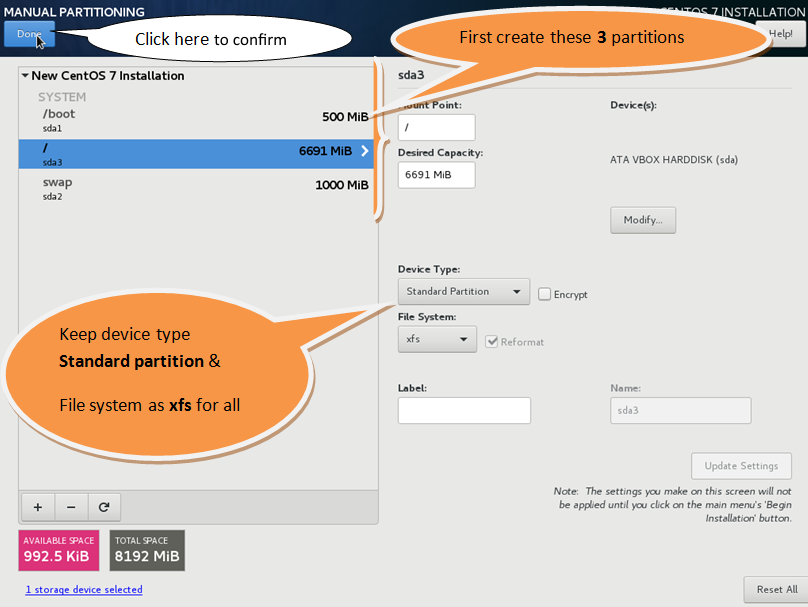
- Now, we create a minimum of three partitions in the partition table (boot, swap, and /). In my case, I have kept File System as xfs, with the Standard Partition type for the boot and / partitions. For the swap partition, the File System type is kept as swap, as shown in the following screenshot:
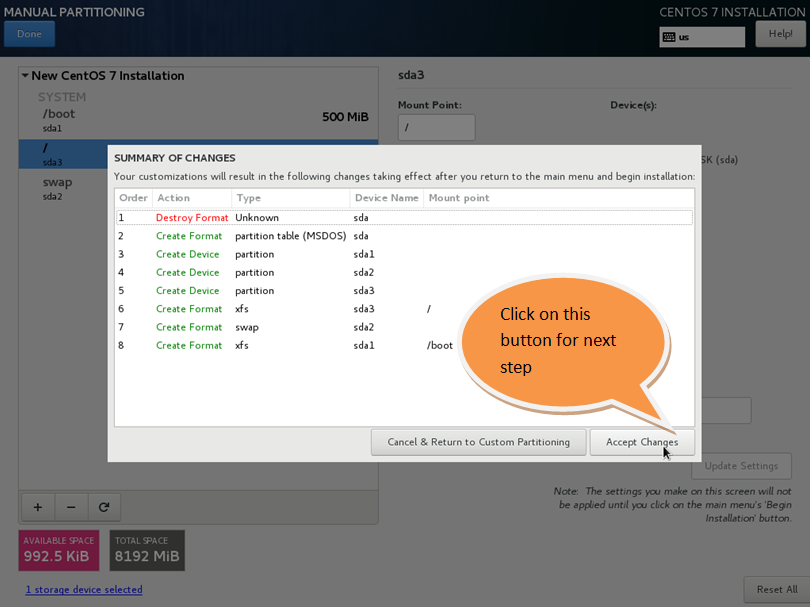
- Next, on pressing Done, you will get the SUMMARY OF CHANGES dialog box. Click on the Accept Changes button to begin creating on the disk the partitions that we specified in the partition table, as shown in the following screenshot:
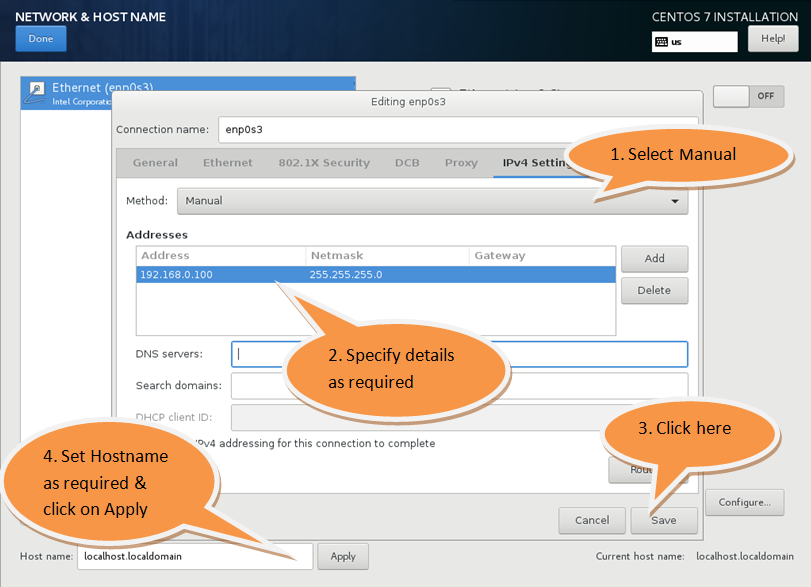
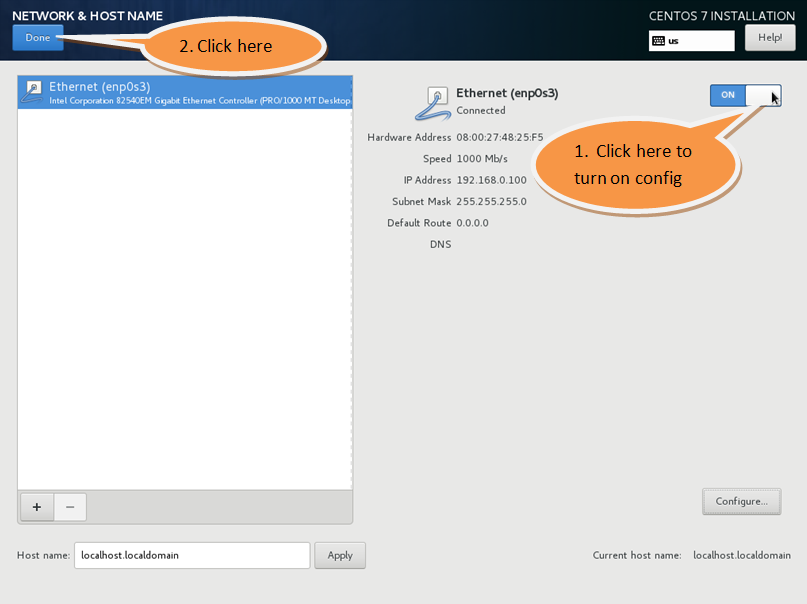
- NETWORK & HOST NAME: In this final part of the installation summary, which we'll configure networking. You can leave the default settings as they are to get the IP address from the DHCP server, or click on NETWORK & HOST NAME to set up networking manually. From the dialog box, click on the IPv4 Settings Tab, then choose the method as Manual from drop-down menu and specify the private IP address, as shown in the following screenshot:
Further in the NETWORK & HOST NAME settings, change the network connection state from Off to On, as shown in the following screenshot:
- Now that all the INSTALLATION SUMMARY sections are configured as required, the Begin Installation button is enabled. Click on the Begin Installation button to start the process of installation, as shown in the following screenshot:
- Next, the screen prompts for user settings. Here, we click Root Password first and set the password to Linux@12345.
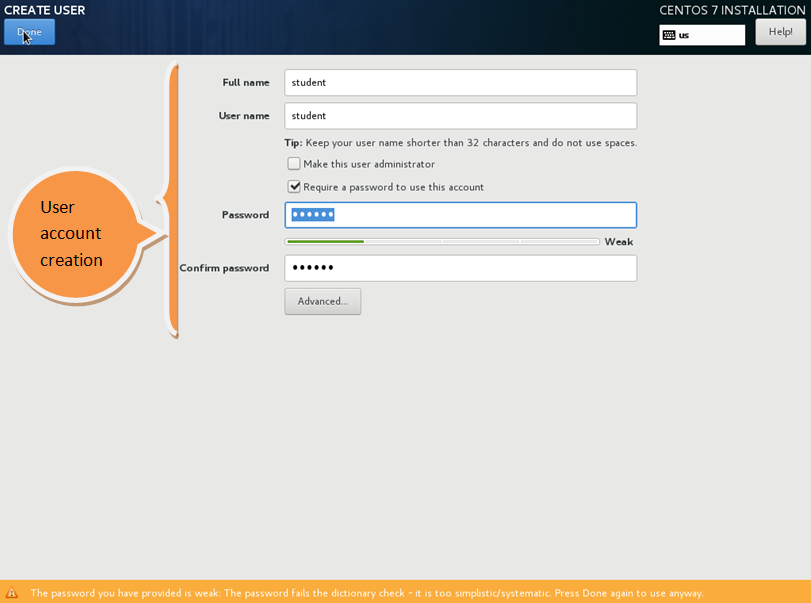
- Next, we click on CREATE USER to create a user. For both the Full name and User name fields, enter student, and set Password as Student@12345. Here also we have to click on the Done button twice to confirm the password, as shown in the following screenshot:
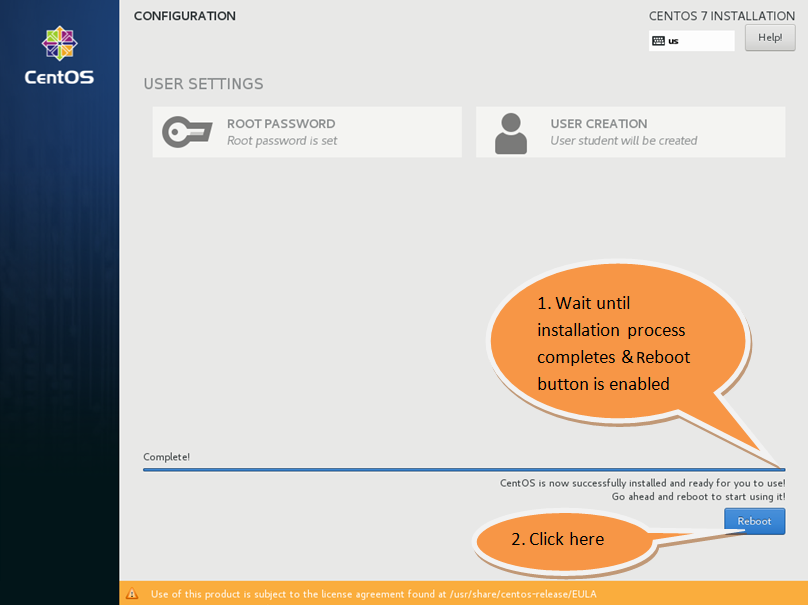
- Have a cup of coffee while the installation process is in progress. Once the installation is complete, remove any installation media (the instructions only apply to the DVD method) and click on the Reboot button, as shown in the following screenshot:
- Once the system has rebooted, we will get the INITIAL SETUP screen, where we have to accept an EULA agreement before logging in to the system. Here, we click on LICENSE INFORMATION to accept the license agreement, as shown in the following screenshot:
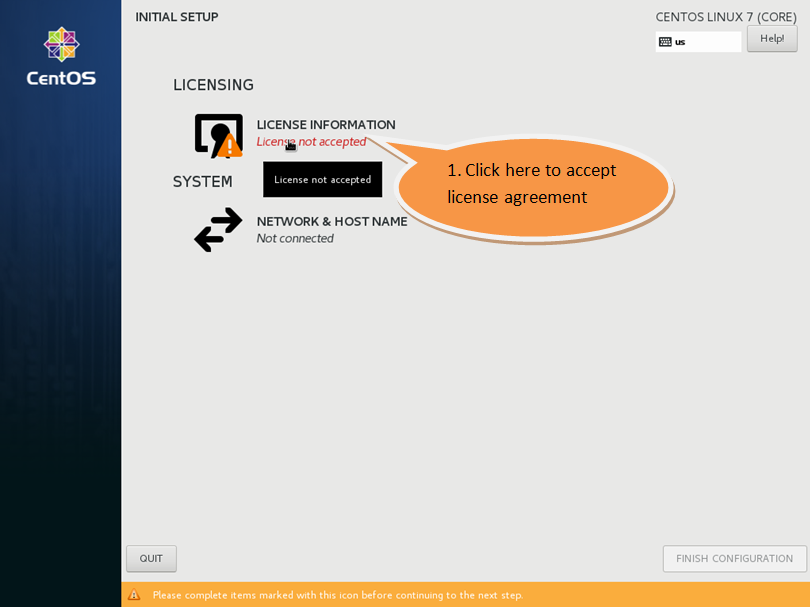
- Once the license agreement has been accepted, the FINISH CONFIGURATION button will become enabled. Click on it to reach the login screen.
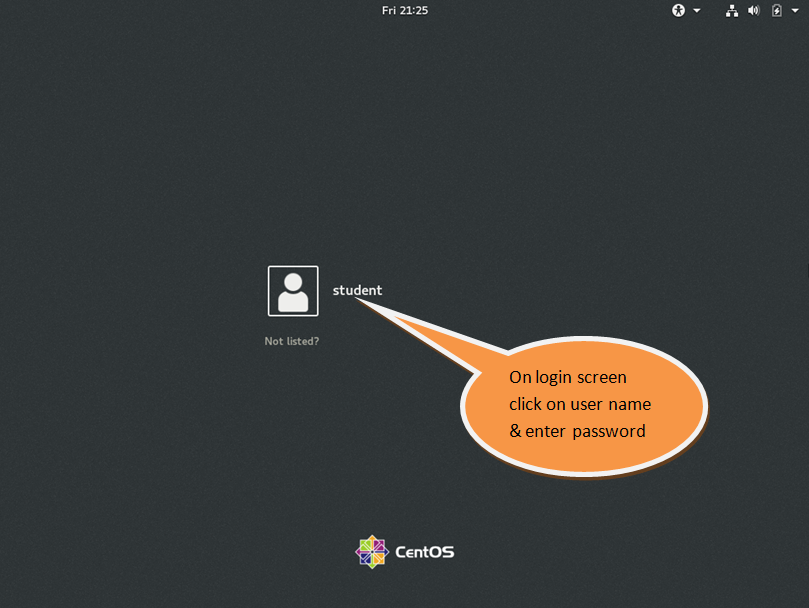
- On the login screen, click on the student username and enter the password as Student@12345, as shown in the following screenshot:
- After a successful login, you will see the welcome screen that is displayed only when the user LOGS IN for the first time. Click on the Next button to reach the desktop.
- Congratulations! You have successfully installed the latest version of CentOS 7 on your computer system or virtual machine. You can explore your new CentOS 7 environment and perform other tasks, such as updating the system or installing other useful software for daily operational requirements. To power down the system, click on the right corner of desktop. You will get a drop-down menu; from there you can click on Shut down, as shown in the following screenshot:

With this, your installation process is complete. In the upcoming section, we will learn how to access the command-line console.