

This recipe describes how to configure the DHCP server. The DHCP server assigns an IP address to anyone who requests one.
In order to enable the DHCP server on an interface, that interface must have a static IP address. If you have followed the recipes in order, you should have at least one interface with a static IP address (the LAN interface). This example will show how to configure the DHCP server on the LAN interface.
- Navigate to
Services|DHCP Server. - Click on the
LANtab, if it isn’t selected already. - Under
General Options, check theEnable DHCP server on LAN interfacecheckbox:
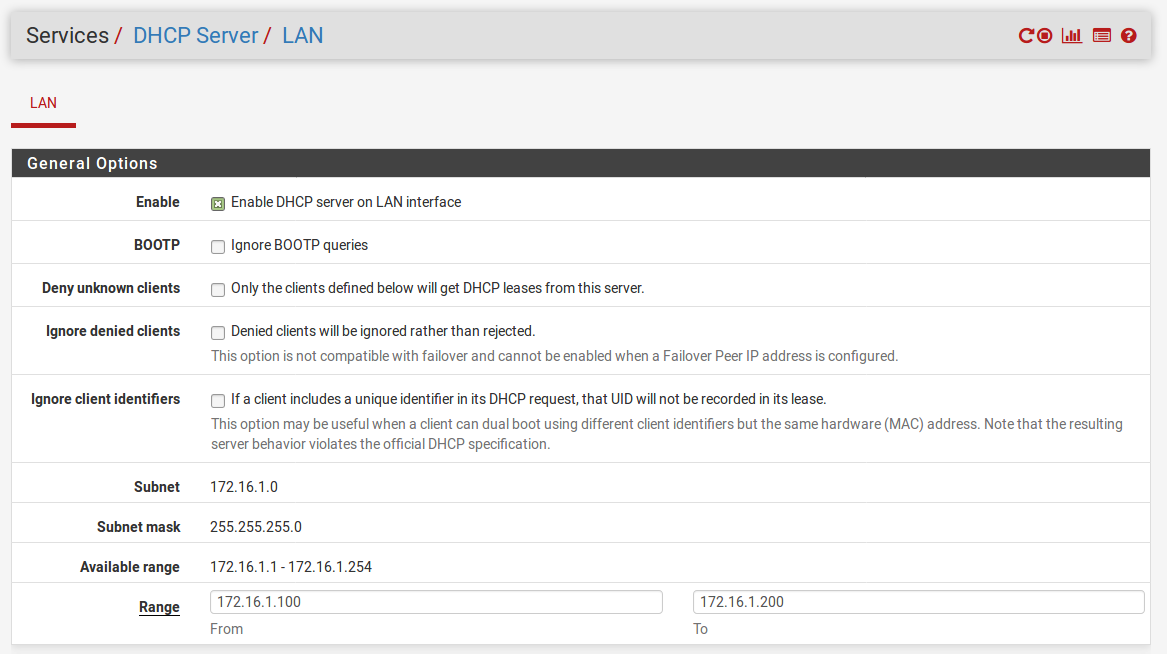
- In the
Rangeedit boxes, enter a range of IP addresses for the DHCP server to assign to clients. The range must be contiguous and within the range listed next toAvailable range. - If you do not need more than a single range of IP addresses, proceed to Step 6. Otherwise, perform the following steps to add multiple IP address pools:
- Under
Additional Pools, click on...
- Under