

The Dradis Framework is a Rails application that can be used to help manage the data overload that can occur when pentesting. With its user friendly web-based interface it simplifies data collection throughout the testing cycle, and is priceless when sharing data with your team members.
When combining disparate data sources, such as Nmap, Nessus, and even Metasploit you would typically need to build out some sort of database and then use various methods of managing the imports. Dradis has plugins that allow you to import this data with just a few clicks. Dradis also allows you to upload attachments such as screenshots or to add your own notes to the database.
The Dradis server can be started by either clicking through the shortcuts menu Applications | BackTrack | Reporting Tools | Evidence Management | Dradis, or by typing the following into the terminal:
# cd /pentest/misc/Dradis/
# ./start.sh
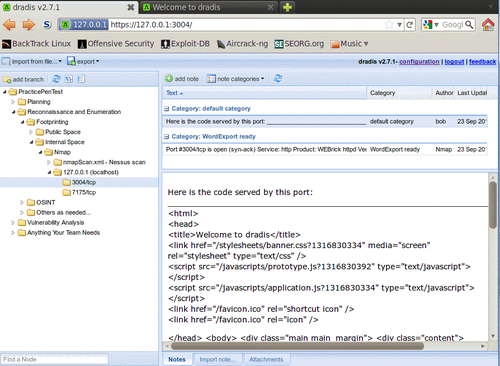
Once the server has started you may open up your browser and type https://127.0.0.1:3004 which takes you to the intro screen of the Dradis application.
Note
The browser will present you with warnings, as the certificate is self-signed. Add the certificate to your exceptions list and continue to the site. You may also want to choose Allow 127.0.0.1 in No Script browser add-on.
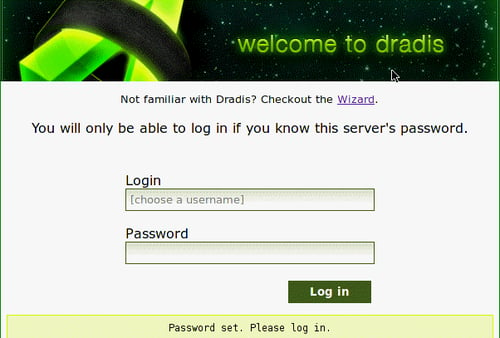
You will be greeted by the "What is Dradis" screen. In order to set the shared password for the server you will need to click on the back to the app link in the top-right corner of the page.

The Dradis framework uses a password that is shared by all team members. Enter a password of your choice in the Password field.
Click on the Initialize button to continue. This will set up the new password and accept the default Meta-Server options.
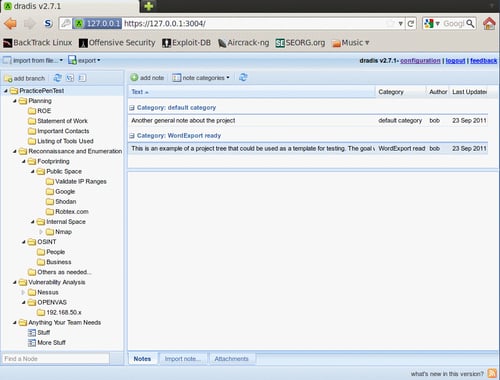
You will now be able to choose a new username in the Login field. The user login field is used for informational purposes only and will not affect the work area. Type the shared server password into the Password field. Once you click on the Log in button, you are presented with the primary Dradis work area.
We will begin setting up our Dradis environment by creating a new branch to represent our penetration test. These branches allow you to manage your findings based on various user-created criteria.
Click on the add branch button displayed in the toolbar at the top of the application window.
The new branch will be ready for you to rename it. Overwrite branch #2 with
PracticePenTestand press Enter.Right-click PracticePenTest and select add child to start your hierarchy.
Experiment a bit and add additional folders. Start thinking about how you would like to have your data arranged for easy access and manageability.
Here is an example of a project tree that could hypothetically be used for data collection during a penetration test:
Testing will consist of a series of planned stages and procedures that do not fluctuate much from one test to another. To take full advantage of this fact, we will be creating a reusable template.
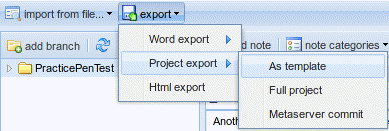
With the PracticePenTest node selected, we will click on the export icon in the top menu bar. When expanding the Project export menu we are presented with the as template option. Clicking this will allow us to save the project template to a location of our choice as an .xml file.
Save the file to your BackTrack Desktop folder and keep the default name of dradis-template.xml. Go back to your Dradis web application window, select the PracticePenTest node, and delete it by right-clicking on it and then choosing Delete node.
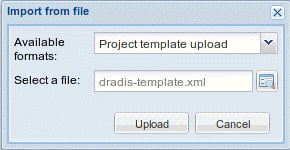
The PracticePenTest node has been deleted along with the rest of our data. Now it is time for us to reuse it, so we need to import the dradis-template.xml file. Click on Import from file from the menu bar and then select old importer. Select Project template upload from the drop-down menu and click on Upload to complete the import sequence and once it has refreshed the screen, we now have two new folders in place: one named Uploaded files, and then of course our original PracticePenTest node structure.
To fully appreciate the value of the Dradis framework, we will be generating some test results using some of the tools commonly used in penetration and vulnerability testing. Most of you probably have some familiarity with these tools, so we will not cover them in depth.
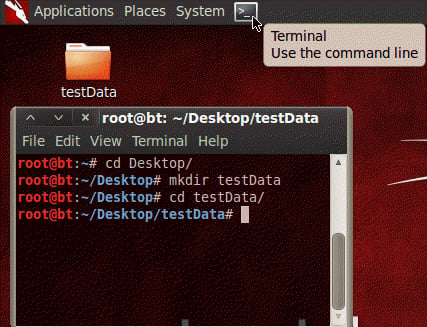
The first thing we need to do is to get our BT5_R1_Tester1 instance up and running if it isn't already. Once you have logged into the BackTrack guest machine and started the graphical user interface with startx, start a new terminal session by clicking on the Terminal icon in the top bar.
Tip
You may have noticed that you are running as root. Many of the tools you will be using require administrative rights to function properly.
Change the directory to Desktop and then make yourself a new directory named testData. This will be used to store the few exports we will be using. Change your present working directory to /Desktop/testData.
# cd Desktop/
# mkdir testData
# cd testData/
Now we will be using Nmap to generate data that will later be imported into Dradis:
nmap -vv -O -sS -A -p- P0 -oA nmapScan 127.0.0.1
This command initializes Nmap to run against the localhost and instructs it to send the results to three file types: XML, standard, and grepable. As a directory was not specified, the files will be placed into the present working directory. We are performing a very verbose TCP SYN scan against all ports with OS and version detection in which the command treats all hosts as online.
With the Dradis web console open, and the PracticePenTest project tree loaded, select Import from file, old importer, and then in the Import from file menu select the Nmap upload format, and click on the folder icon to the right of the Select a file: input field. Browse to and highlight the nmapScan.xml file and click on Open.
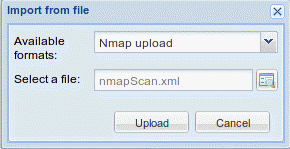
Clicking on Upload will complete the import. It will take a few moments to process the data. The length of time it takes to process is proportional to the amount of data you have.
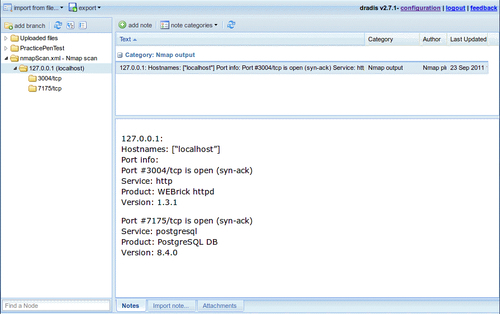
The import has added an additional node to our tree. This can be moved to whichever location in the PracticePenTest node you would like it to be in, by dragging it with the left mouse button. By moving the 127.0.0.1 scan result into the logical hierarchy of PracticePenTest it is now easy to associate it with this penetration test and other correlating data.
One of the benefits of using this type of centralized data collection is that you will be able to set certain flags on notes to have the data exported into PDF, MS Word, or HTML format.
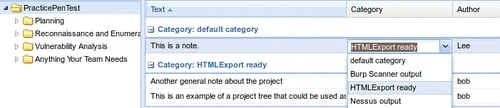
With Dradis up and running, we will need to select the PracticePenTest node and click on the Add note button in the workspace to the right of your project tree. Type "This is a note" into the editor that pops up and then click on Save. This will add your note to the list.
You will not always want to export everything into your reporting formats. To address this fact, the Dradis development team added the Category field. This field will flag the data to be exported into the various formats available. In this case we will double-click on the text default category listed to the right of our new note titled "This is a note." Choose the HTMLExport ready option from the drop-down menu.
To see our data, select the export option on the top toolbar and click on HTML export. You will be presented with an HTML output of all PracticePenTest notes that are members of the HTMLExport category throughout the project tree.
As you can see the output is very nice, but what if you would like to have something that is a bit more customized? The standard templates can be changed to customize the look and feel of the export. Here is an example of how to change the footer of the document:
Change the current working directory to the export plugin of choice. In this case we will be modifying the html_export/template.html.erb file.
# cd /pentest/misc/dradis/server/vendor/plugins/html_export
To modify template.html.erb we will be using nano, a very powerful-easy to use text editor.
# nano template.html.erb
The file will be displayed within the Nano text editor. The Nano commands will be listed on the bottom of the application if reference is needed. We are presented with the HTML that makes up the template.html.erb file. Make a small change to the template by placing <h1>You can change this template to suite your needs.</h1> into the template HTML right below the <title><%= title %></title> line.
<title><%= title %></title>
<h1>You can change this template to suite your needs.</h1>
Save the changes in Nano using Ctrl+O which will write out the file to disk. You will be asked what filename you would like to use to save the file; accept the defaults by pressing Enter on your keyboard.
To see your changes in action, go back to the Dradis web console, select PraticePenTest and click on export then HTML export from toolbar menu. Your new template will load and your change will be visible in the report export. The template is very customizable and can be made to have the look and feel you want it to with a bit of effort and HTML skill.
Tip
Please note that the MS Word export functionality requires you to have MS Office installed.
This means that we cannot use our BackTrack instance to fully appreciate the power of Dradis. The Word templates are easily customized to include your company information, list the data in your preferred formatting, and to add standard footers and headers to the document.
Because Dradis is very portable, if you need the power to export into MS Word, but do not have a license available to install it in BackTrack, install Dradis on your Windows machine that has Microsoft Office installed, export the Dradis project from BackTrack, and re-import it into the Windows Dradis installation.