
When creating PowerShell scripts, modules, and profiles, it is considered best practice to digitally sign them. Signing scripts performs the following two functions:
Ensures the script is from a trusted source
Ensures the script hasn't been altered since it was signed
To sign a PowerShell script, a code-signing certificate will be needed. Normally these certificates will be provided by your enterprise Private Key Infrastructure (PKI), and the PKI Administrator should be able to help you with the requesting process. Code-signing certificates can also be purchased from third party Certificate Authorities (CA) which can be helpful if your scripts are being distributed outside of your corporate environment.
Once received, the code-signing cert should be added to your Current User | Personal | Certificates certificate store on your computer. Additionally, the root certificate from the Certificate Authority should be added to the Trusted Publishers store for all computers that are going to execute the signed scripts.
Carry out the following steps:
Create and test a PowerShell script.
Sign the script with
Set-AuthenticodeSignature.$cert = Get-ChildItem Cert:CurrentUser\My\ -CodeSigningCert Set-AuthenticodeSignature C:\temp\ServerInfo.ps1 $cert
The signing process is fairly simple, but also extremely powerful. The process starts by searching the Current User certificate store for a certificate capable of code signing and is placed into a $cert variable. Set-AuthenticodeSignature is then called to sign the script with the certificate.
If there is more than one code signing certificate on your system, you need to select which certificate to use. To achieve this, update the first line to include a where clause. For example:
$cert = Get-ChildItem Cert:CurrentUser\My\ -CodeSigningCert | Where-Object Subject -eq 'CN=CorpInternal'
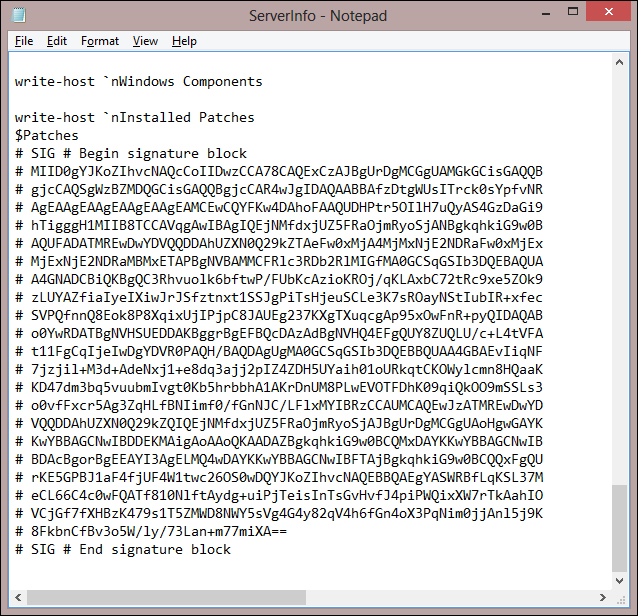
If you open the script in a text editor after it has been signed, you will notice several lines of content appended to the end. These additional lines are the signature that PowerShell will verify before running the script.
If you don't have an available PKI to obtain a code-signing certificate, or your PKI Administrator is hesitant to give you one, you can create a self-signed certificate for testing purposes. To do this, you can use the following PowerShell script which is based on the script by Vishal Agarwal at http://blogs.technet.com/b/vishalagarwal/archive/2009/08/22/generating-a-certificate-self-signed-using-powershell-and-certenroll-interfaces.aspx:
$name = new-object -com "X509Enrollment.CX500DistinguishedName.1"
$name.Encode("CN=TestCode", 0)
$key = new-object -com "X509Enrollment.CX509PrivateKey.1"
$key.ProviderName = "Microsoft RSA SChannel Cryptographic Provider"
$key.KeySpec = 1
$key.Length = 1024
$key.SecurityDescriptor = "D:PAI(A;;0xd01f01ff;;;SY)(A;;0xd01f01ff;;;BA)(A;;0x80120089;;;NS)"
$key.MachineContext = 1
$key.Create()
$serverauthoid = new-object -com "X509Enrollment.CObjectId.1"
$serverauthoid.InitializeFromValue("1.3.6.1.5.5.7.3.3") # Code Signing
$ekuoids = new-object -com "X509Enrollment.CObjectIds.1"
$ekuoids.add($serverauthoid)
$ekuext = new-object -com "X509Enrollment.CX509ExtensionEnhancedKeyUsage.1"
$ekuext.InitializeEncode($ekuoids)
$cert = new-object -com "X509Enrollment.CX509CertificateRequestCertificate.1"
$cert.InitializeFromPrivateKey(2, $key, "")
$cert.Subject = $name
$cert.Issuer = $cert.Subject
$cert.NotBefore = get-date
$cert.NotAfter = $cert.NotBefore.AddDays(90)
$cert.X509Extensions.Add($ekuext)
$cert.Encode()
$enrollment = new-object -com "X509Enrollment.CX509Enrollment.1"
$enrollment.InitializeFromRequest($cert)
$certdata = $enrollment.CreateRequest(0)
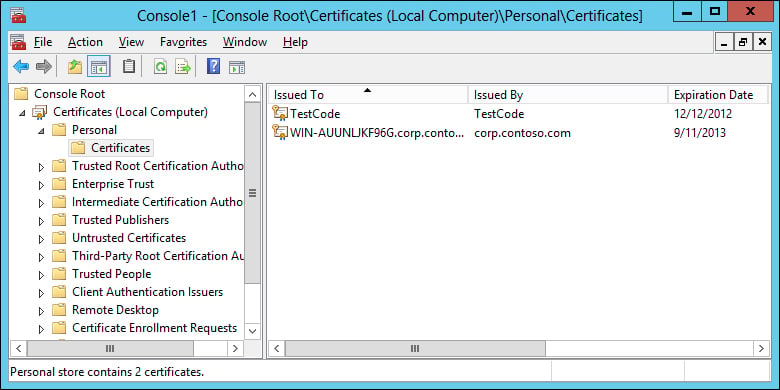
$enrollment.InstallResponse(2, $certdata, 0, "")Executing this script will create the certificate and install it on the local computer as shown in the following screenshot: