
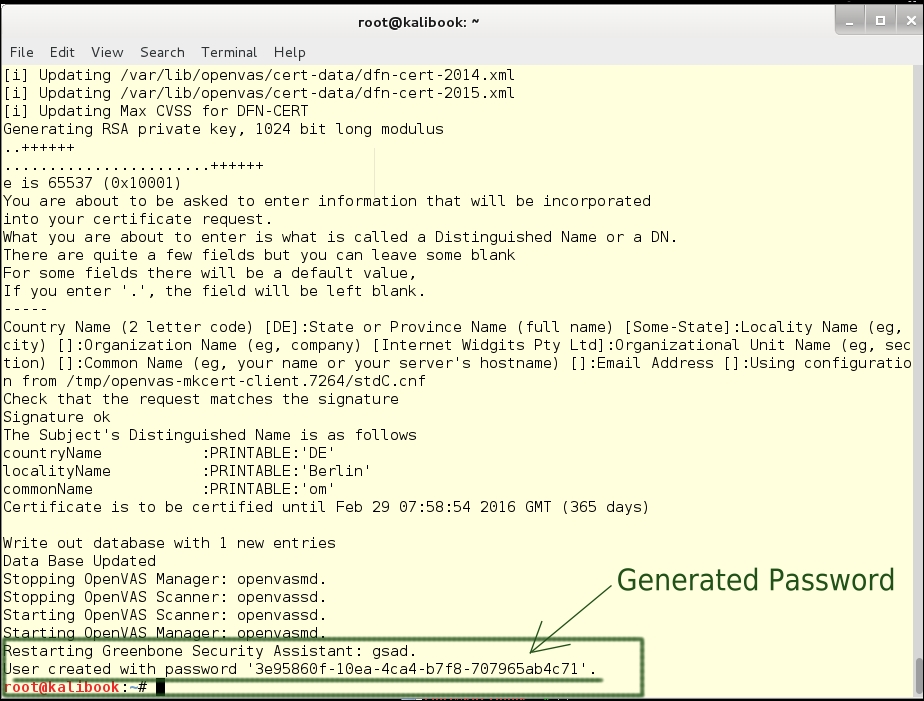
Recon is everything, so a good vulnerability scanner is necessary. Kali come with OpenVAS installed. It must be configured and updated before use. Fortunately, Kali comes with a helpful script to set this up. This can be found under Applications | openvas initial setup. Clicking on this will open a terminal window and run the script for you. This will set up the self-signed certificates for SSL and download the latest vulnerability files and related data. It will also generate a password for the admin account on the system.
Tip
Be sure to save this password as you will need it to login. You can change it after your first login.
Kali also comes with a check setup script which will check the services and configuration. If an issue does come up it will give you helpful information on the issue. This script can be found at Applications | Kali Linux | System Services | OpenVas | openvas check setup. Click here and a terminal window will open and run the script.
The script results are as shown in the following screenshot:
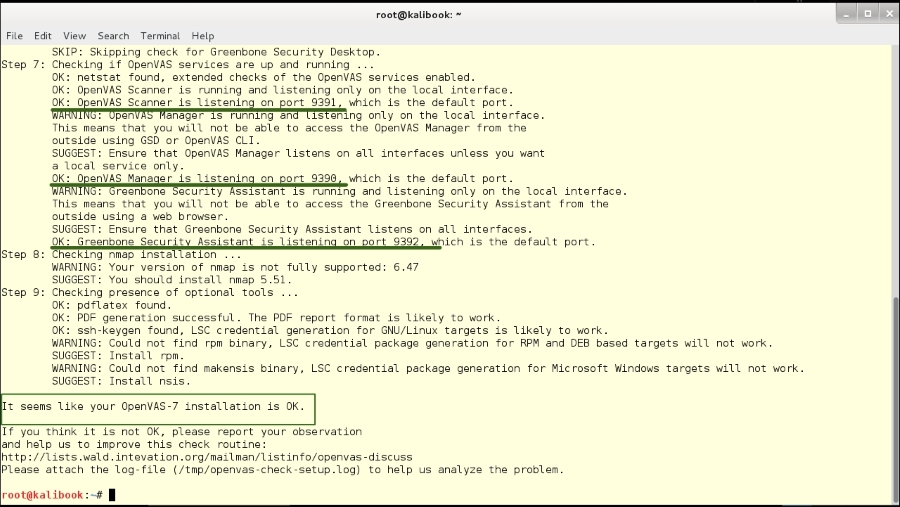
Note this check shows the running ports of the services. The check shows a warning that these services are only running on the local interface. This is fine for your work. It may at some point be useful for you to run the OpenVAS server on some other machine to improve the speed of your scans.
Next, we will log into the Greenbone web interface to check OpenVAS. Open the browser and go to https://localhost:9392. You will be shown the security warning for a self-signed certificate. Accept this and you will get the following login screen.
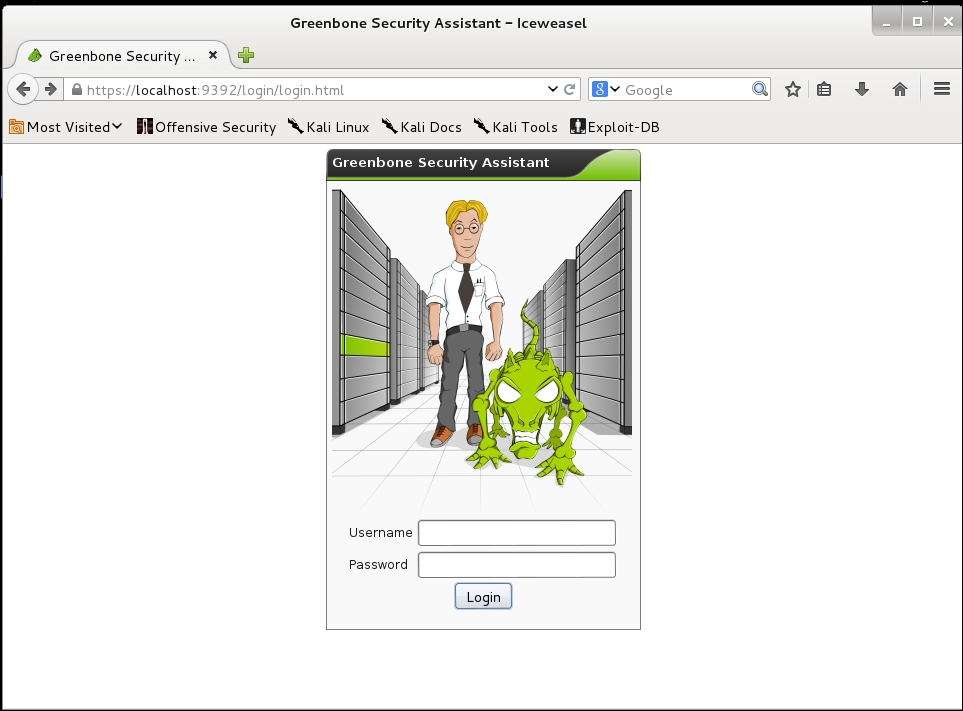
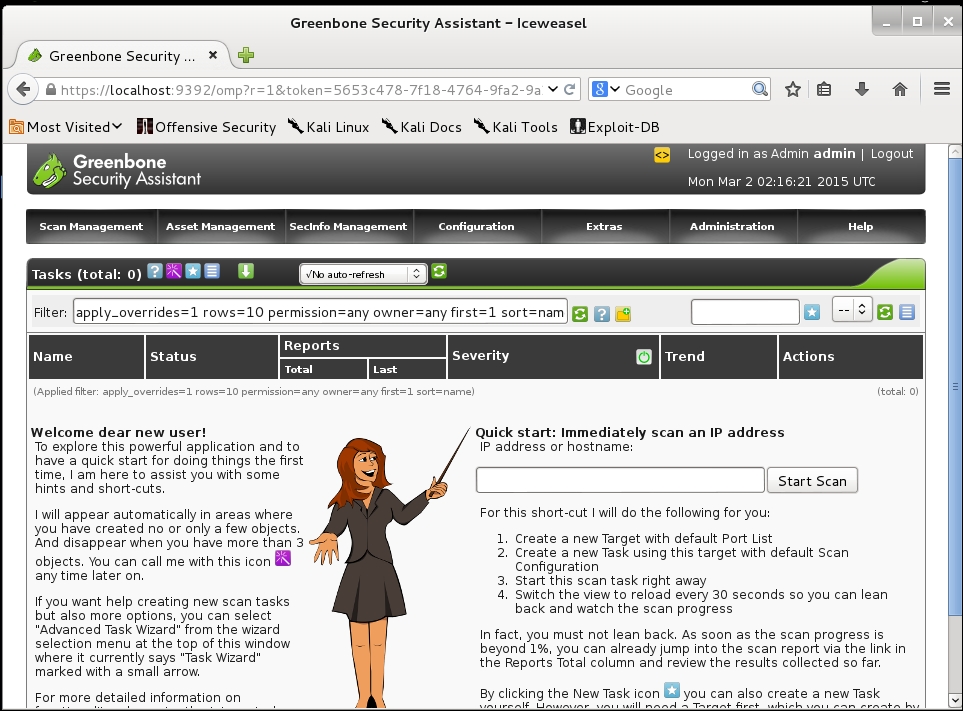
You will log in with the user name admin and the very long and complex password generated during the set up. Don't worry, we're going to change that once we get logged in. Once logged in you will see the following page.
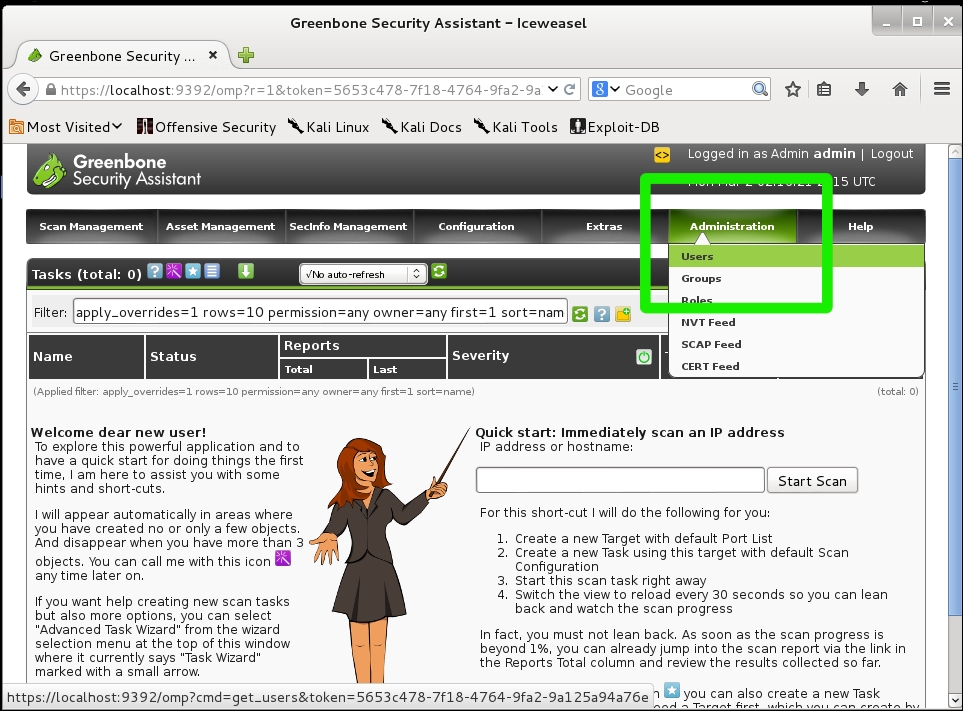
Now go to the Administration | Users tab:
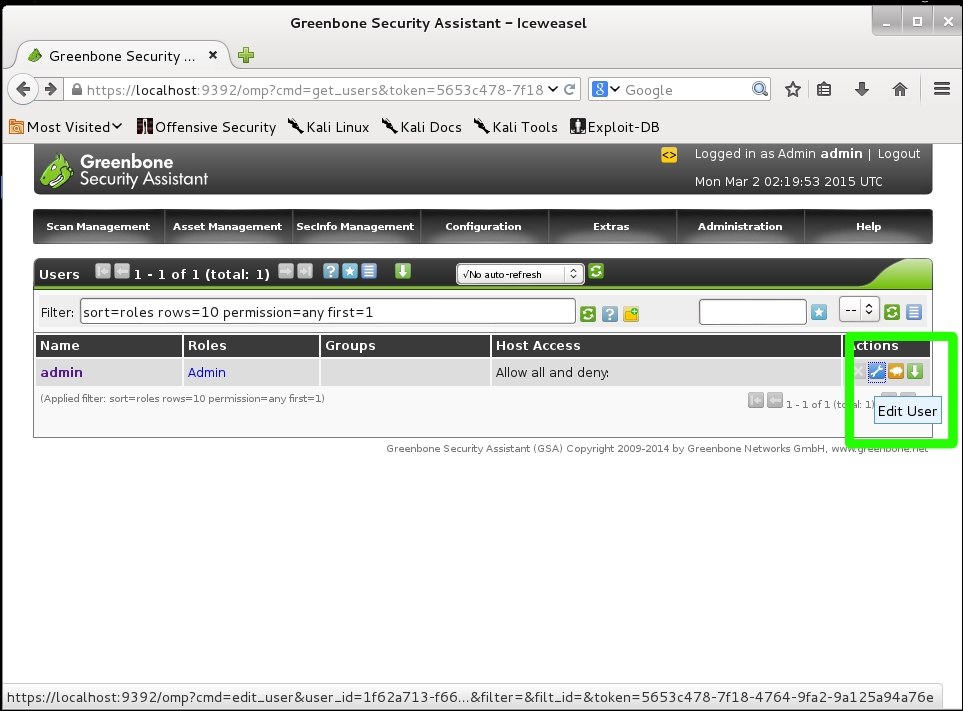
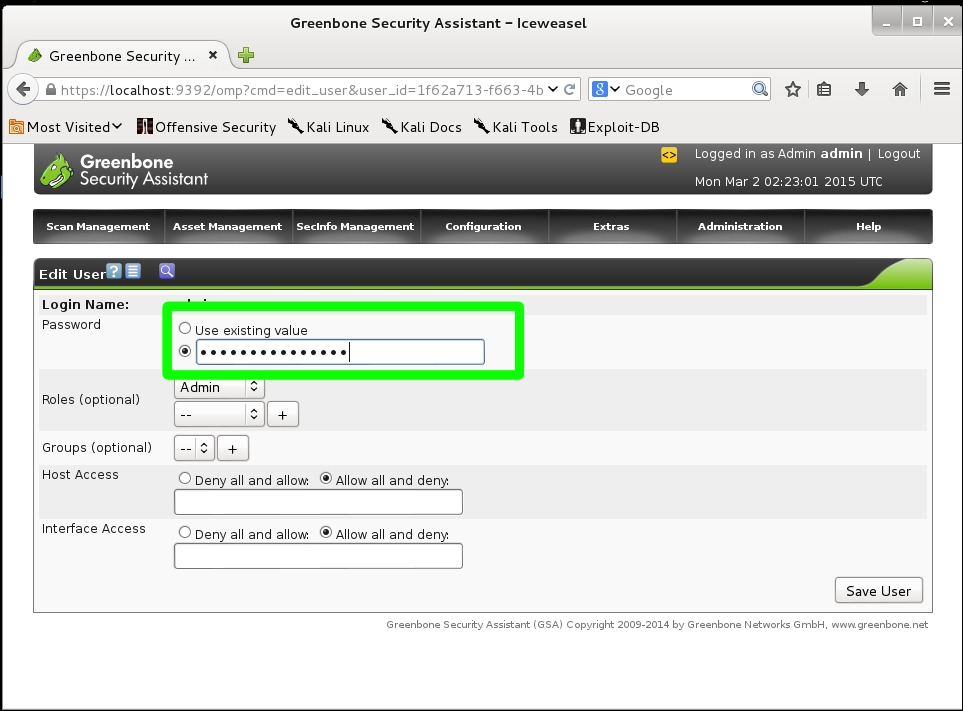
This will take you to the user administration page. Click the wrench link to the right of the name admin and this will open the edit page for the admin user.
This will take you to the edit page. Change the radio button for Use existing value to the blank field and add your new password and click the Save button.
We've now finished the setup of OpenVAS and we're ready to do some real work.