
Installing Linux on a hard disk is the first step. The process of installing Kali Linux on a physical hard disk or on Virtual Hard Disk is absolutely similar. So, feel free to use the same steps to install Linux on your physical machine. Needless to say that by using this method only Kali Linux 2.0 will be installed on your hard disk as the primary operating system.
Before installing Kali Linux, you will require Linux Latest ISO Image, which can be downloaded from https://www.kali.org/downloads/ .
Perform the steps for recipe:
- Open VMware on your macOS and press command + N , once the same is done we will see something like the following screenshot:
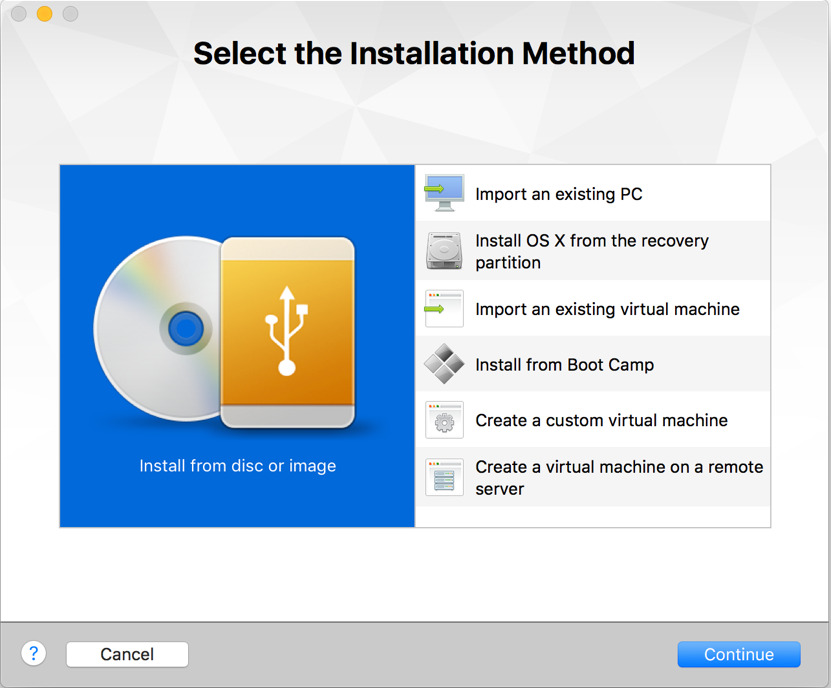
- Select
Install from or imageand onContinue:
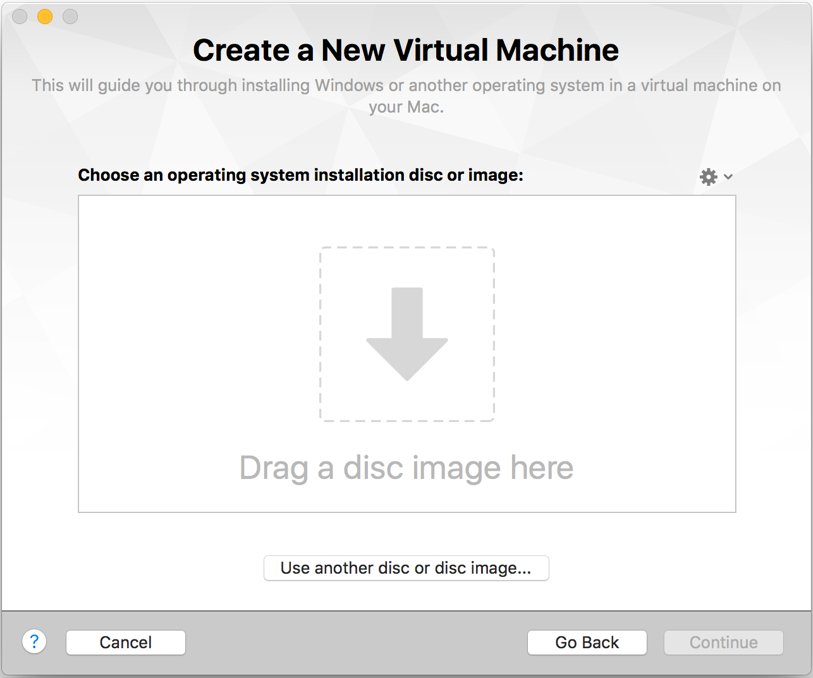
- Drag and the Kali Linux 2.0 ISO, which have just downloaded, as shown in the following screenshot:
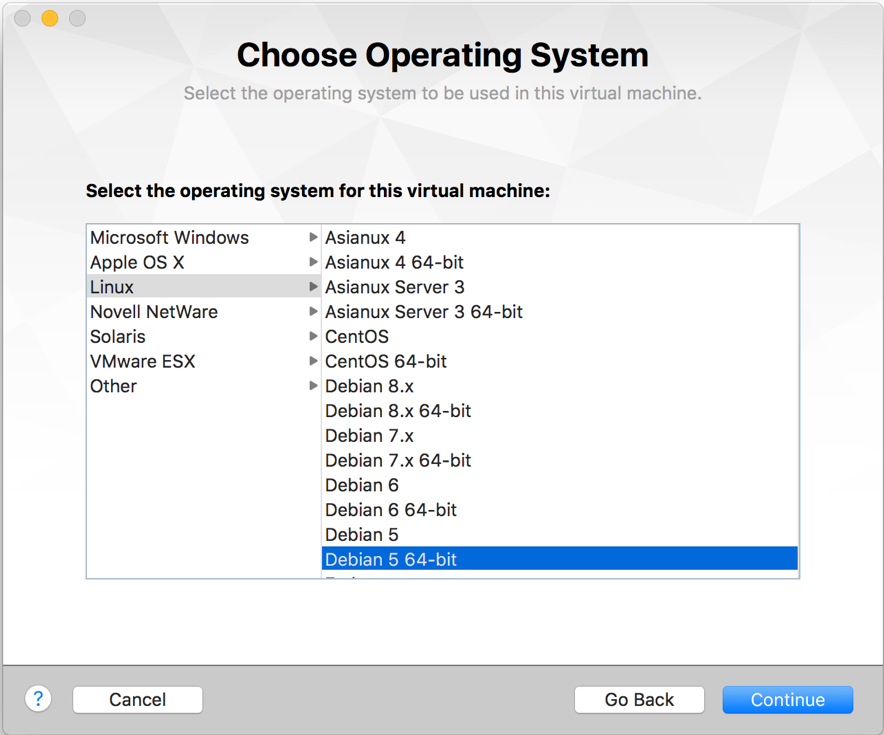
- Select
Debian 5 64bitand onContinue, as shown in the screenshot:
- Click on
Settingand select the location to save your virtual machine:

- After saving, opens
Debian settings. OpenProcessors & Memoryand the RAM size to 4 GB (or based on the memory available in your laptop). Remember that Metasploit requires minimum 2GB of RAM to run as a prerequisite:
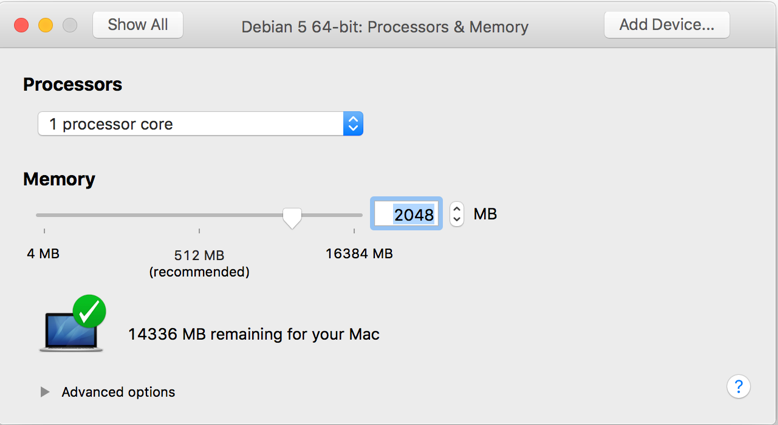
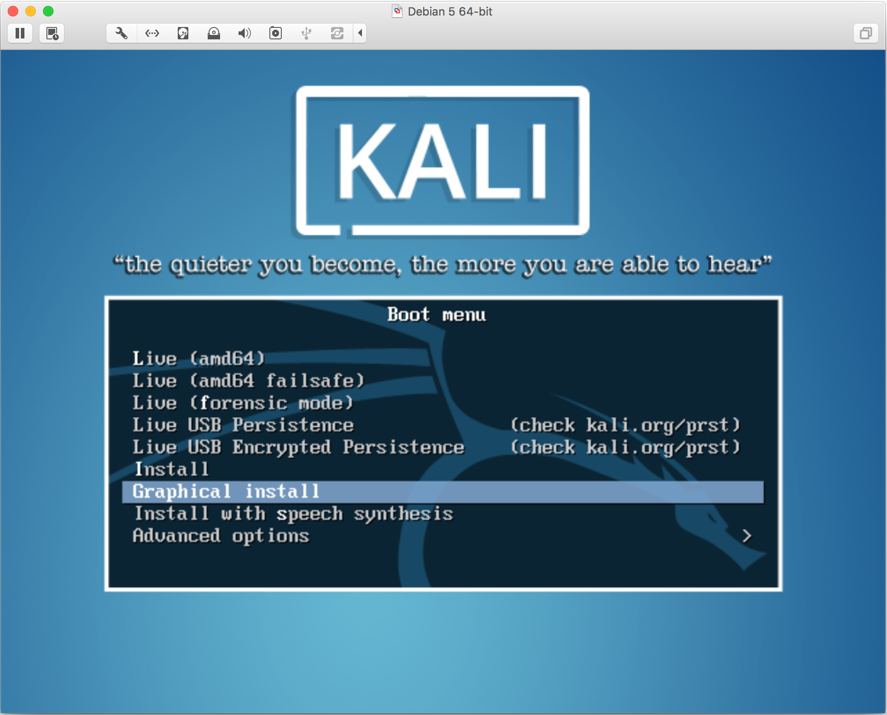
- Close the and click on
Startand then inside the window. The cursor control will go toGuest VM. Scroll down and selectGraphical installas shown in the following screenshot:
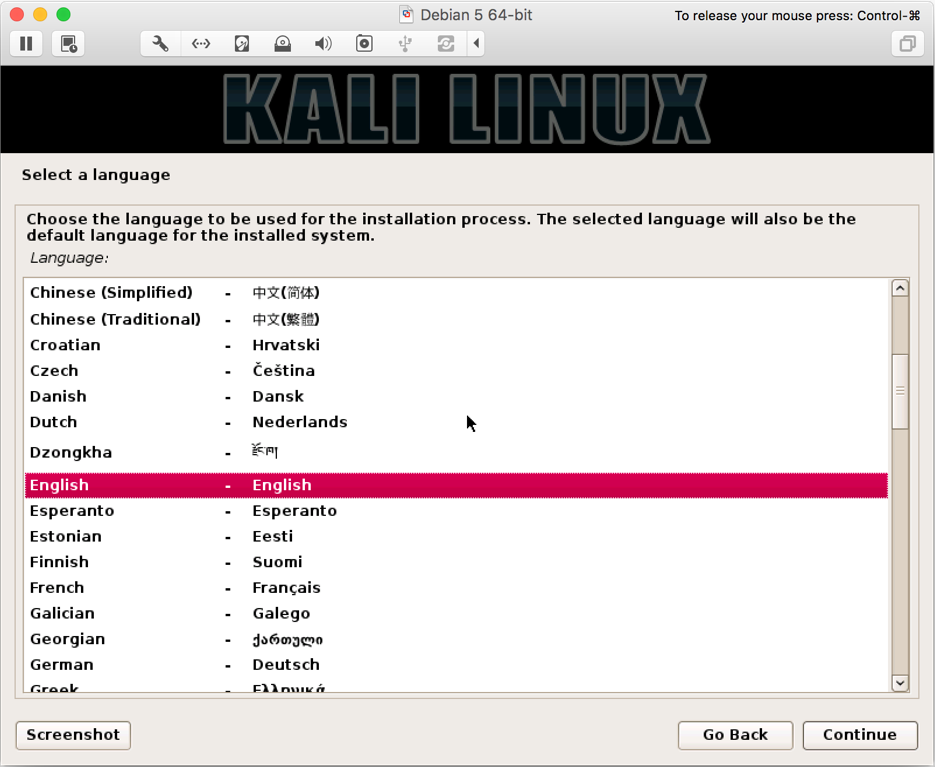
- Select your language and on
Continue(we choseEnglish):
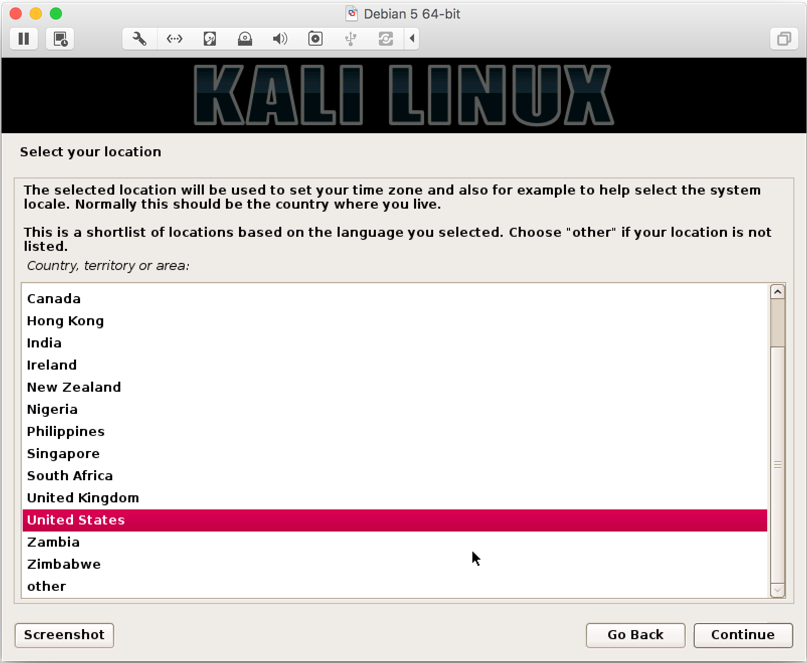
- Select country (we
United States):
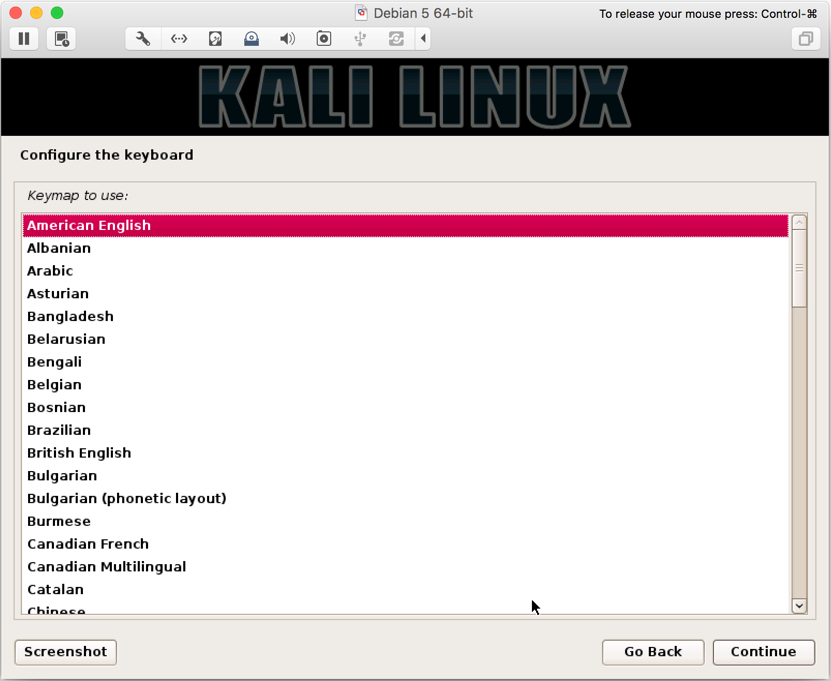
- Select keyboard (we selected
American English):
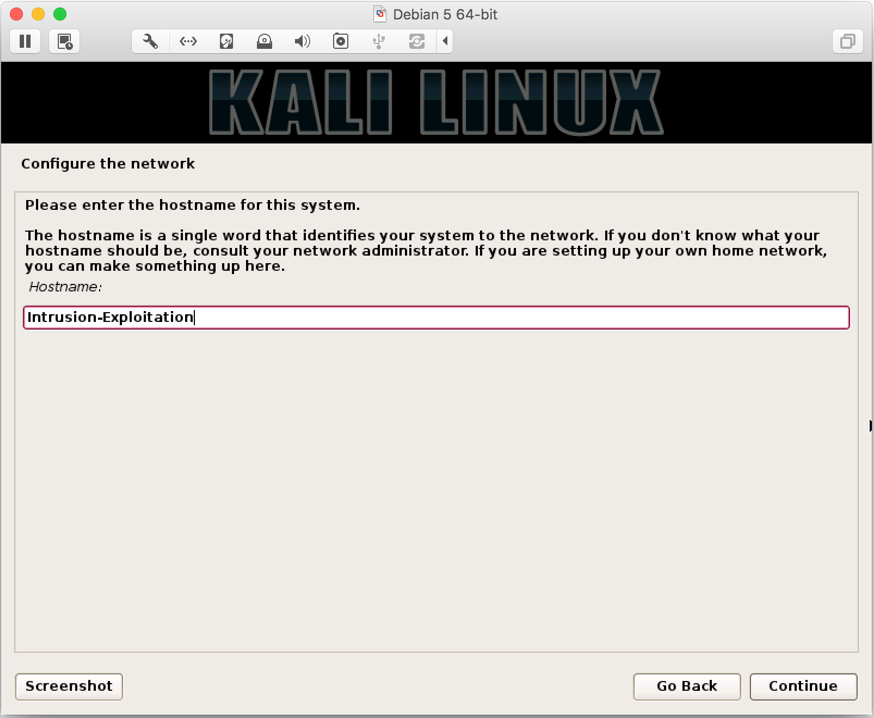
- Next, we to configure the network services. Enter your preferred hostname (we named it
Intrusion-Exploitation):
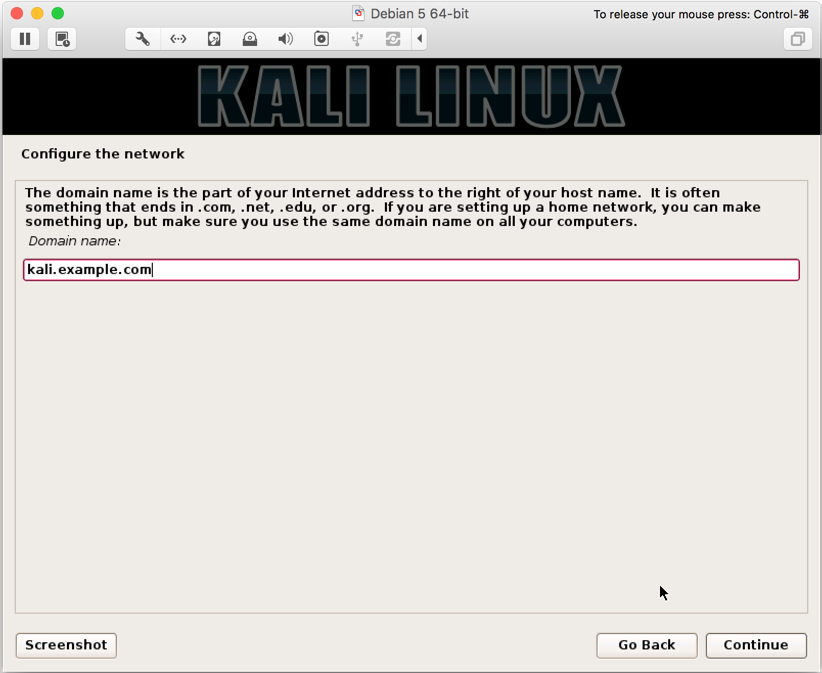
- Next, enter domain of your choice (we entered
kali.example.com):
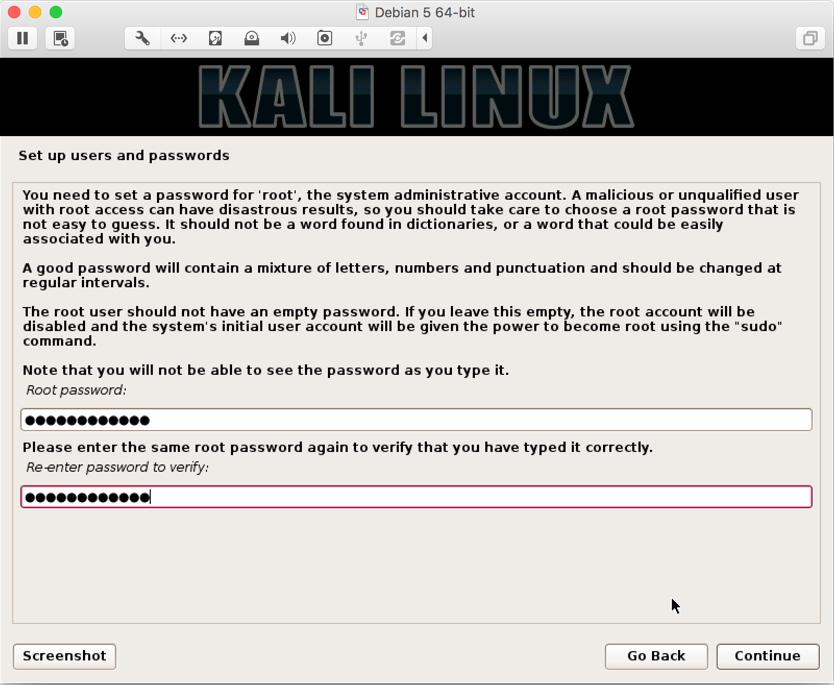
- The most step is to enter your password, and make sure you have a strong password, and that you don't forget it (use a combination of A-Z, a-z, 0-9, and special characters):
- In next screen, you select your zone (we chose
Eastern):

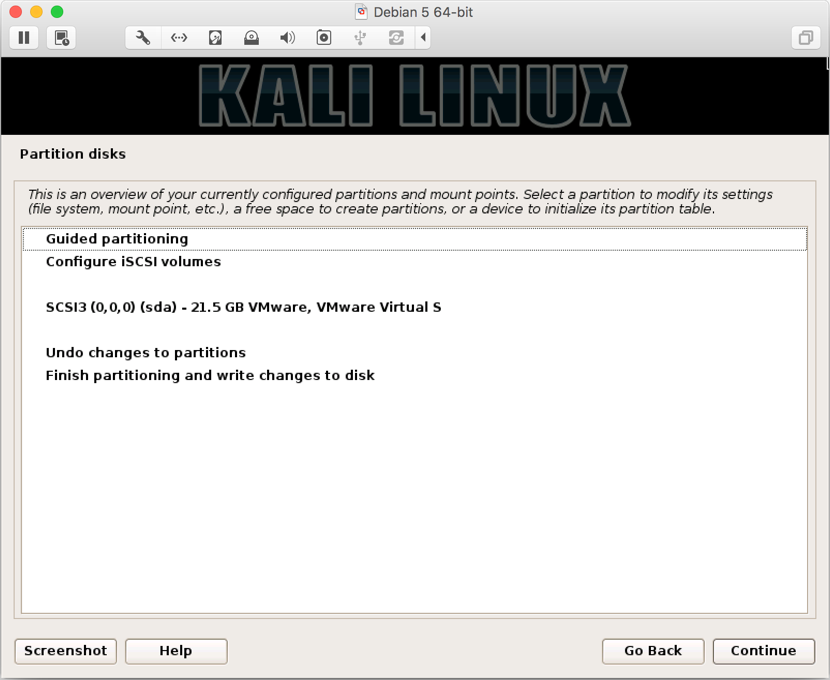
- Next, you will be four options to from; if you have a preferred way of partitioning disk, you can select
Manual. However, for easy partitioning, we will be usingGuided - Use Entire Disk:
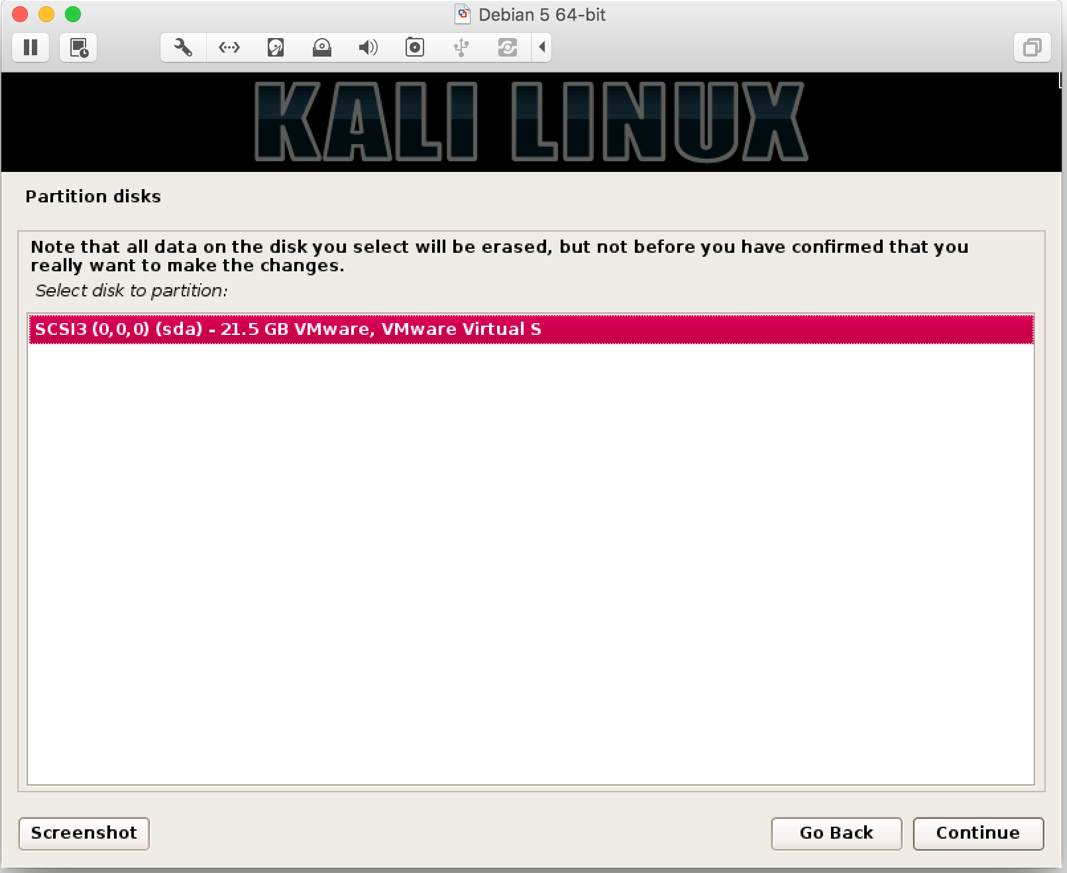
- On the screen, you will be prompted that the entire disk space will be formatted, click on
Continue:
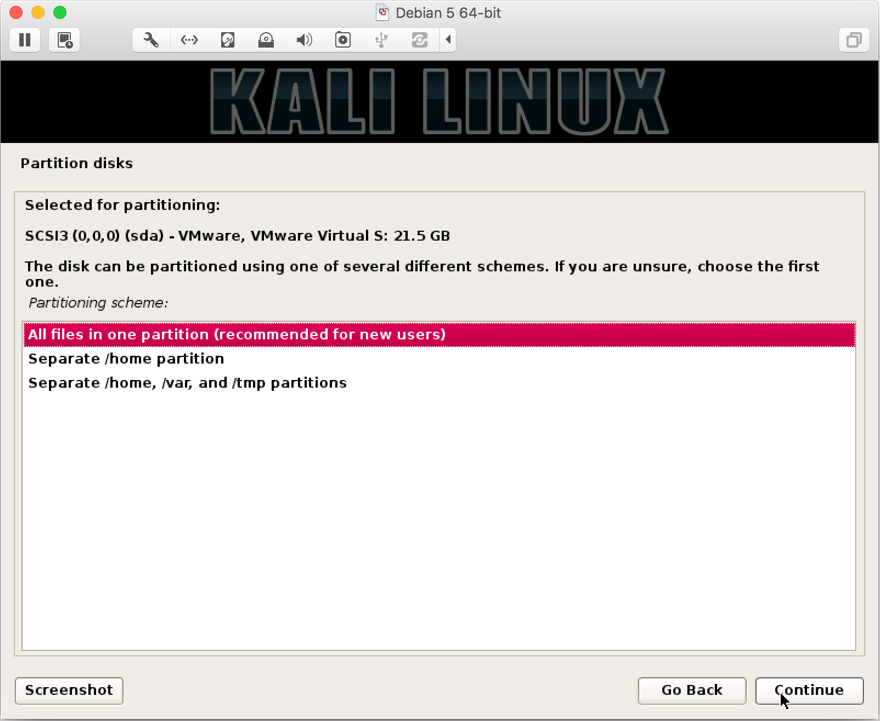
- Next, you will be shown options. Since we are only going to use it for penetration and not as a server or main desktop operating system, it is safe to select
All files in one partition:
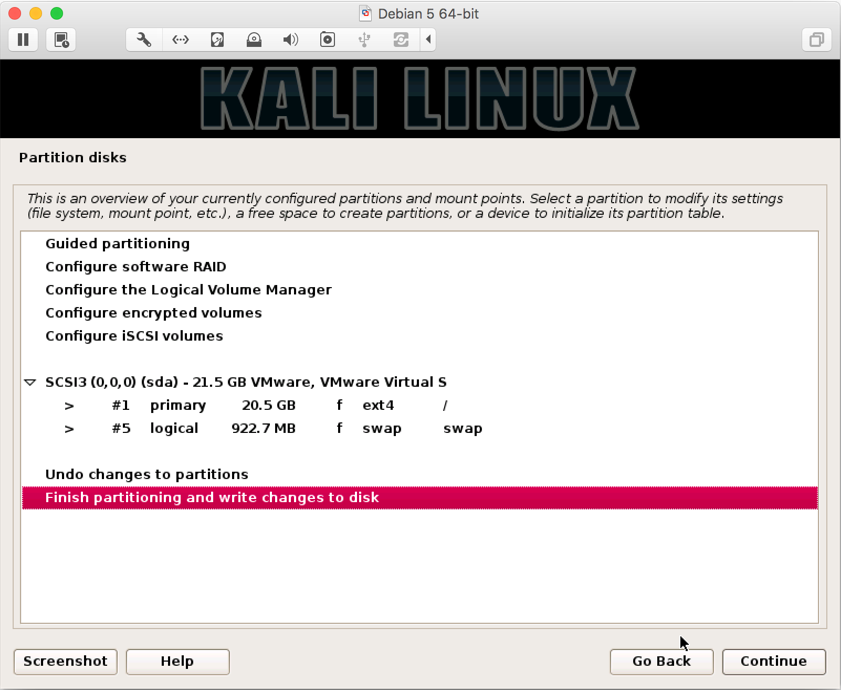
- You will be a summary of to be made on your disk. Select
Finish Partitioning and write changes to the diskand click onContinue:
- Select
YesclickContinue:

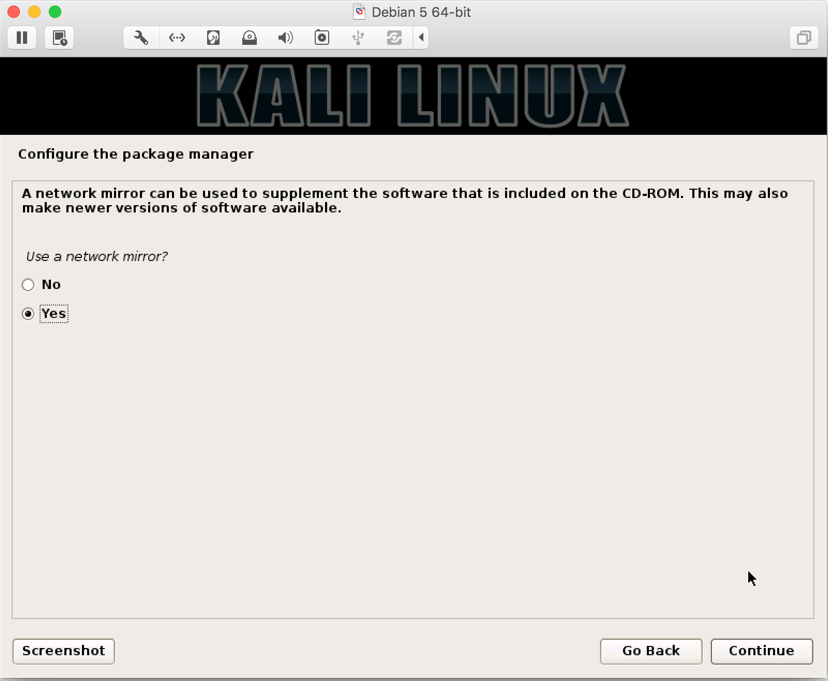
- Next, you will be asked to configure your manager using a network mirror. It allows you to update your Kali tools collection as and when are available, and, in our case, we selected
Yes:
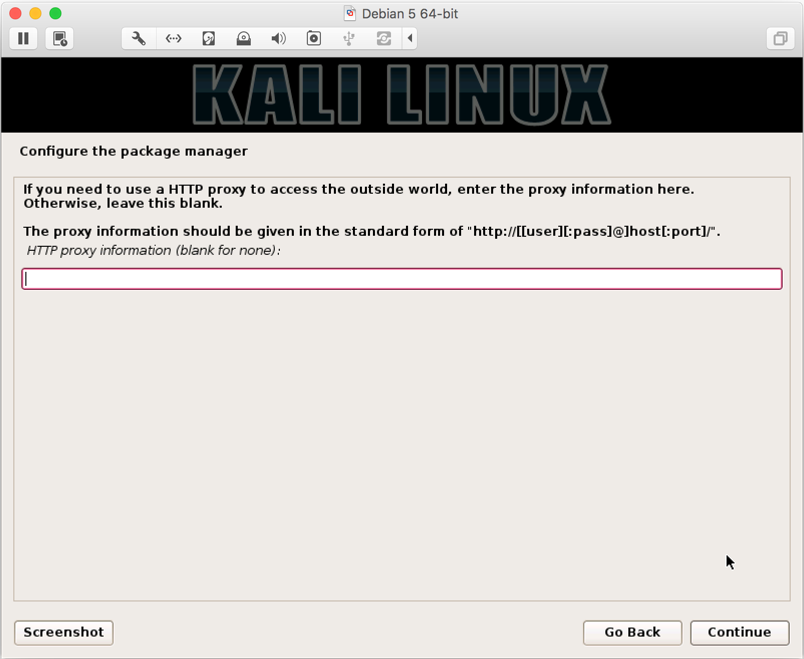
- Next, you can enter if you any proxy server in network. If not, you can simply skip and click on
Continue:
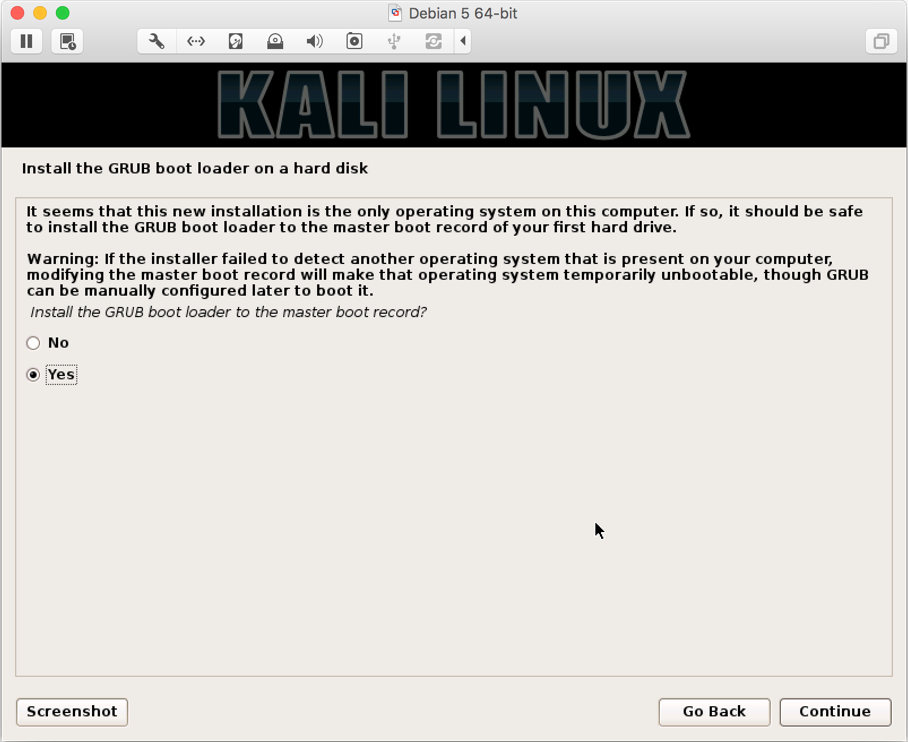
- Finally, you be asked to GRUB Bootloader to/Dev/SDA- Master Boot Record; select
Yesand click onContinue:
- Finally, you will be asked to enter the device or
/dev/sda; select/dev/sdaand onContinue:
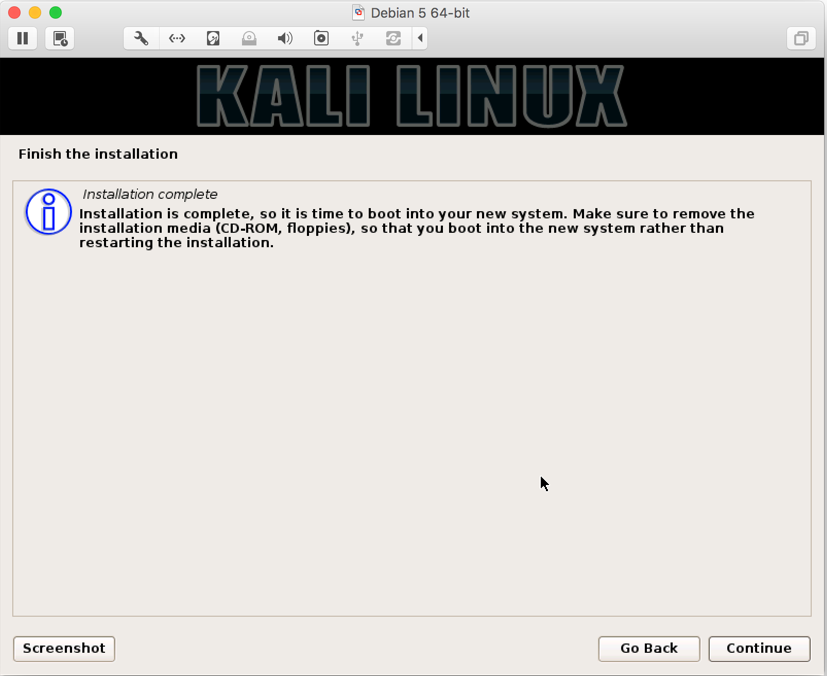
- If you see the preceding screen, it means that you have made it till the end and Kali installation is complete. Congratulations! Click on
Continueand your system will be rebooted to bring you fresh installed Kali Linux.
In this recipe, we inserted the Linux ISO and the graphical install. During the graphical install, we started configuring with our preferred language, keyboard language, country, and timezone. From step 5 onwards, we entered the hostname for our Kali Linux and in step 6, we entered the domain name for our Kali Linux.
From steps 9 to 13, we configured the hard disk partition to use the entire disk for installation and created one partition for all folders since we will only be using it for penetration testing. Once the installation is finished, step 14 onwards we configured Kali to use network mirrors for faster updates, configured any network proxy (if required) and finally installed GRUB bootloader.