
You can use Kali Linux in one of the following ways:
You can run Kali Linux directly from the Live DVD
You can install Kali Linux on the hard disk and then run it
You can install Kali Linux on the USB disk (as a portable Kali Linux)
In the following sections, we will briefly describe each of those methods.
If you want to use Kali Linux without installing it first, you can do so by burning the ISO image file to a DVD. After the burn process finishes successfully, boot up your machine with that DVD. You need to make sure that you have set the machine to boot from the DVD.
The advantage of using Kali Linux as a Live DVD is that it is very fast to set up and is very easy to use.
Unfortunately, the Live DVD has several drawbacks; for example, any files or configuration changes will not be saved after the reboot. Additionally, running Kali Linux from the DVD is slow as compared to running Kali Linux from the hard disk because the DVD's reading speed is slower than the hard disk's reading speed.
This method of running Kali is recommended only if you just want to test Kali. However, if you want to work with Kali Linux extensively, we suggest that you install Kali Linux.
To install Kali Linux on your hard disk, you can choose one of the following methods:
Installation on a physical/real machine (regular installation)
Installation on a virtual machine
You can choose whichever method is suitable for you, but we personally prefer to install Kali Linux on a virtual machine.
Before you install Kali Linux on a physical/real machine, make sure that you install it on an empty hard drive. If your hard drive already has some data on it, that data will be lost during the installation process because the installer will format the hard drive. For the easiest installations, it is recommended that you use the entire hard disk. For more advanced setups, there is the option of installing Kali Linux on a partition of a single logical drive. To do this, you will have to have a primary partition that boots the operating system and another partition for Kali Linux. Take care when doing this because it is easy for the bootable operating system to become corrupted.
Note
The official Kali Linux documentation that describes how to install Kali Linux with the Windows operating system can be found at http://docs.kali.org/installation/dual-boot-kali-with-windows.
There are several tools that can be used to help you perform disk partitioning. In the open source area, the following Linux Live CDs are available:
SystemRescueCD (http://www.sysresccd.org/)
GParted Live (http://gparted.sourceforge.net/livecd.php)
Kali Linux (http://www.kali.org)
To use the Linux Live CD, you just need to boot it up and you are ready for disk partitioning. Make sure that you back up your data before you use the Linux Live CD disk-partitioning tool. Even though they are safe for use in our experience, there is nothing wrong with being cautious, especially if you have important data on the hard disk.
After you are done with the disk partitioning (or you just want to use all the hard disk space), you can boot your machine using the Kali Linux Live DVD and select the Install or Graphical install option when you are prompted with the Kali Linux Live CD menu:

After that, you will see an installation window. You need to set up several things during the installation process:
Set Language: The default is English.
Selection Location: Use the drop-down menu to select your country.
Configure the Keyboard: Select the keyboard that best fits your needs.
Host Name for the system.: The default is Kali. For beginners you can leave the default in place. Host names are often used in enterprise environments where an accounting of all systems connected to the network is necessary.
Set the Domain: For beginners, this should be left blank. This would only be used if the installation was to be part of a network domain.
Set Password: This will be the password for the ROOT account. Choose a strong one, do not share it and do not forget it.
Configure the clock: Choose your time zone.
Partition Disk: The installer will guide you through the disk partitioning process. If you use an empty hard disk, just select the default Guided - use entire disk option for better ease. If you have some other operating system installed on your machine, you might first want to create a separate partition for Kali Linux and then select Manual in this menu. After you have selected the suitable menu, the installer will create the partition.
The installer will ask you about the partitioning scheme; the default scheme is All files in one partition. Remember that if you want to store files in the home directory, you should select Separate /home partition so that those files won't be deleted if you reinstall the system. The /home partition's size really depends on your needs. If you want to put all your data in that directory, you may want a big partition size (more than 50 GB). For average usage, you can go ahead with 10 to 20 GB.
For beginners, it is recommended that you select the option Guided – use entire disk. Then select the disk that you want to install Kali Linux to. Select All files in one partition.
The installer will display an overview of your currently configured partitions, as shown in the following screenshot:

Make sure the Finish partitioning and write changes to disk is selected and then click Continue. Finally, click the Yes radio button and click Continue to write the changes to the disk.
Network Mirror: For beginners, choose no. We will cover updating Kali Linux.
Next, the installer will install the Kali Linux system. The installation will be completed in several minutes and you will have Kali Linux installed on your hard disk afterwards. In our test machine, the installation took around 20 minutes.
After the installation is finished, the installer will ask you to configure the package manager. Next, it will ask you to install GRUB to the Master Boot Record. You can just choose the default values for these two questions. Beware if you have some other operating system on the same machine, you should not choose to install GRUB to the Master Boot Record.
If you see the following message, it means that your Kali installation is complete:

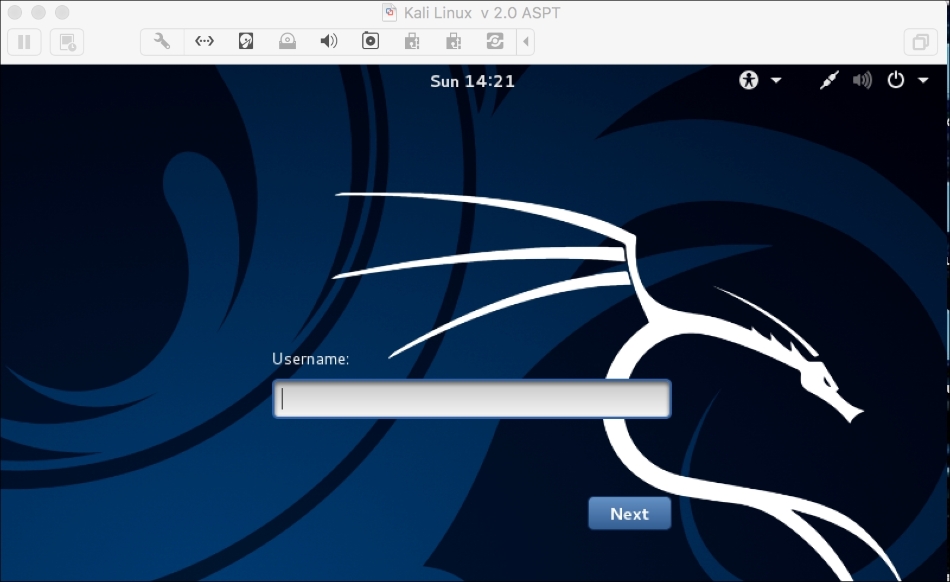
You can restart the machine to test your new Kali installation by selecting the Continue button. After restarting, you will see the following Kali login screen. You can log in using the credentials that you configured in the installation process:
You can also install Kali Linux to a virtual machine environment as a guest operating system. The advantages of this type of installation are that you do not need to prepare a separate physical hard disk partition for the Kali Linux image and can use your existing operating system as is.
Note
We will use VirtualBox (http://www.virtualbox.org) as the virtual machine software. VirtualBox is an open source virtualization software that is available for Windows, Linux, OS X, and Solaris operating systems.
Unfortunately, there is also a disadvantage of running Kali Linux on a virtual machine; it is slower than running Kali Linux on a physical machine.
There are two options that can be utilized for installing Kali Linux on a virtual machine. The first option is to install the Kali Linux ISO image into a virtual machine. This option will take more time compared to the VMware image installation. The advantage of this method is that you can customize your Kali installation.
To install a Kali Linux ISO image on a virtual machine, the following steps can be used:
Create a new virtual machine by selecting New from the VirtualBox toolbar menu:

After that, you need to define the virtual machine's name and the operating system's type. Here, we set the VM's name to
Kali Linuxand we choose Linux for the OS type and Debian for the version:
Then, you need to define the VM's base memory size. The more memory you provide, the better the virtual machine will be. Here, we allocated 2048 MB of memory to the Kali Linux virtual machine. Remember that you can't give all of your physical memory to the VM because you still need the memory to run your host operating system:

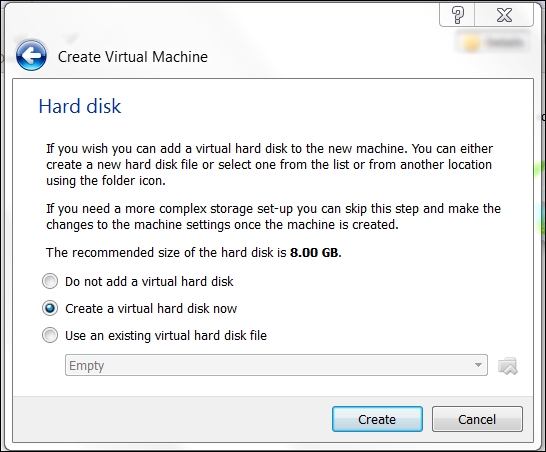
Next, you will be asked to create a virtual hard disk. You can just select the VDI as the hard disk type along with a dynamically allocated virtual disk file. We suggest creating at least a 32 GB virtual hard disk. If you want to install some software packages later on, you may want to create a larger virtual hard disk. Choose Create a virtual hard disk now and click Continue:
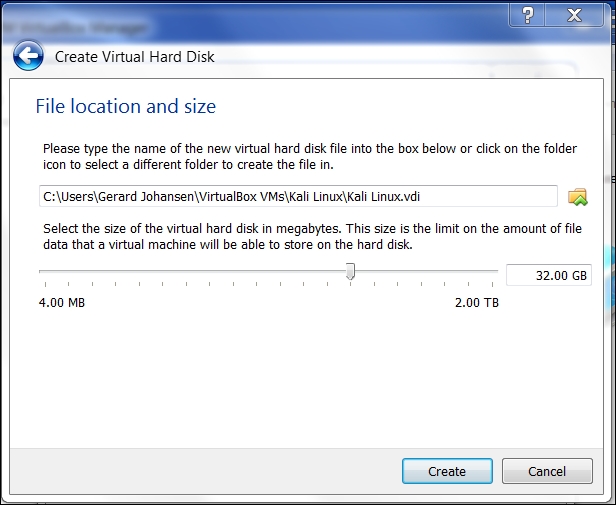
Now select a file location and size. Click Continue:
Read the dialog box and click Continue:

After this, your newly created VM will be listed on the VirtualBox menu:
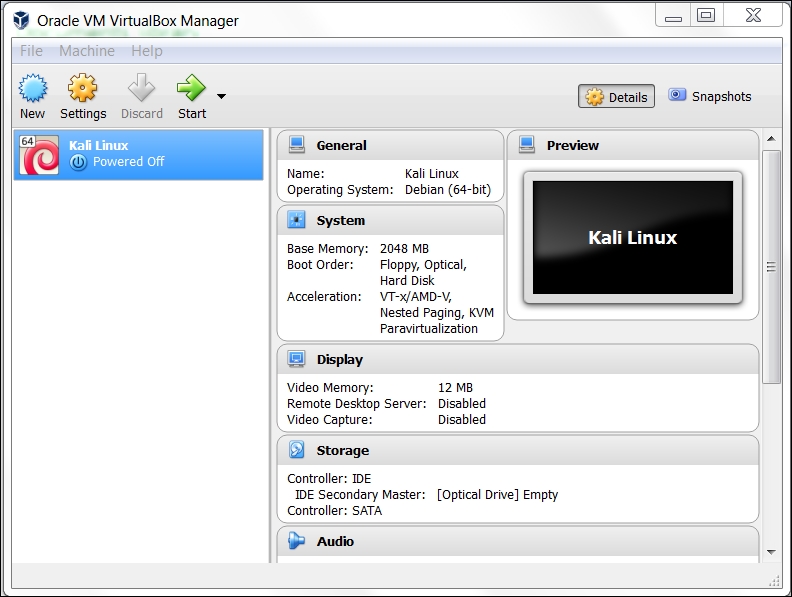
Double-click on the new Kali Linux virtual machine:
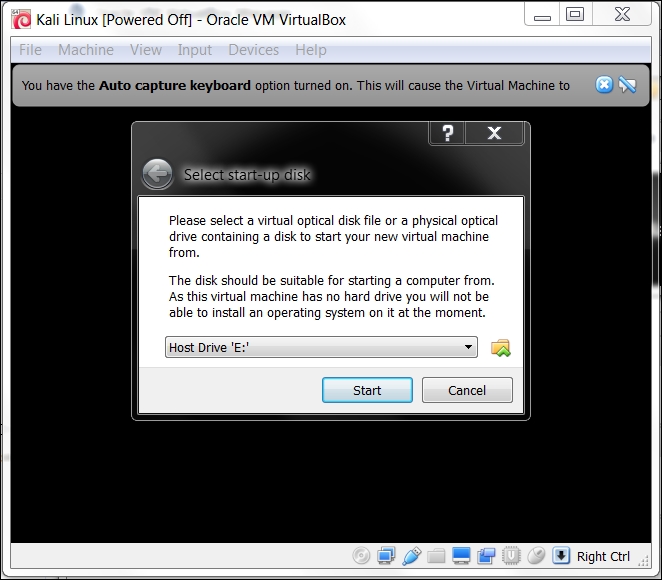
Using the file icon, navigate to where you have the Kali Linux 2.0 ISO of your choice. Once selected, click Start.
Once the installation starts, follow the directions as they were defined in the previous section on installing Kali Linux 2.0.
The second option is using the VMWare image provided by Kali Linux. With this option, you can install Kali Linux on a virtual machine with ease:
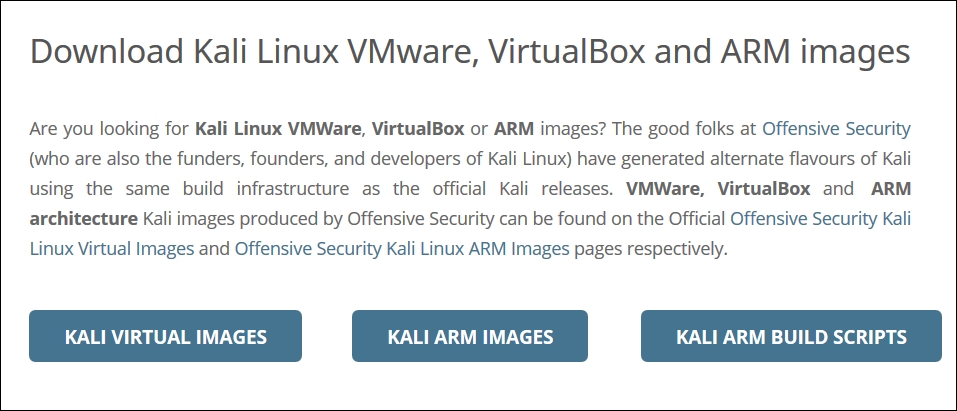
After clicking the Kali Virtual Images, we are brought to another page listing the packages and their associated SHA1 values:
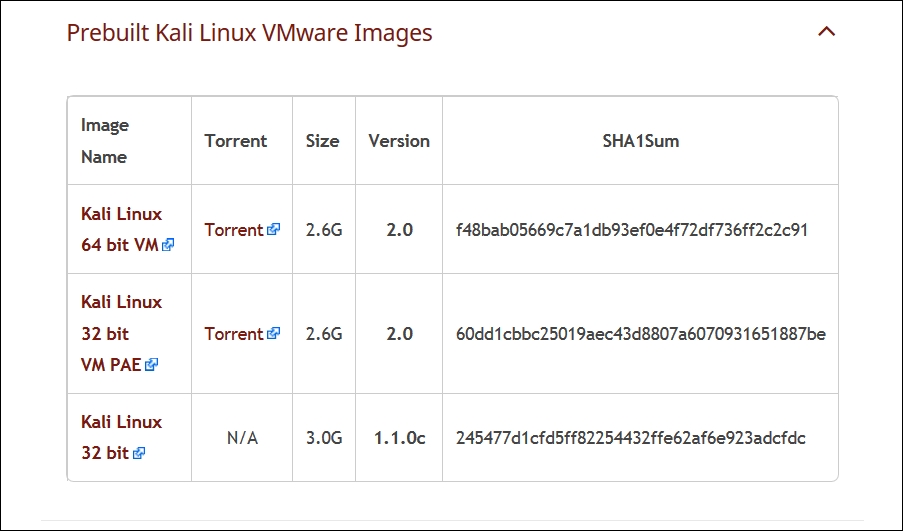
After downloading the Kali Linux VMware image (Kali-Linux-2.0.0-vm-amd64.7z), you need to verify the SHA1 hash of the downloaded file with the hash value provided in the download page. If the hash value is the same, you can extract the image file to the appropriate folder.
As the Vmware image is compressed in the GZ format, you can use any software that can extract a .gz file such as gzip, or 7-Zip if you use a Windows operating system. If you have extracted it successfully, you will find 13 files in the directory:
To create the new virtual machine using this VM image file, select New from the VirtualBox icon toolbar.
We will use Kali Linux from VM as the VM name and choose Linux as the operating system and Debian as the version.
We configure the Kali Linux virtual machine to use 2048 MB as its memory size.
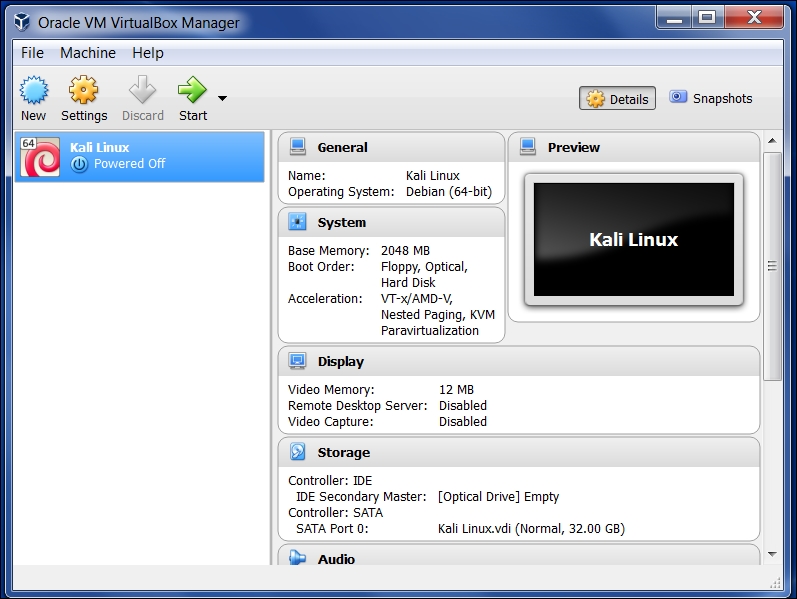
Next, we define the virtual hard disk to Use an existing virtual hard drive file. Then, we select the
Kali-Linux-2.0.0-vm-amd64.vmdkfile for the hard disk. After that, we choose Create to create the virtual machine, as shown in the following screenshot: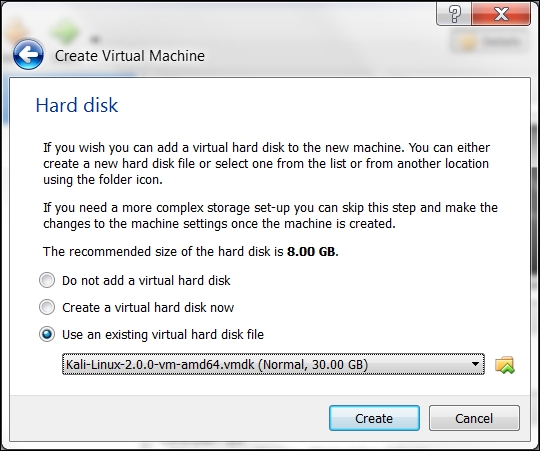
The following is the default configuration of the Kali Linux VMware image:
Hard disk size: 30 GB
Network type: NAT
Username: root
Password: toor
Note
For penetration purposes, we should avoid using NAT as the network type. The recommended network type is bridged. Change the default password for Kali when you configure the Kali VM.
If successful, you will see the new virtual machine in the virtual manager list within Virtual Box.
To run the Kali Linux virtual machine, click on the Start icon at the top of the VirtualBox menu bar. After the boot process, Kali Linux will display its login prompt.
If you got the following error message, you need to install the VirtualBox Extension Pack. You can get it from http://www.virtualbox.org/wiki/Downloads:
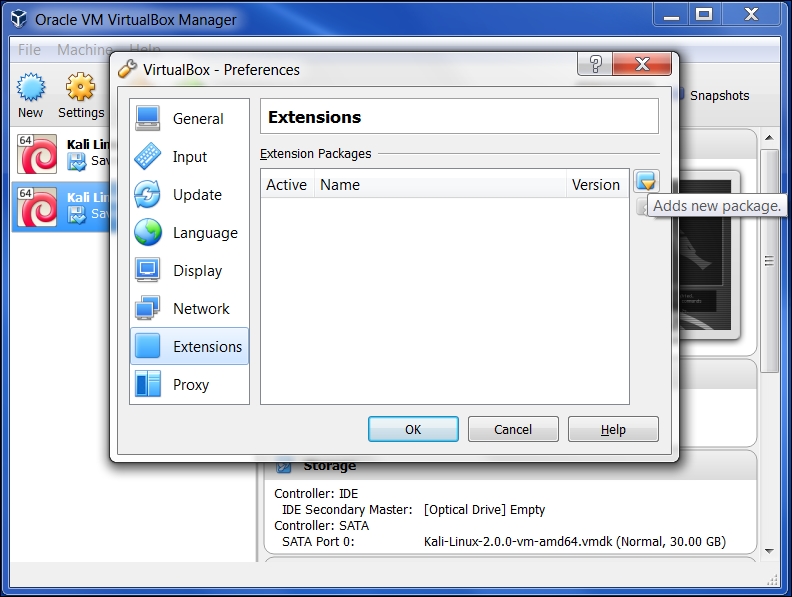
Clicking OK will bring you to the following:

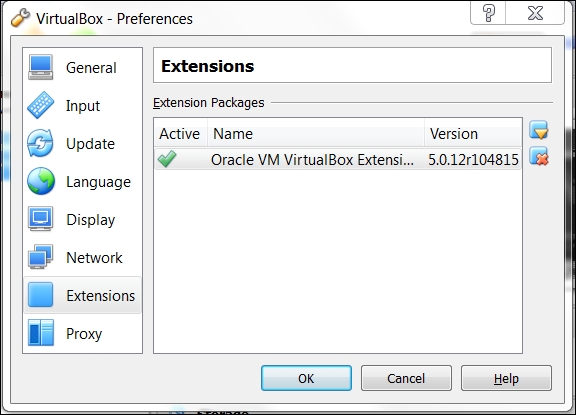
Go ahead and click on Install and the following will appear:
There are two other advantages to using Kali Linux as a virtual machine. The first is the ease with which the virtual machine can be paused. Pausing the virtual machine allows you to suspend your activity without losing any of your work. For example, if you have to shut down the host system and the virtual machine is still processing an action, suspending it will allow you to pick up right where you left off. To pause the virtual machine, click on the pause button located at the upper left-hand corner of the virtual machine window:

Another feature of the virtual machine is the ability to move it from one host to another. This is very handy if you need to change host systems. For example, running on a laptop and then moving it to a newer, more powerful laptop. This ensures that any configurations or modifications you have made remain so that you do not have to go through the whole process again.
To export a virtual machine, go to File and click on Export Virtual Appliance. You will then be guided through exporting the Kali Linux virtual machine. Select a location to export to and leave the application settings the same. Finally, click Export and the virtual machine will be exported to the location. This may take some time, depending on how large the virtual machine is.
Once the export has concluded, you can use whatever storage device you would like and transfer the virtual machine to another host system. Keep in mind that if you use Oracle Virtual Box to create the virtual machine, use the same version on the new host computer. Once it has transferred, you can import the virtual machine by going to File, Import virtual machine, and following the instructions.
The third option to use Kali Linux is by installing it to a USB flash disk; we call this method Portable Kali Linux. According to the official Kali documentation, this is the Kali developer's favorite and fastest method of booting and installing Kali. Compared to the hard disk installation, you can run Kali Linux using any computer that supports booting from the USB flash disk with this method.
Note
The installation procedure for the USB flash disk is also applicable to the installation of memory cards (SSD, SDHC, SDXC, and so on).
There are several tools available to create portable Kali Linux. One of them is Rufus (http://rufus.akeo.ie/). This tool can be run only from a Windows operating system.
You can use other tools to create a bootable disk from the ISO image, such as:
Win32DiskImager (https://launchpad.net/win32-image-writer)
Universal USB Installer (http://www.pendrivelinux.com/universal-usb-installer-easy-as-1-2-3/)
Linux Live USB Creator (http://www.linuxliveusb.com)
Before creating portable Kali Linux, you need to prepare a couple of things:
Kali Linux ISO image: Even though you can use the portable creator tool to download the image directly while making the Kali Linux portable, we think it's much better to download the ISO first and then configure Rufus to use the image file.
USB flash disk: You need an empty USB flash disk with enough space on it. We suggest using a USB flash disk with a minimum size of 16 GB.
After downloading Rufus, you can run it on your Windows computer by double-clicking on the rufus.exe file. You will then see the Rufus window.
Tip
If you use a Unix-based operating system, you can create the image using the dd command. The following is an example of imaging:
dd if=kali-linux-2.0-i386.iso of=/dev/sdb bs=512k
Here, /dev/sdb is your USB flash disk.
To create a bootable Kali USB flash disk, we need to fill in the following options:
For Device, we choose the location of the USB flash disk. In my case, it is the E: drive in my Windows system.
For Partition scheme and target system type, set it to MBR partition scheme for BIOS or UEFI computers.
In the Create a bootable disk using option, set the value to ISO image and select the ISO image using the disk icon:
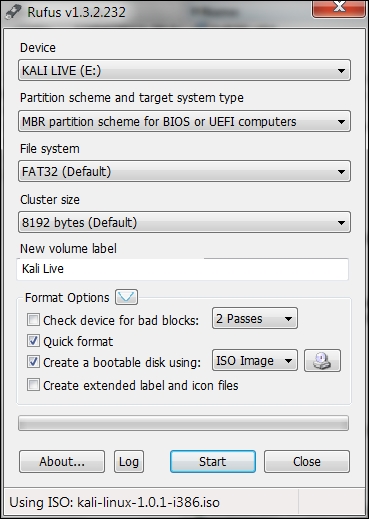
Click on Start to create the bootable image:

After the process is complete, save all your work first and then reboot your system if you want to try the USB flash disk right away. You may want to configure your Basic Input Output System (BIOS) to boot it from the USB disk. If there is no error, you can boot up Kali Linux from the USB flash disk.
Tip
If you want to add persistence capabilities to the USB flash disk, you can follow the steps described in the documentation section Adding Persistence to Your Kali Live USB located at http://docs.kali.org/installation/kali-linux-live-usb-install.