
A WWNN is a 64-bit address assigned to Fibre Channel (FC) devices. In UCS, WWNN is assigned to the mezzanine card installed in a blade server because a mezzanine card can have more than one port (vHBA). Each port (vHBA) created from the mezzanine card acquires a unique WWPN. WWPNs are described in the next section.
These are the steps to create WWNN address pools:
- Log in to the UCSM screen.
- Click on the
SANtab in the navigation pane. - Click on the
Poolstab and expandroot.
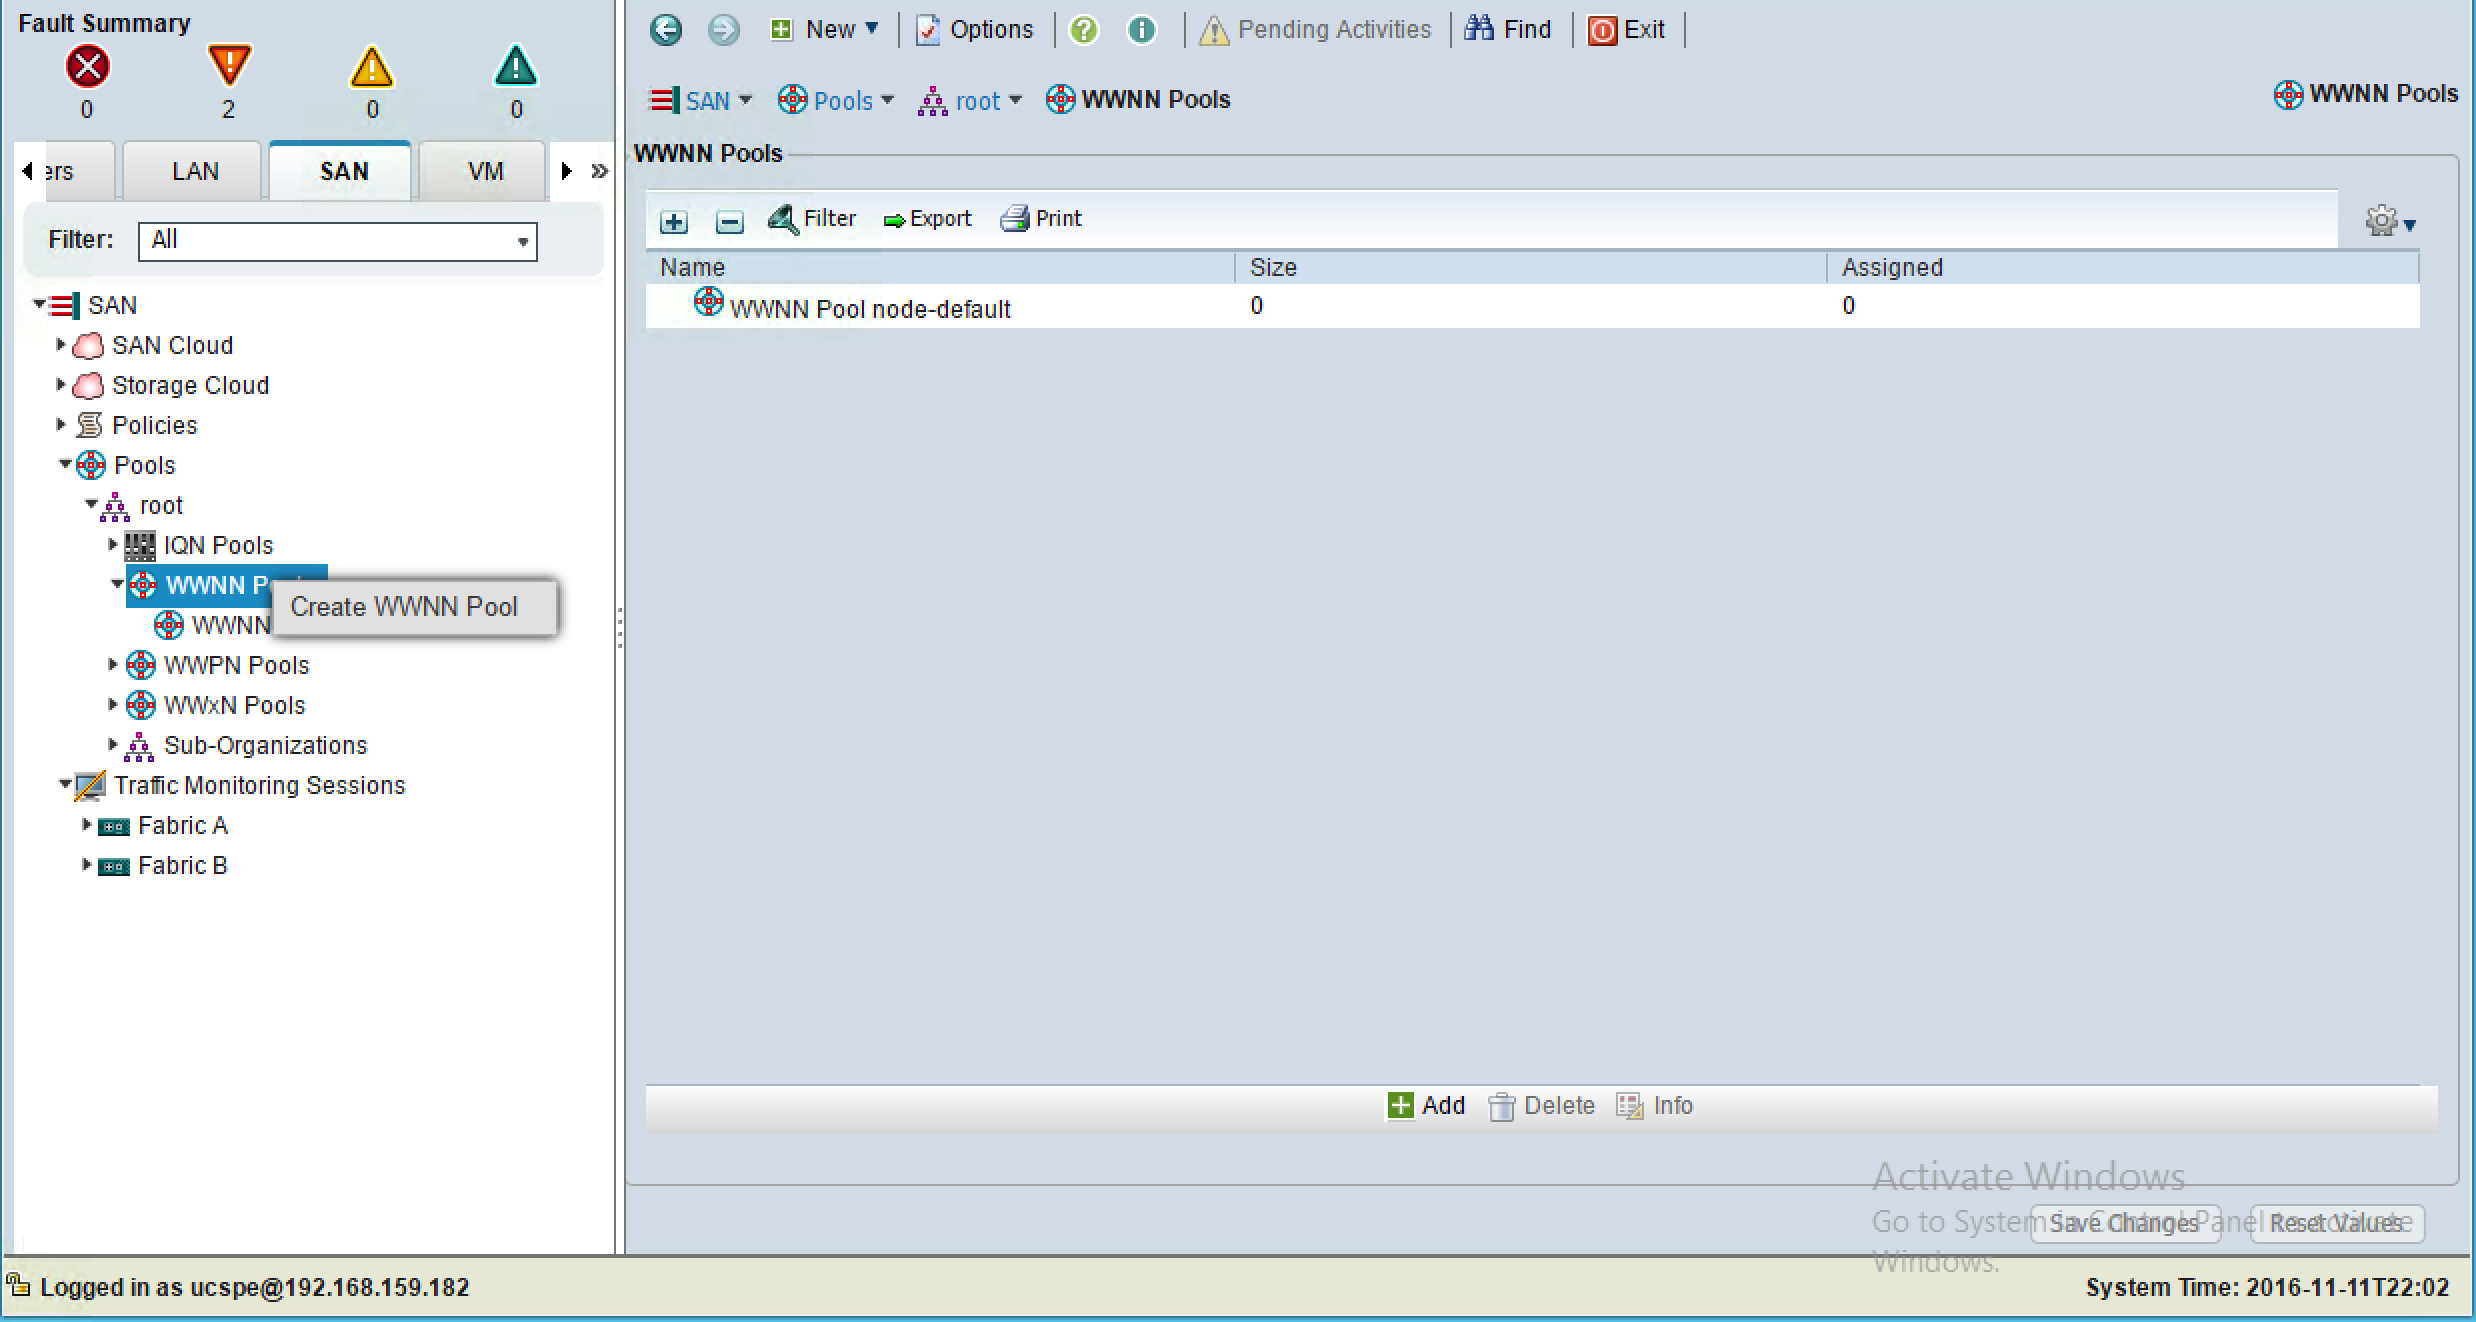
- Right-click on
WWNN Pools, and click onCreate WWNN Pool, as shown in the following screenshot:
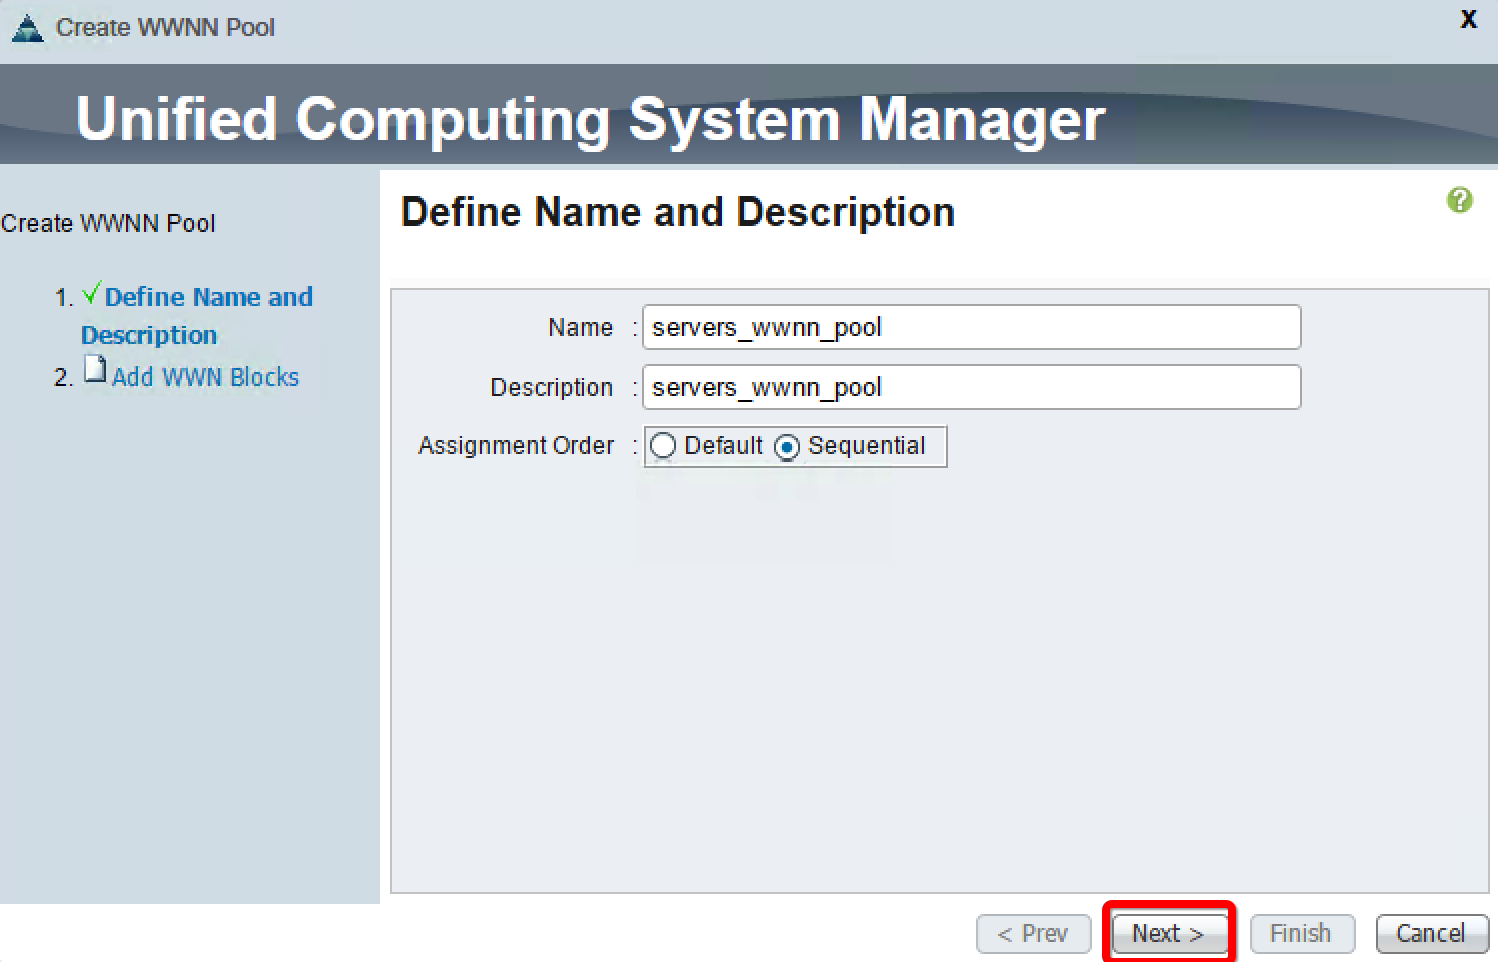
- In the pop-up window, assign the
NameandDescriptionvalues to the WWNN pool. - The selection of
Defaultas theAssignment Ordervalue is random. SelectSequentialto assign the WWNNs sequentially.
- Click on
Next:
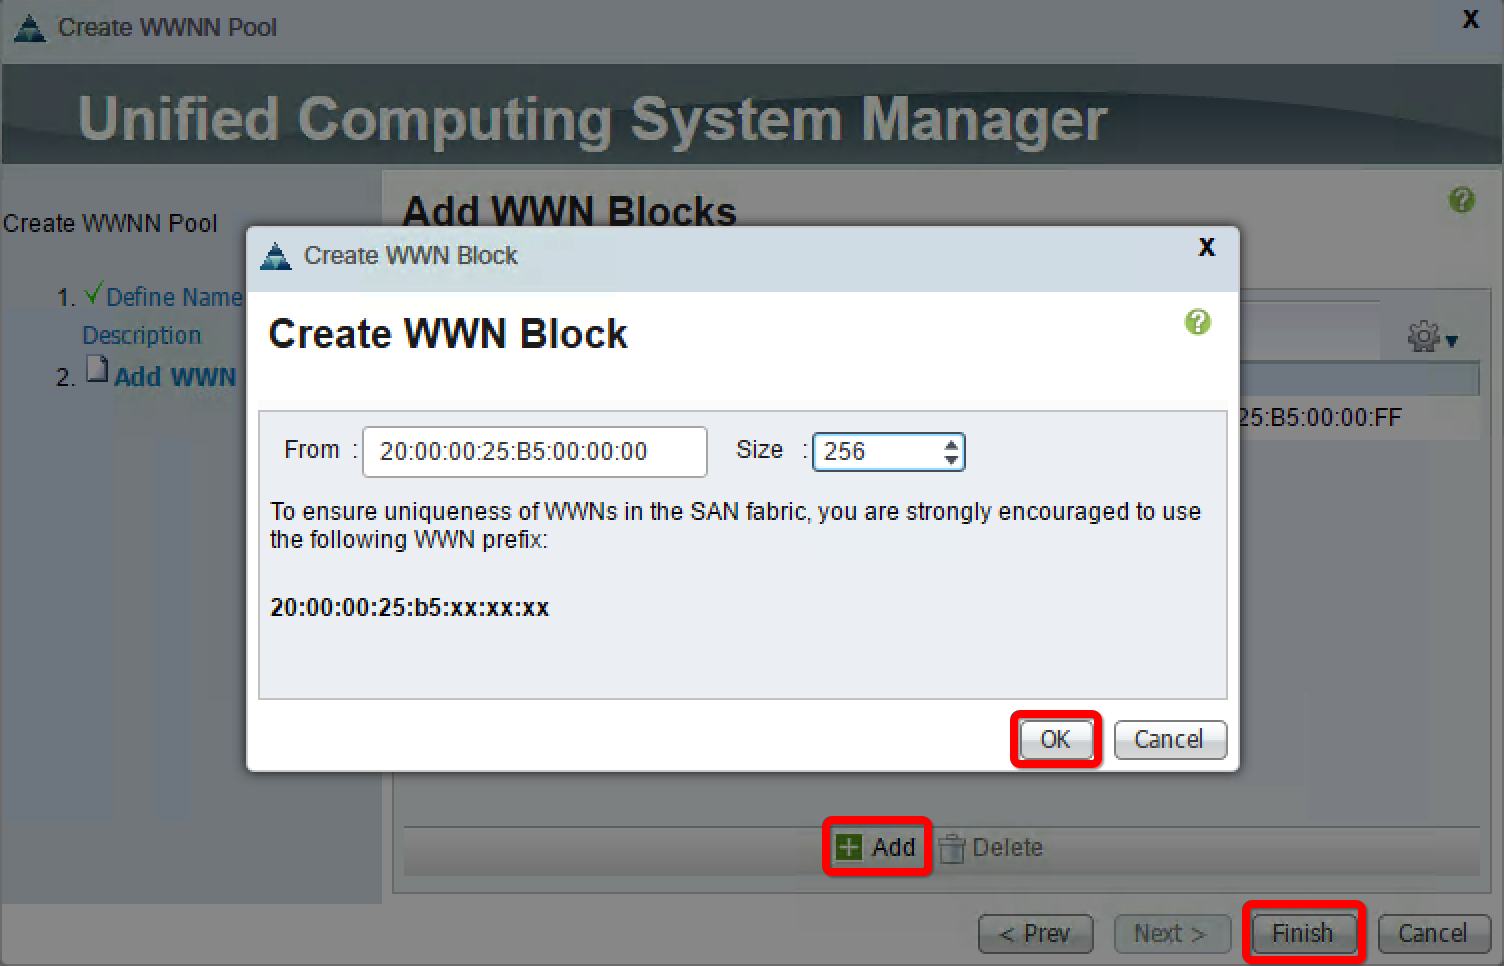
- Click on
Addon the next screen. - In the pop-up window, change
Sizeto create the desired number of WWNN addresses.
- Click on
OKand then onFinish, as shown here:
- In order to verify the WWNN pool...