We've seen how network access control systems can employ simple MAC address filtering and captive portal authentication to control network access. Now, suppose that you're coming away from the ARP poisoning attack just described, excited that you scored yourself some legitimate credentials. You try to log in with your Kali box and you're slapped down by a validation check that you hadn't foreseen. You have the correct username and password – how does the NAC know it isn't the legitimate user?
NAC vendors quickly figured out that it was a simple matter for anyone to spoof a MAC address, so some systems perform additional verification to match the hardware address to other characteristics of the system. Imagine the difference between authenticating someone by fingerprint alone and authenticating someone by fingerprint, clothing style, vocal patterns, and so on. The latter prevents simple spoof attacks. In this context, the NAC is checking that the MAC address matches other characteristics: manufacturer, operating system, and user agent are common checks. It turns out that the captive portal knows this Phil user you've just spoofed, and it was expecting an Apple iPad (common in the enterprise as an approved device). Let's review these three checks in detail.
There are two main parts to a MAC address: the first three octets are the Organizationally Unique Identifier (OUI), and the last three octets are Network Interface Controller-specific (NIC-specific). The OUI is important here because it uniquely identifies a manufacturer. The manufacturer will purchase an OUI from the IEEE Registration Authority and then hardcode it into their devices in-factory. This is not a secret – it's public information, encoded into all the devices a particular manufacturer makes. A simple Google search for Apple OUI helps us narrow it down, though you can also pull up the IEEE Registration Authority website directly. We quickly find out that 00:21:e9 belongs to Apple, so we can try to spoof a random NIC address with that (for example, 00:21:e9:d2:11:ac).
But again, vendors are already well aware of the fact that MAC addresses are not reliable for filtering, so they're likely going to look for more indicators.
Anyone who has dissected a packet off a network should be familiar with the concept of operating system fingerprinting. Essentially, operating systems have little nuances in how they construct packets to send over the network. These nuances are useful as signatures, giving us a good idea of the operating system that sent the packet. We're preparing to spoof the stack of a chosen OS as previously explained, so let's cover a tool in Kali that will come in handy for a variety of recon situations: Passive Operating system Fingerprinter (p0f).
Its power is in its simplicity: it watches for packets, matches signatures according to a signature database of known systems, and gives you the results. Of course, your network card has to be able to see the packets that are to be analyzed. We saw with our example that the restricted network is switched, so we can't see other traffic in a purely passive manner; we had to trick the network into routing traffic through our Kali machine. So, we'll do that again, except on a larger scale as we want to fingerprint a handful of clients on the network. Let's ARP spoof with Ettercap, a tool that should easily be in your handiest tools Top 10. Once Ettercap is running and doing its job, we'll fire up p0f and see what we find.
We're going to bring up Ettercap with the graphical interface featuring a very scary-looking network-sniffing spider:
# ettercap -G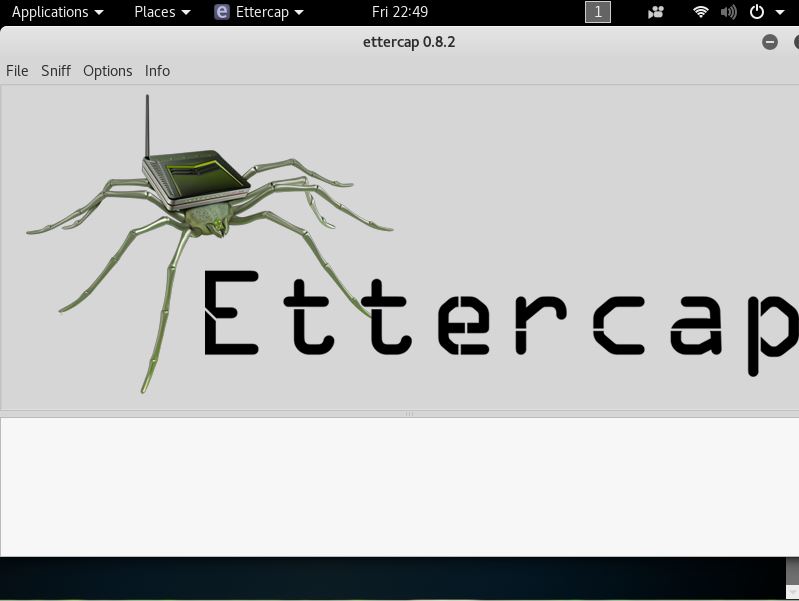
Let's start sniffing, and then we'll configure our man-in-the-middle attack. Click Sniff in the menu at the top and choose Unified Sniffing. Unified sniffing means we're just sniffing from one network card; we aren't forwarding anything to another interface right now.
Now we tell Ettercap to find out who's on the network. Click Hosts | Scan for hosts. When the scan is complete, you can click Hosts again to bring up the host list. This tells us what Ettercap knows about who's on the network.
Now, we're doing something rather naughty; I've selected the gateway as Target 1 (by selecting it and then clicking Add to Target 1) and a handful of clients as Target 2. This means Ettercap is going to poison the network with ARP announcements for all of those hosts, and we'll soon be managing the traffic for all of those hosts.
Note
Be very careful when playing man-in-the-middle with more than a few hosts at a time. Your machine can quickly bottleneck the network. I've been known to kill a client's network doing this.
Select Mitm | ARP poisoning. I like to select Sniff remote connections, though you don't have to for this particular scenario.
That's it. Click OK and now Ettercap will work its magic. Click View | Connections to see all the details on connections that Ettercap has seen so far.
Those of you who are familiar with Ettercap may know that the Profiles option in the View menu will allow us to fingerprint the OS of the targets, but, in keeping with presenting the tried-and-true, quick-and-dirty tool for our work, let's fire up p0f. The -o flag allows us to output to a file – trust me, you'll want to do this, especially for a spoofing attack of this magnitude:
# p0f -o poflogp0f likes to show you some live data as it's collecting the juicy gossip. Here we can see that 192.168.108.22 is already fingerprinted as a Windows NT host by looking at a single SYN packet:
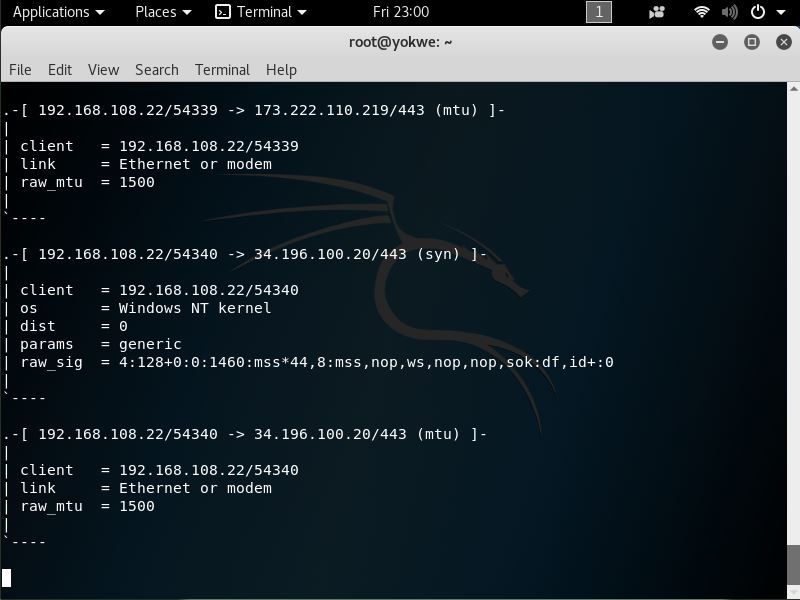
Ctrl + C closes p0f. Now, let's open up our (greppable) log file with nano:
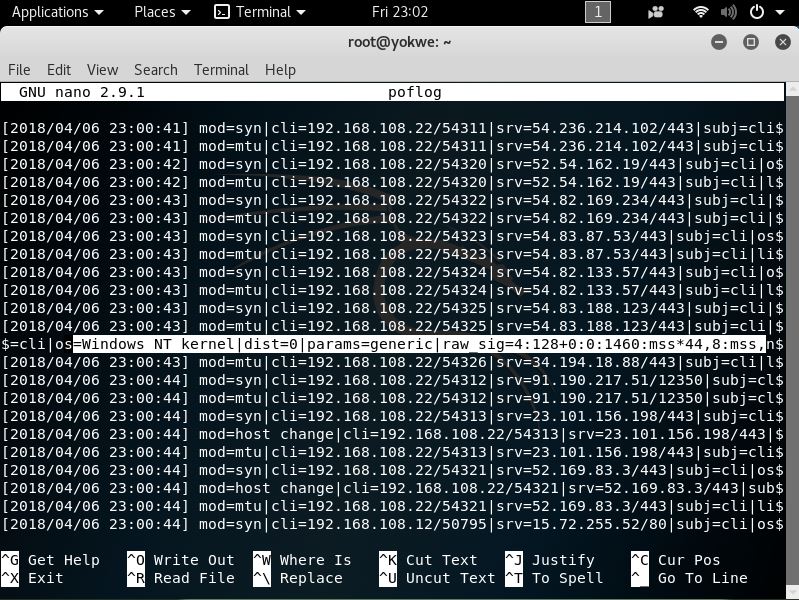
Beautiful, isn't it? The interesting stuff is the raw signature at the end of each packet detail line, which is made up of colon-delimited fields in the following order:
- Internet protocol version (for instance, 4 means IPv4).
- Initial time-to-live (TTL). It would be weird if you saw anything other than 64, 128, or 255, but some OSes use different values; for example, you may see AIX hosts using 60, and legacy Windows (95 and 98) using 32.
- IPv4 options length, which will usually be 0.
- Maximum Segment Size (MSS), which is not to be confused with MTU. It's the maximum size in bytes of a single TCP segment that the device can handle. The difference from MTU is that the TCP or IP header is not included in the MSS.
- TCP receive window size, usually specified as a multiple of the MTU or MSS. p0f is nice enough to let us know; in this case, the value is the MSS multiplied by 44.
- Window scaling factor, if specified.
- A comma-delimited ordering of the TCP options (if any are defined).
- A field that the
readmecalls quirks: weird stuff in the TCP or IP headers that can help us narrow down the stack creating it. Check out thereadmefile to see what kind of options are displayed here; an example isdffor thedon't fragmentflag set.
Why are we concerned with these options anyway? That's what the fingerprint database is for, isn't it? Of course, but part of the wild and wacky fun of this tool is the ability to customize your own signatures. You might see some funky stuff out there and it may be up to you playing with a quirky toy in your lab to make it easier to identify in the wild. However, of particular concern to the pen tester is the ability to craft packets that have these signatures to fool these NAC validation mechanisms. We'll be doing that in the next section, but for now, you have the information needed to research the stack you want to spoof.
Some budding hackers may be surprised to learn that browser user agent data is a consideration in network access control systems, but it is commonly employed as an additional validation of a client. Thankfully for us, spoofing the HTTP User-Agent field is easy. Back in my day, we used custom UA strings with cURL, but now you kids have fancy browsers that allow you to override the default.
Let's try to emulate an iPad. Sure, you can experiment with an actual iPad to capture the user agent data, but UA strings are kind of like MAC addresses in that they're easy to spoof, and detailed information is readily available online. So, I'll just search the web for iPad user agent data and go with the more common ones. As the software and hardware change over time, the UA string can change, as well. Keep that in mind if you think all iPads (or any device) are created equal.
In Kali, we open up Firefox ESR and navigate to about:config in the address bar. Firefox will politely warn you that this area isn't for noobs; go ahead and accept the warning. Now, search for useragent and you'll see the configuration preferences that reference the user agent:
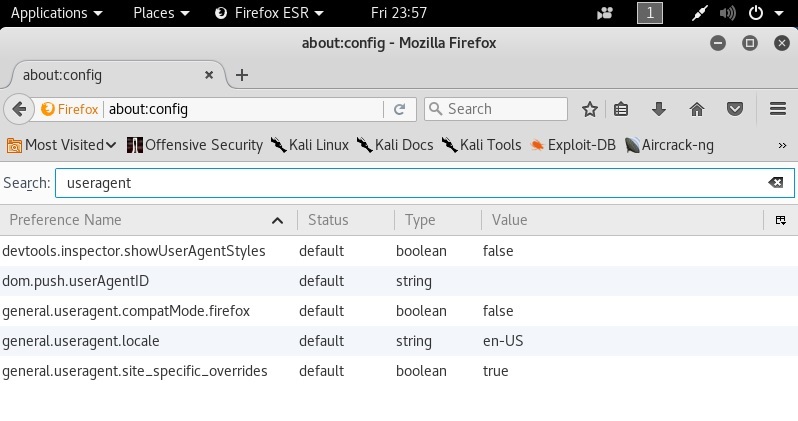
Note that there isn't an override preference name with a string data type (so we can provide a useragent string). So, we have to create it. Right-click to create a new preference name and call it general.useragent.override.
The data type is a string, of course, and the value is the user agent data. Keep in mind, there isn't a handy builder that will take specific values and put together a nicely formatted UA string; you have to punch it in character by character, so check the data you're putting there for accuracy. You could pretend to be a refrigerator if you wanted to, but I'm not sure that helps us here:
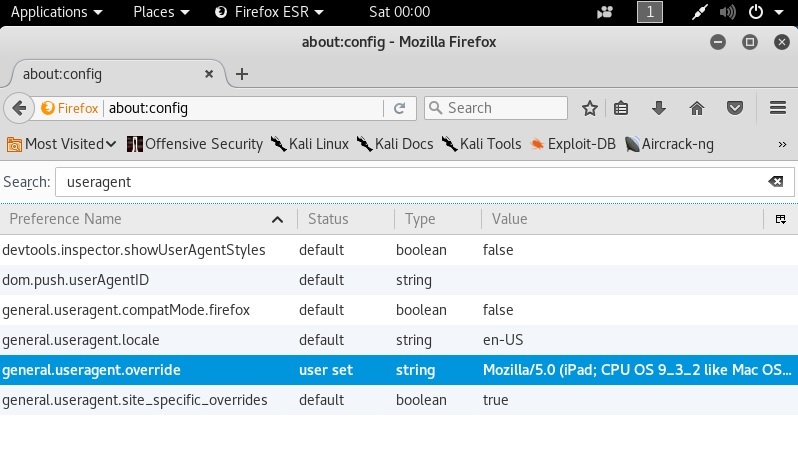
I've just dumped in the User-Agent data for an iPad running iOS 9.3.2, opened a new tab, and verified what the web thinks I am:
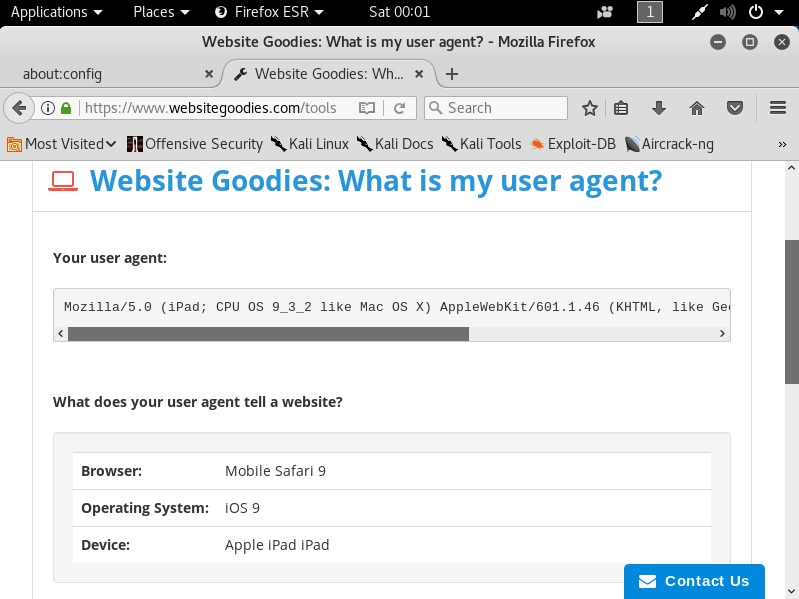
The Website Goodies page is now convinced that my Kali box is actually a friendly iPad.
While we're here, we should cover ourselves from JavaScript validation techniques, as well. Some captive portals may inject some JavaScript to validate the operating system by checking the Document Object Model (DOM) fields in the browser. You can manipulate these responses in the same way you did for the User-Agent data:
general.[DOM key].override
For example, the oscpu field will disclose the CPU type on the host, so we can override the response with the following:
general.oscpu.override
As before, the data type is a string. This seems too easy, but keep in mind that the only code that will get the true information instead of your override preferences that are defined here is privileged code (for instance, code with UniversalBrowserRead privileges). If it was easy enough to inject JavaScript that could run privileged code, then we'd have a bit of a security nightmare on our hands. This is one of those cases where the trade-off helps us.


