Book Image

CentOS High Performance

By : Gabriel Cánepa
Book Image

CentOS High Performance

By: Gabriel Cánepa

Overview of this book

CentOS is the enterprise level Linux OS, which is 100% binary compatible to Red Hat Enterprise Linux (RHEL). It acts as a free alternative to RedHat's commercial Linux offering, with only a change in the branding. A high performance cluster consists in a group of computers that work together as one set parallel, hence minimizing or eliminating the downtime of critical services and enhancing the performance of the application. Starting with the basic principles of clustering, you will learn the necessary steps to install a cluster with two CentOS 7 servers. We will then set up and configure the basic required network infrastructure and clustering services. Further, you will learn how to take a proactive approach to the split-brain issue by configuring the failover and fencing of the cluster as a whole and the quorum of each node individually. Further, we will be setting up HAC and HPC clusters as a web server and a database server. You will also master the art of monitoring performance and availability, identifying bottlenecks, and exploring troubleshooting techniques. At the end of the book, you’ll review performance-tuning techniques for the recently installed cluster, test performance using a payload simulation, and learn the necessary skills to ensure that the systems, and the corresponding resources and services, are being utilized to their best capacity.
Table of Contents (13 chapters)
CentOS High Performance
Credits
About the Author
About the Reviewers
www.PacktPub.com
Preface
Index

Testing the DRBD resource along with Apache


As a simple test, we will display the information about the PHP installation. Create a file named info.php inside /var/www/html on node01 with the following contents:

<?php
phpinfo();
?>

Now, point your browser to 192.168.0.4/info.php and verify that the output is similar to the one shown here:

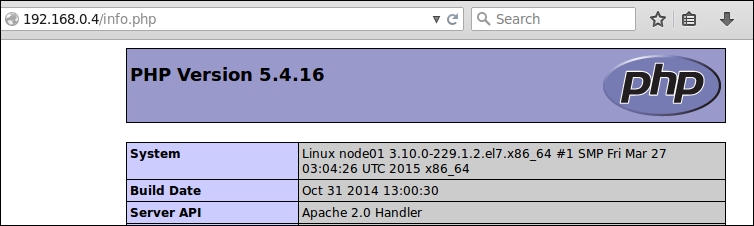
Then, stop the cluster (pcs cluster stop) on node01 or put it into the standby mode (pcs cluster standby node01) and refresh the browser. The only thing that should change on the output is the system name, as shown in the following screenshot, since the phinfo() PHP function returns the local hostname along with the information about the PHP installation:

In addition, if you list the contents of /var/www/html on node02, you will see that the info.php file that was created originally on node01 now shows on node02 as well, as indicated in this screenshot:

Before proceeding, remember to return node01 to normal mode:

pcs cluster unstandby node01