Sign In Start Free Trial
Account

Add to playlist

Create a Playlist

Modal Close icon
You need to login to use this feature.
  • Book Overview & Buying C# 7 and .NET Core 2.0 Blueprints
  • Table Of Contents Toc
  • Feedback & Rating feedback
C# 7 and .NET Core 2.0 Blueprints

C# 7 and .NET Core 2.0 Blueprints

By : Dirk Strauss, Jas Rademeyer
5 (1)
close
close
C# 7 and .NET Core 2.0 Blueprints

C# 7 and .NET Core 2.0 Blueprints

5 (1)
By: Dirk Strauss, Jas Rademeyer

Overview of this book

.NET Core is a general purpose, modular, cross-platform, and open source implementation of .NET. With the latest release of .NET Core, many more APIs are expected to show up, which will make APIs consistent across .Net Framework, .NET Core, and Xamarin. This step-by-step guide will teach you the essential .NET Core and C# concepts with the help of real-world projects. The book starts with a brief introduction to the latest features of C# 7 and .NET Core 2.0 before moving on to explain how C# 7 can be implemented using the object-oriented paradigm. You'll learn to work with relational data using Entity Framework and see how to use ASP.NET Core practically. This book will show you how .NET Core allows the creations of cross-platform applications. You'll also learn about SignalR to add real-time functionality to your application. Then you will see how to use MongoDB and how to implement MongoDB into your applications. You'll learn about serverless computing and OAuth concepts, along with running ASP.NET Core applications with Docker Compose. This project-based guide uses practical applications to demonstrate these concepts. By the end of the book, you'll be proficient in developing applications using .NET Core 2.0.
Table of Contents (11 chapters)
close
close

Upgrading to .NET Core 3

In order to follow this section, you won't need the WinForms app from the first edition—any WinForms app will do; however, it is recommended that you use that application, especially for the later section where we will discuss C# 8 features.

You can download the original project from the following location:

https://github.com/PacktPublishing/CSharp7-and-.NET-Core-2.0-Blueprints

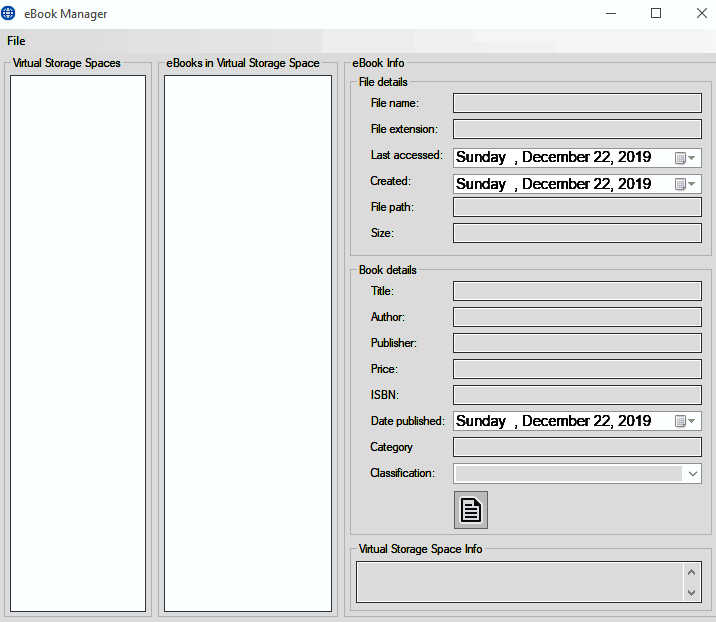
If you download and run the application, you should see that it still works fine:

Let's now investigate how we can run this exact same code base under .NET Core 3. We'll start with the project file. Basically, we need to tell Visual Studio that we now have a .NET Core 3 project, and not a Framework one.

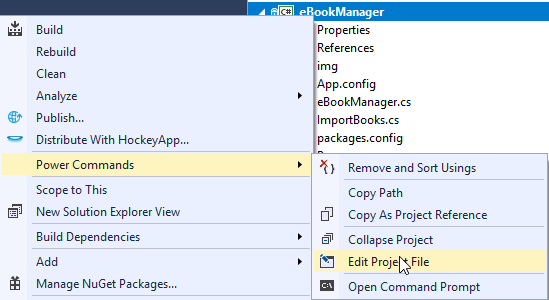
If you have PowerTools installed (https://marketplace.visualstudio.com/items?itemName=VisualStudioProductTeam.ProductivityPowerPack2017), you can do this from within Visual Studio; if not, then simply open the .csproj file using your favorite text editor:

Change the contents of the .csproj file to the following:

<Project Sdk="Microsoft.NET.Sdk.WindowsDesktop">
 
  <PropertyGroup>
    <OutputType>WinExe</OutputType>
    <TargetFramework>netcoreapp3.0</TargetFramework>
    <LangVersion>8.0</LangVersion>
    
    <AssetTargetFallback>uap10.0.18362</AssetTargetFallback>
    <UseWindowsForms>true</UseWindowsForms>
  </PropertyGroup>
 
  <ItemGroup>
    <PackageReference Include="Newtonsoft.Json" Version="12.0.2" />
  </ItemGroup>
 
  <ItemGroup>
    <ProjectReference Include="..\eBookManager.Controls\eBookManager.Controls.csproj" />
    <ProjectReference Include="..\eBookManager.Engine\eBookManager.Engine.csproj" />
    <ProjectReference Include="..\eBookManager.Helper\eBookManager.Helper.csproj" />
  </ItemGroup>
 
  <ItemGroup>
    <Reference Include="System">
      <HintPath>System</HintPath>
    </Reference>
  </ItemGroup>
  
</Project>    

This is, essentially, all that's needed; however, you will need to decide what to do about the project's resources. You can manually just check that they are all set to copy to the output directory; alternatively, we can add an ItemGroup to the project file, such as the following:

  <ItemGroup>
    <None Update="ico\importBooks.ico">
      <CopyToOutputDirectory>PreserveNewest</CopyToOutputDirectory>
    </None>
    <None Update="ico\mainForm.ico">
      <CopyToOutputDirectory>PreserveNewest</CopyToOutputDirectory>
    </None>
    <None Update="img\add_ebook_to_storage_space.png">
      <CopyToOutputDirectory>PreserveNewest</CopyToOutputDirectory>
    </None>
    <None Update="img\add_new_storage_space.png">
      <CopyToOutputDirectory>PreserveNewest</CopyToOutputDirectory>
    </None>
    <None Update="img\docx16.png">
      <CopyToOutputDirectory>PreserveNewest</CopyToOutputDirectory>
    </None>
    <None Update="img\docxx16.png">
      <CopyToOutputDirectory>PreserveNewest</CopyToOutputDirectory>
    </None>
    <None Update="img\eBook.png">
      <CopyToOutputDirectory>PreserveNewest</CopyToOutputDirectory>
    </None>
    <None Update="img\epubx16.png">
      <CopyToOutputDirectory>PreserveNewest</CopyToOutputDirectory>
    </None>
    <None Update="img\folder-close-x16.png">
      <CopyToOutputDirectory>PreserveNewest</CopyToOutputDirectory>
    </None>
    <None Update="img\folder_exp_x16.png">
      <CopyToOutputDirectory>PreserveNewest</CopyToOutputDirectory>
    </None>
    <None Update="img\image sources.txt">
      <CopyToOutputDirectory>PreserveNewest</CopyToOutputDirectory>
    </None>
    <None Update="img\no_eBook.png">
      <CopyToOutputDirectory>PreserveNewest</CopyToOutputDirectory>
    </None>
    <None Update="img\pdfx16.png">
      <CopyToOutputDirectory>PreserveNewest</CopyToOutputDirectory>
    </None>
    <None Update="img\ReadEbook.png">
      <CopyToOutputDirectory>PreserveNewest</CopyToOutputDirectory>
    </None>
    <None Update="img\storage_space_cloud.png">
      <CopyToOutputDirectory>PreserveNewest</CopyToOutputDirectory>
    </None>
  </ItemGroup>

As you can see, the whole thing is a great deal simpler than the previous version of the file.

At the time of writing, the first preview of a WinForms editor was released. The following article details what it is currently capable of: https://devblogs.microsoft.com/dotnet/introducing-net-core-windows-forms-designer-preview-1/.

Unfortunately, Preview 1 was not stable enough to make the changes necessary for this chapter, and so we are bypassing the designer.

The next step is to delete the following files, found under Properties:

  • AssemblyInfo.cs
  • Settings.Designer.cs
  • Settings.settings

In fact, by the end of this chapter, the entire Properties folder will be gone.

Actually, that's it. Simply reload the project and hit F5. The app is now running under .NET Core. However, it's very likely you'll get an error at this point. The reason is that we have two other projects that are still running under .NET Framework:

  • eBookManager.Engine
  • eBookManager.Helper

We'll need to migrate each project in a similar way; let's start with eBookManager.Engine. As before, edit the project file and replace what you find there with the following:

<Project Sdk="Microsoft.NET.Sdk">
  <PropertyGroup>
    <TargetFramework>netcoreapp3.0</TargetFramework>
  </PropertyGroup> 
</Project>

As you can see, this is even simpler than before. In fact, it is not necessary to have this target 3.0; we could target 2.2, or even 2.1 if we so chose. Again, we'll delete AssemblyInfo.cs.

Finally, we come to eBookManager.Helper. Edit the project file again to match the following:

<Project Sdk="Microsoft.NET.Sdk"> 
  <PropertyGroup>
    <TargetFramework>netcoreapp3.0</TargetFramework>
  </PropertyGroup>
 
  <ItemGroup>
    <PackageReference Include="Newtonsoft.Json" Version="11.0.2" />
  </ItemGroup>
 
  <ItemGroup>
    <ProjectReference Include="..\eBookManager.Engine\eBookManager.Engine.csproj" />
  </ItemGroup>
</Project>

Again, we'll delete AssemblyInfo.cs. We'll also need to remove a stray reference to System.Windows.Forms in ExtensionMethods.cs.

Fixing compilation errors

Finally, we'll need to restructure some of the code that depends on embedded image resources. If you run the code as-is, you'll likely get an error similar to the following:

At the time of writing, WinForms on .NET Core 3.0 doesn't support binary serialization. As a result, we need to make a few small changes.

Resource files

The first thing we'll need to do is to read the files from the output directory, so we'll change the Copy to Output Directory setting on the image and icon files; highlight all the files, and then change the Copy to Output Directory action to Copy if newer:

The next step is to go to the eBookManager screen.

The eBookManager screen

In the eBookManager.Designer.cs file, remove the imageList1 section:

Also remove the btnReadEbook section:

And finally, remove the this.Icon assignment in the eBookManager section:

We'll move the code that has been removed into the Form_Load event of eBookManager.cs:

private void Form1_Load(object sender, EventArgs e)
{
    System.ComponentModel.ComponentResourceManager resources = new System.ComponentModel.ComponentResourceManager(typeof(eBookManager));
 
    this.components = new System.ComponentModel.Container();
 
    // imageList1
    //this.imageList1.ImageStream = ((System.Windows.Forms.ImageListStreamer)(resources.GetObject("imageList1.ImageStream")));            
    this.imageList1.Images.Add("storage_space_cloud.png", Image.FromFile("img/storage_space_cloud.png"));
    this.imageList1.Images.Add("eBook.png", Image.FromFile("img/eBook.png"));
    this.imageList1.Images.Add("no_eBook.png", Image.FromFile("img/no_eBook.png"));
    this.imageList1.TransparentColor = System.Drawing.Color.Transparent;
 
    // btnReadEbook            
    this.btnReadEbook.Image = Image.FromFile("img/ReadEbook.png");
    this.btnReadEbook.Location = new System.Drawing.Point(103, 227);
    this.btnReadEbook.Name = "btnReadEbook";
    this.btnReadEbook.Size = new System.Drawing.Size(36, 40);
    this.btnReadEbook.TabIndex = 32;
    this.toolTip1.SetToolTip(this.btnReadEbook, "Click here to open the eBook file location");
    this.btnReadEbook.UseVisualStyleBackColor = true;
    this.btnReadEbook.Click += new System.EventHandler(this.btnReadEbook_Click);
 
    // eBookManager Icon            
    this.Icon = new System.Drawing.Icon("ico/mainForm.ico");
 
    PopulateStorageSpaceList();
}

importBooks screen

A similar change is needed for importBooks.Designer.cs. The following section should be removed:

Remove the setter for the btnAddeBookToStorageSpace image in the same file:

Remove the image for btnAddNewStorageSpace (again, in the same file):

Finally, remove the icon setter for the form:

We'll move this into the Form_Load event of ImportBooks.cs, which should now look as follows:

private void ImportBooks_Load(object sender, EventArgs e)
{
    // tvImages                        
    this.tvImages.Images.Add("docx16.png", Image.FromFile("img/docx16.png"));
    this.tvImages.Images.Add("docxx16.png", Image.FromFile("img/docxx16.png"));
    this.tvImages.Images.Add("pdfx16.png", Image.FromFile("img/pdfx16.png"));
    this.tvImages.Images.Add("epubx16.png", Image.FromFile("img/epubx16.png"));
    this.tvImages.Images.Add("folder-close-x16.png", Image.FromFile("img/folder-close-x16.png"));
    this.tvImages.Images.Add("folder_exp_x16.png", Image.FromFile("img/folder_exp_x16.png"));
    this.tvImages.TransparentColor = System.Drawing.Color.Transparent;
 
    // btnAddeBookToStorageSpace
    this.btnAddeBookToStorageSpace.Image = Image.FromFile("img/add_ebook_to_storage_space.png");
    
    // btnAddNewStorageSpace
    this.btnAddNewStorageSpace.Image = Image.FromFile("img/add_new_storage_space.png");
 
    // ImportBooks            
    this.Icon = new System.Drawing.Icon("ico/importBooks.ico");
 
 
    PopulateStorageSpacesList();
                
    if (dlVirtualStorageSpaces.Items.Count == 0)
    {
        dlVirtualStorageSpaces.Items.Add("<create new storage space>");
    }
 
    lblEbookCount.Text = "";
}

ProcessStartInfo

Finally, the following will need to be changed in eBookManager.cs:

private void btnReadEbook_Click(object sender, EventArgs e)
        {
            string filePath = txtFilePath.Text;
            FileInfo fi = new FileInfo(filePath);
            if (fi.Exists)
            {
                var processStartInfo = new ProcessStartInfo(filePath, Path.GetDirectoryName(filePath))
                {
                    // Change in .NET Core - this defaulted to true in WinForms
                    UseShellExecute = true
                };
                Process.Start(processStartInfo);
            }
        }

The reason is that ProcessStartInfo in .NET Framework used to default to UseShellExecute = true. However, in .NET Core, it now defaults to false, and will therefore fail without this change.

That's it! If you run the app, you're now running it under .NET Core 3. It's the same application (albeit with some minor code changes), but now it's running the .NET Core runtime!

Benefits of upgrading to .NET Core

Let's start with the elephant in the room. You can't now take Ebook Manager and run it on Linux—it is not now cross-platform. WinForms always was, still is, and probably always will be, a Windows-specific technology.

Upgrading essentially gives you three benefits:

  • Speed: .NET Core 2.1 saw some significant speed improvements. Your mileage may vary with this, and it's likely that it will depend on exactly what your application is doing. For example, the Ebook Manager application scans the hard drive to retrieve books: it's unlikely that the memory allocation improvements made in .NET Core 2.1 are going to make a huge difference to the speed of that.

  • Support: Once you've upgraded to .NET Core, your app will now be running on a far more active piece of technology; in the future, Microsoft is less likely to change .NET Framework, except for security bug patches, but .NET Core has an active road-map.

  • Enthusiasm: It's hard to get people excited about (or to get people at all) working on a WinForms application written fifteen years ago.
From the announcement with build 2019, it looks like .NET Framework will shortly be swallowed by .NET Core (to be known as .NET 5 at the time of writing). This means that, if you haven't converted by then, you may be on a train that ends (albeit in a few years) with Microsoft withdrawing support for the framework.

C# 8 brings a host of new features to the table, including the following:

  • Nullable reference types
  • Default implementations of interfaces
  • Records
  • Recursive patterns
  • Async streams
  • Ranges
  • Static local functions
  • Using declarations

Taking the top two headline features from that list, it's clear that there is synergy between being able to run legacy code in .NET Core 3 and being able to apply some of these features to help to update and maintain legacy code.

Visually different images
CONTINUE READING
83
Tech Concepts
36
Programming languages
73
Tech Tools
Icon Unlimited access to the largest independent learning library in tech of over 8,000 expert-authored tech books and videos.
Icon Innovative learning tools, including AI book assistants, code context explainers, and text-to-speech.
Icon 50+ new titles added per month and exclusive early access to books as they are being written.
C# 7 and .NET Core 2.0 Blueprints
notes
bookmark Notes and Bookmarks search Search in title playlist Add to playlist download Download options font-size Font size

Change the font size

margin-width Margin width

Change margin width

day-mode Day/Sepia/Night Modes

Change background colour

Close icon Search
Country selected

Close icon Your notes and bookmarks

Confirmation

Modal Close icon
claim successful

Buy this book with your credits?

Modal Close icon
Are you sure you want to buy this book with one of your credits?
Close
YES, BUY

Submit Your Feedback

Modal Close icon
Modal Close icon
Modal Close icon