Book Image

Learn Programming in Python with Cody Jackson

By : Cody Jackson
Book Image

Learn Programming in Python with Cody Jackson

By: Cody Jackson

Overview of this book

Python is a cross-platform language used by organizations such as Google and NASA. It lets you work quickly and efficiently, allowing you to concentrate on your work rather than the language. Based on his personal experiences when learning to program, Learn Programming in Python with Cody Jackson provides a hands-on introduction to computer programming utilizing one of the most readable programming languages–Python. It aims to educate readers regarding software development as well as help experienced developers become familiar with the Python language, utilizing real-world lessons to help readers understand programming concepts quickly and easily. The book starts with the basics of programming, and describes Python syntax while developing the skills to make complete programs. In the first part of the book, readers will be going through all the concepts with short and easy-to-understand code samples that will prepare them for the comprehensive application built in parts 2 and 3. The second part of the book will explore topics such as application requirements, building the application, testing, and documentation. It is here that you will get a solid understanding of building an end-to-end application in Python. The next part will show you how to complete your applications by converting text-based simulation into an interactive, graphical user interface, using a desktop GUI framework. After reading the book, you will be confident in developing a complete application in Python, from program design to documentation to deployment.
Table of Contents (14 chapters)

Working with Python

Python can be programmed through an interactive command line (the interpreter), but anything you code won't be saved. Once you close the session it all goes away. To save your program, it's easiest to just type it in a text file and save it (be sure to use the .py extension, that is, foo.py).

To use the interpreter, simply type python at the command prompt (*nix and Mac) or click the Python application icon (Windows and Mac). If you're using Windows and installed the Python .msi file, you should be able to also type python at the command prompt, or find the launch icon in the Start menu.

Though they may look the same, the main difference between the Python interpreter and the system command prompt is that the command prompt is part of the operating system while the interpreter is part of Python. The command prompt can be used for other tasks besides messing with Python; the interpreter can only be used for Python.

Note that *nix is used throughout this book to denote any UNIX-like operating system, such as Linux, BSD, and others, as these OSes tend to have similar functionality.

Installation

Depending on your operating system, Python may already be installed. Python is very prevalent in the *nix world, though different operating systems use different versions. It is almost guaranteed that Python 2 is installed, and an increasing number of systems have some version of Python 3 installed as well.

It is recommended to go to https://www.python.org and download the latest version of Python. While this book will focus on version 3.6 and later, the majority of the information will apply to older versions of Python 3 as well. Various installers are available for the major operating systems, as well as some specialized and older platforms; installation instructions are provided with the download.

Launching the Python interpreter

If you're using Linux, BSD, or another *nix operating system, I'll assume you already know about the Terminal; you probably even know how to get Python up and running already. For those who aren't familiar with opening Terminal or the command prompt (same thing, different name on different operating systems), the following sections explain how to do it.

The interactive Python interpreter is sometimes referred to as the Python shell, Python prompt, Python terminal, or Python command line. They all mean the same thing—a special, text-based interface that allows for Read-Evaluate-Print Loop (REPL) interaction with Python.

Windows (Win8 and above)

The following steps will help you to install Python in Windows:

  1. Press the Windows key.
  2. Type cmd and press Enter.
  3. You should now have a black window with white text. This is the command prompt.
  4. If you type python at the prompt, you should be dropped into the Python interpreter prompt. If not, Python isn't installed correctly.

Mac

The following steps will help you to install Python in Mac:

  1. Open Applications.
  2. Open Utilities.
  3. Scroll down and open Terminal.
  1. You should now have a black window with white text. This is the command prompt.
  2. Type python at the prompt and you will be in the Python interpreter.

Using the Python command prompt

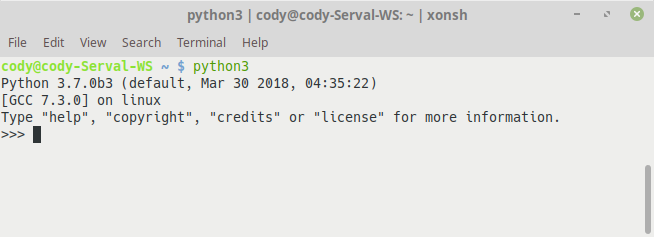
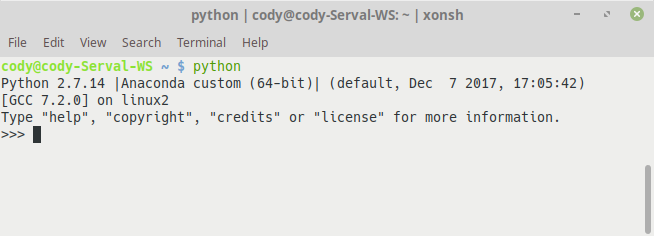
Your Terminal should look similar to the screenshot labeled Python 3 prompt. Notice that the command to launch the interpreter is actually python3. If both Python 2 and Python 3 are installed on the system, you need to expressly indicate which version to use; otherwise, the system default will be used, which may be different from what is desired. The screenshot labeled Default Python prompt shows what the default prompt on the author's system looks like.

Anaconda is a customized Python distribution (https://www.anaconda.com) that includes a large number of data science and machine learning tools by default, making it easier for users to manage their environment. This simply demonstrates that, in addition to multiple Python versions, different Python distributions can be installed on the same system, each one customized to a particular use. Below is an example of the interactive Python shell for a vanilla Python installation:

Python 3 prompt

In addition, the astute reader will see there is a difference in the Python environment between the different versions. The following screenshot states that the Python 3 environment is standard Python, whereas the preceding screenshot shows that Python 2 is part of the Anaconda distribution:

Default Python prompt

For the most part, you won't even notice which version is in use; for example, version 3.4 versus 3.7, unless you are using a library, function, or method for a specific version. Then, you can simply add a special code to identify what version the user has and provide notification to upgrade, or you can modify your code so it is backwards-compatible.

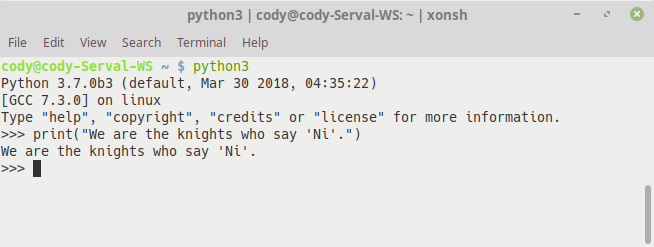
The >>> characters in the preceding screenshot is the Python command prompt; your code is typed here and the result is printed on the following line, without a prompt. For example, the following screenshot shows how the user can interact with the Python interpreter just like using a normal operating system command prompt.

Python prompt example

If you write a statement that doesn't require any processing by Python, it will simply return you to the prompt, awaiting your next order. In the previous example, the print() function simply takes the text that is placed in the parentheses and prints it to the screen. Python doesn't have to do anything with this, in terms of performing calculations or anything, so it prints the statement and then waits for a new command.

(By the way, Python was named after Monty Python, not the snake. Hence, some of the code you'll find on the internet, and tutorial, and books will have references to Monty Python sketches.)

The standard Python interpreter can be used to test ideas before you put them in your code. This is a good way to test the logic required to make a particular function work correctly or see how a conditional loop will work. You can also use the interpreter as a simple calculator; if you import various mathematical libraries, you can perform complex calculations as well.

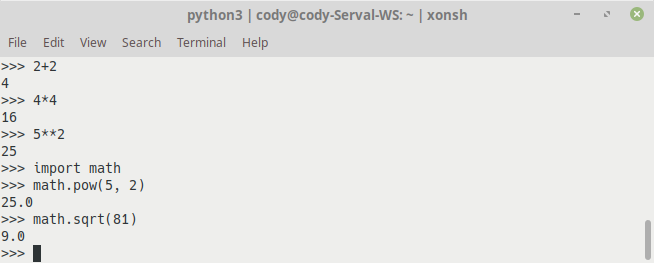
The following screenshot shows the Python interpreter being used for simple arithmetic; it also shows that the math library is imported so more complex calculations can be performed (importing libraries will be covered in more detail in the Importing modules section):

Python calculator