
Logic Pro windows, menus, and terminology
We will begin by explaining the Logic Pro windows, exploring its menus, and mastering its terminology so that we are clear on what we are discussing as we learn to use Logic Pro.
The Main Window
Shockingly the main window you see when you open a new Logic Pro project is called … wait for it … the Main Window!
You may hear some long-time Logic Pro users refer to it as the Arrange window because for many, many years that was indeed what the window was named.
Most of what you need to do in Logic Pro can indeed be done in only this window, but as you will learn, there are other options. By default, Quick Help will be turned on and it is very helpful for beginners.
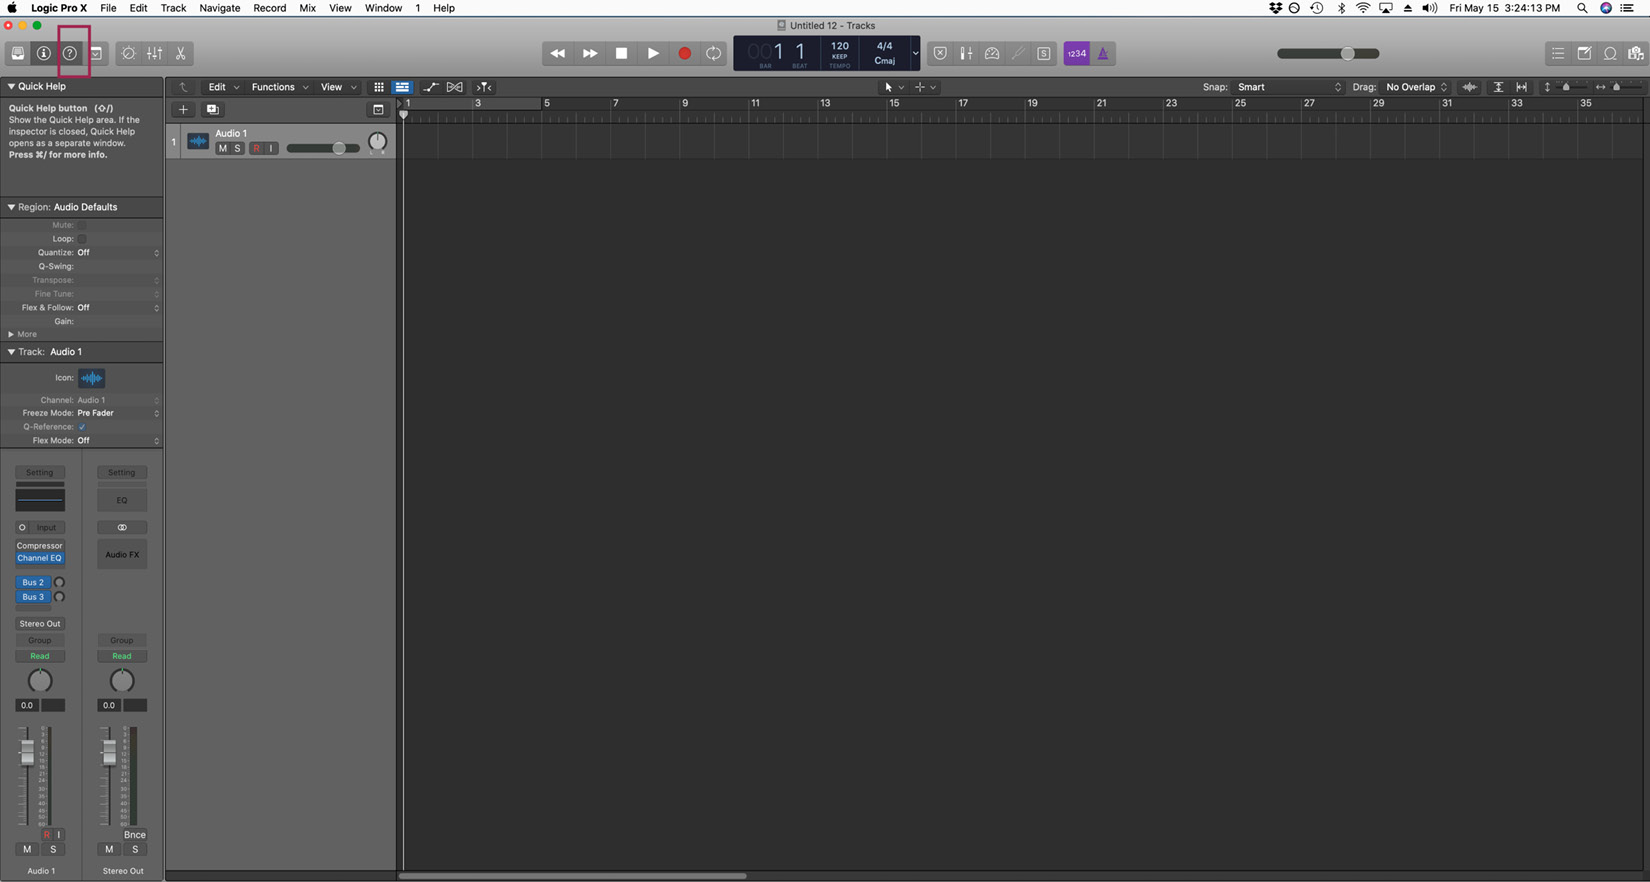
Figure 2.1 – Quick Help in the Main Window
You can toggle it on/off by clicking the question mark button in the top left of the Control bar, which is the light gray area running across the Graphical User Interface of the Main Window, hereafter referred to as the GUI. As you hold your mouse or trackpad down on each button, Quick Help will tell you what it is. I recommend that you click each one and see how they behave when toggled on and off.
Important note
If when you open a new project, your only track creation option is External MIDI, then create that. The problem is that Logic Pro cannot see an audio interface. If you do not have one hooked up, Logic Pro should default to your built-in audio with a laptop or iMac. If it isn't seeing that or your audio interface, go under the Logic Pro menu to Preferences | Audio and in the Devices tab, select the audio interface or built-in options and click Apply Changes. Don't worry about the other settings for now.
The Control bar is one of the three main areas of the Main Window and it is very important to your workflow and extremely customizable, which will be especially helpful for laptop users who are screen real estate challenged.
Directly below the Control bar is the Bar Ruler, which displays bars and beats. The vertical white line you see is called the Playhead and if you press the play button, you will see it start to move throughout the project until you press the stop button. Pressing the rewind button brings you back to the beginning.
Below the bar ruler is the second important area in the main window, the Tracks area. It contains the Track List and the grid where you will record and edit all your regions, called the Tracks Area (although the Quick Help refers to it as the Workspace.)
On the left side of the GUI, you see the third important area – it's called the Inspector.
If you have Quick Help toggled on, you will see an area at the top with the description Quick Help. You will also see a disclosure triangle that closes it.
Below it is the part of the Inspector that affects the region, called the Region Inspector. Settings there will affect any regions you select, whether they are on the same track or different tracks. It too has a disclosure triangle to close it, but also another to show more within it.
The next area in the Inspector has settings that control the entire track and is called the Track Inspector.
Below that are two faders, similar to what you might see on a recording console. The one on the left pertains to the Channel Strip of the selected track while the one on the right of it shows the Stereo Output, where all signal goes to if you are working "in the box" and then going out of your audio interface with outputs going to hardware mixers, or a tape recorder, or another hardware device.
Tracks versus Channel Strips
There is some Logic Pro terminology that often confuses newcomers, and for a very good reason – it is confusing.
I will now create a second track either by clicking the + at the top of the track list or by navigating to the Track menu and choosing New Tracks…. As before, we see choices for creating new tracks:
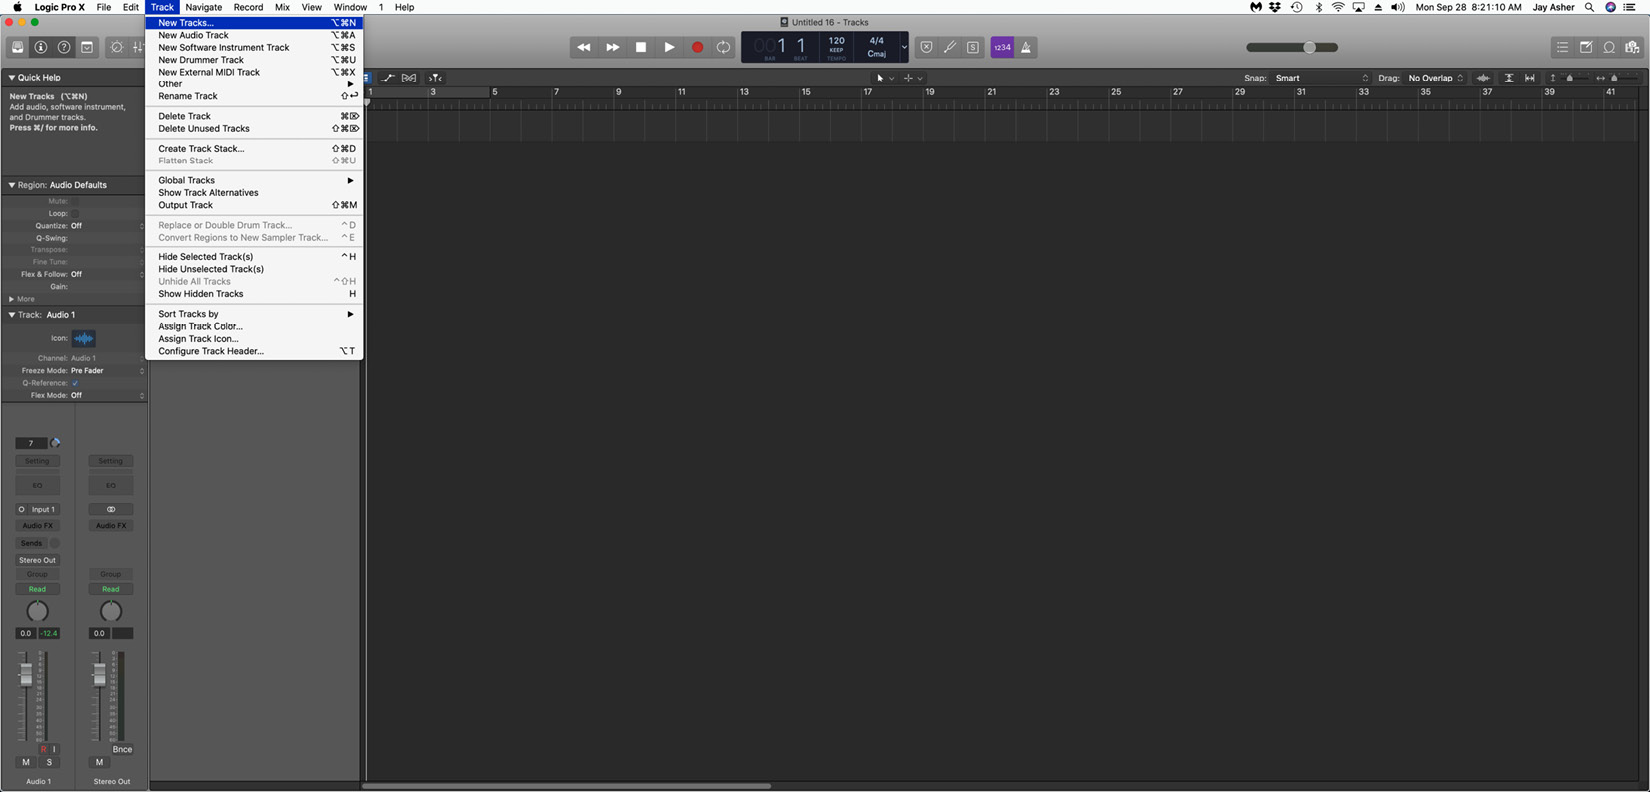
Figure 2.2 – Creating new tracks
The truth is, we are creating tracks, but we are also creating channel strips, each with a single track flowing through it. But it is possible to have multiple tracks flowing through the same channel strip, and there are times that you will want to.
For now, create a Software Instrument track with Details showing. Create it as an Empty Channel Strip with Open Library checked.
Note
In addition to the choices of Audio, Software Instrument, and Drummer tracks, you also will see External MIDI and Guitar or Bass. External MIDI is for recording sounds from a keyboard or tone module while Guitar or Bass is actually also an audio track with different plugin choices.
Next, we will examine the Library in Logic Pro, where we find helpful combinations of Software Instruments and FX plugins.