

The Logic Pro Library
The Library has a collection of already created patches. A patch is a collection of plugins designed to help you achieve a certain sound. You can also create your own and save them to the library.
The Library's visible content is related to the kind of channel strip you choose in the Track List. If it's an Audio channel strip, you will see various kinds of FX plugins. If it is a Software Instrument channel strip, you will see Software Instrument and FX plugin combinations. If it's a Drummer channel strip, you will see drummers and drum kits:
- Select the Audio track and see the choices.
- Then select the Software Instrument track and notice that they change. If you select a patch in the Library, it will automatically load the plugins to the channel strip.
- With the Software Instrument track selected in the Track List, select the Steinway Grand Piano patch and you will see that it loads Logic Pro's Sampler software instrument (before 10.6, it was called EXS 24) and an EQ, Compressor, and a Tape Delay. There are also two Sends. The sends control the level being sent to two busses, each assigned as the input on an aux, that have reverbs instantiated on them. Don't worry if you don't understand what all those are and do. I will teach you about them when we get to learn about mixing in Chapter 13, Organizing for the Mix.
- If you have a MIDI controller hooked up to your computer, you will be able to play notes and hear the sound. If not, press Command + K to open a virtual keyboard. Play notes on it and in the LCD section of the Control bar, you will see a little dot appear that shows that it is receiving MIDI input.
- You can now close the Library. There are two ways to do so. You can click the Library button on the Control bar or simply press the letter Y on your computer keyboard.
Congratulations, you have just learned your first key command. I will be showing you some more, and I encourage you to keep a list or memorize them. My personal motto is "never do by dragging the mouse or trackpad around what you can do with a keystroke."
While we are at it, press the letter I and notice that you can toggle the Inspector open and hidden.
If those do not work, then the key command sets are not assigned properly. They should be set correctly by default but I occasionally have seen Logic default to a Pro Tools compatible set seemingly for no reason.
Important note
If the key commands are not working, go to the Logic Pro menu to Key Commands | Presets and choose the ones appropriate for your language.
The Toolbar
If you either click the Toolbar button on the Control bar or under the LCD display, grab the blue line, and drag down, you will see the Toolbar. When Logic Pro went from Logic Pro 9 to Logic Pro, the whole paradigm of the Toolbar was changed into the present Control bar, so the Toolbar has been deemphasized in Logic Pro. Many users still find it useful, and like the Control bar, it is customizable:
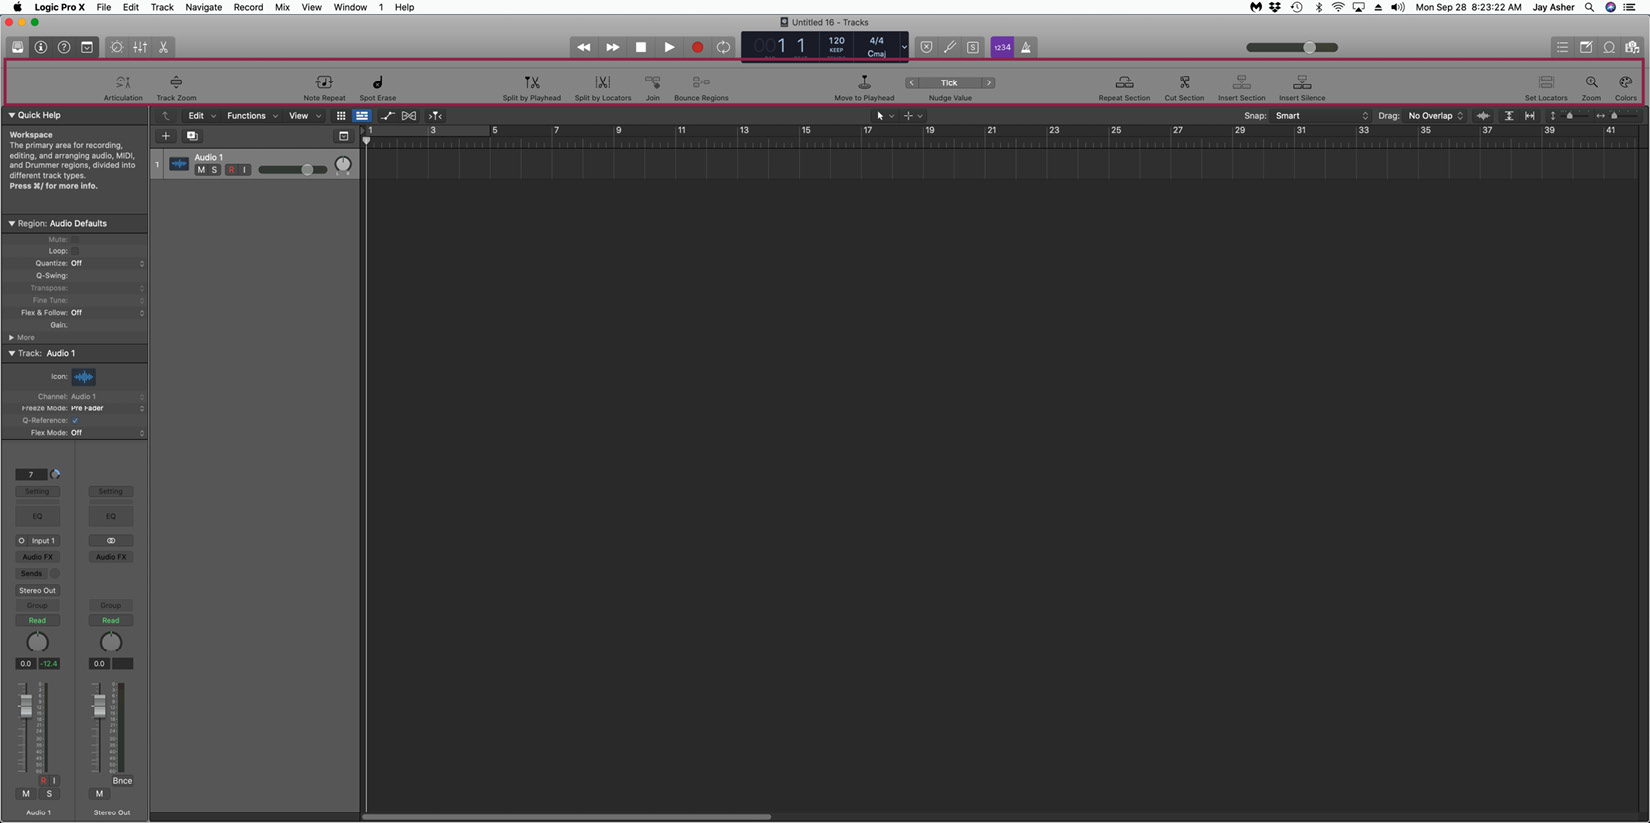
Figure 2.3 – Logic Pro Toolbar
Customizing the Control bar and Toolbar
If you are using a laptop with a small display, it is entirely possible that you will not see everything included by default and will see some arrows that you can hold down on to see more. Even on a large display or two displays, however, the default is not optimal for working with Logic Pro in my opinion, so I will show you how to customize it to your specific needs now.
On the right side of the LCD in the center of the Control bar, if you hold down your mouse or trackpad, you will see some options for the Control bar display:
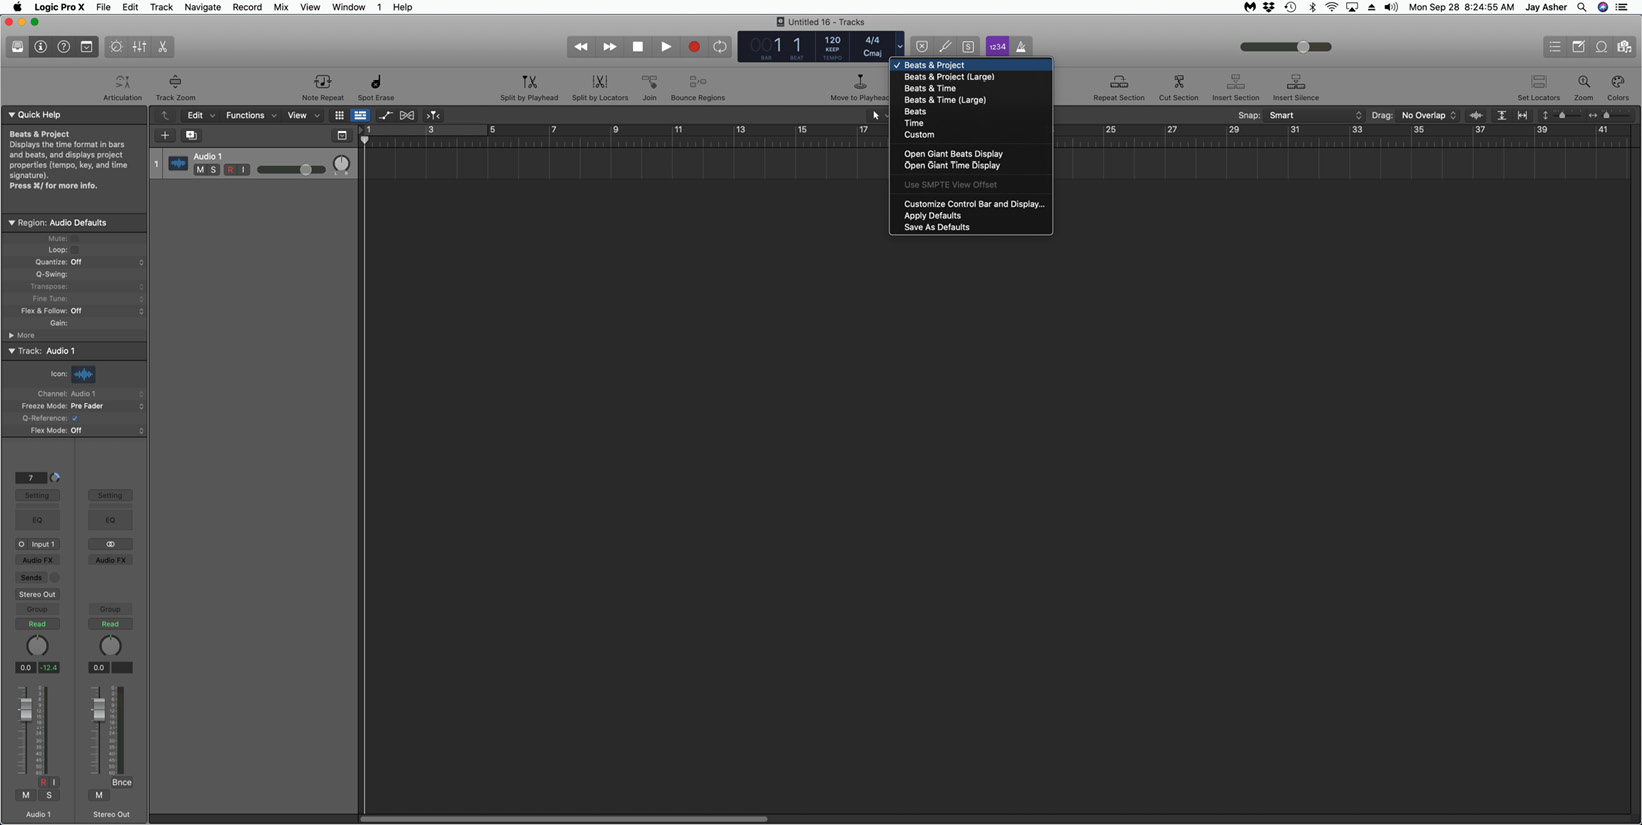
Figure 2.4 – Control bar display options
- Choose Customize Control bar and Display.
- Hold down your mouse or trackpad and change from Beats & Project to Custom, and wow – you will see it has changed greatly. On a small screen, you see even less!
No worries, this is where customizing is powerful. Look at the default Views that are checked:
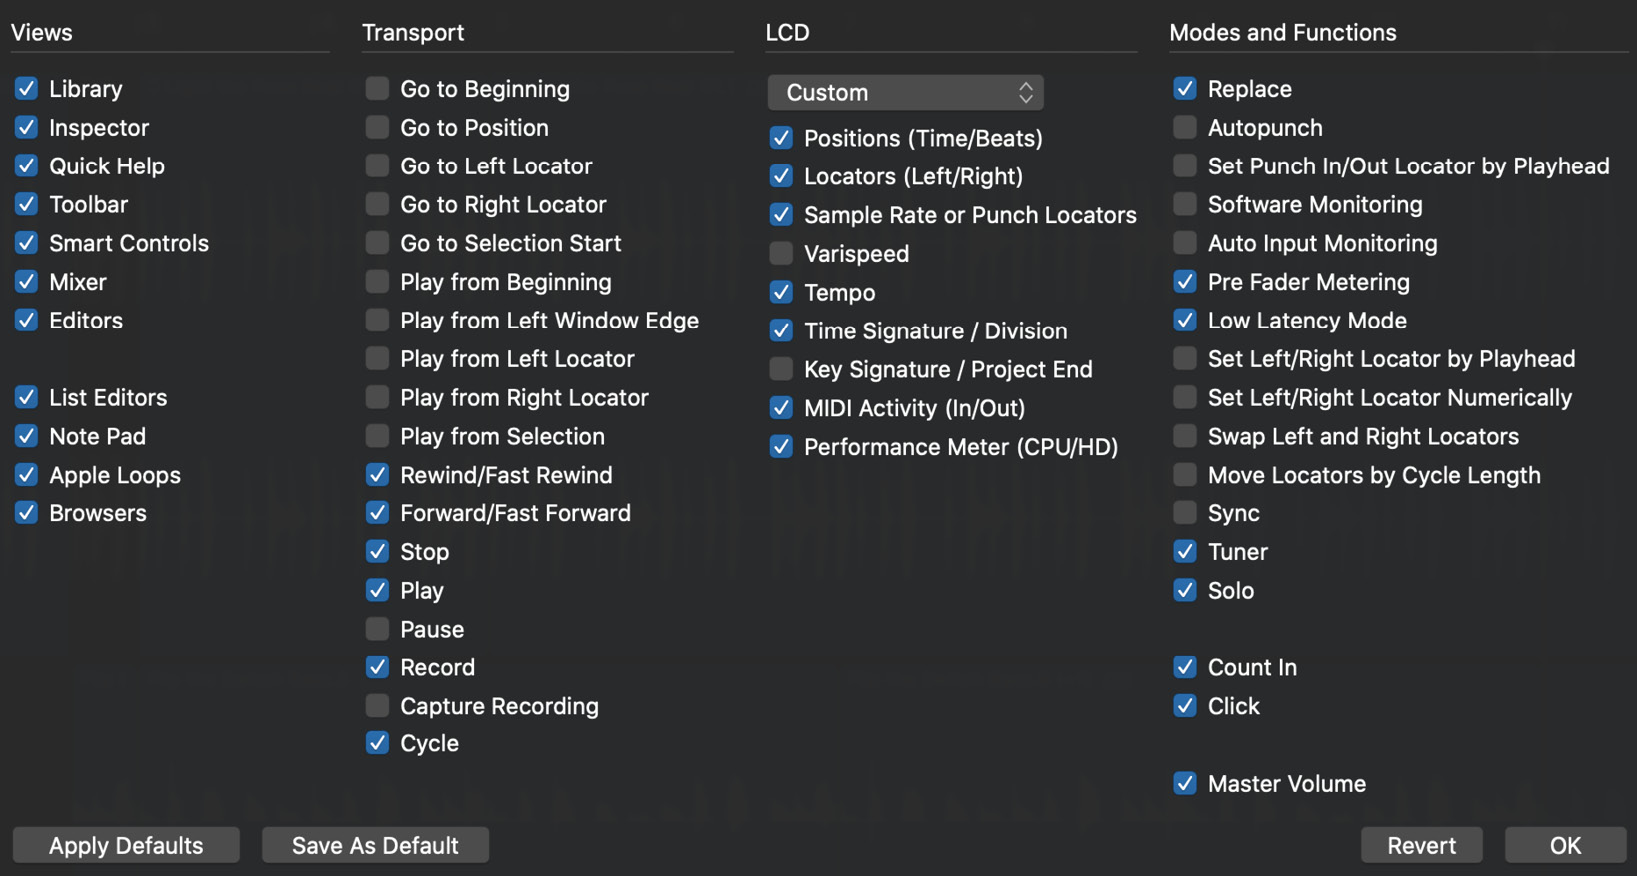
Figure 2.5 – Selected default Views
If you memorize the relevant key commands, most of these are unnecessary. In fact, I have already mentioned a couple, but now I will give you a list:
- Y toggles the Library.
- I toggles the Inspector
- Left Shift + forward slash toggles Quick Help.
- Control + Option + Command + T toggles the Toolbar.
- B toggles the Smart Controls.
- X toggles the Mixer
- E toggles the Editors.
- D toggles the List Editors.
- Option + Command + P toggles the Note Pad.
- O toggles the Loop Browser.
- F toggles the File Browser.
If you memorize some or all of these, you can uncheck them here and free up space in the Control bar. I recommend that you uncheck all but the more complicated ones.
Under the Transport menu, you can check or uncheck what you would like to see. Since I know that the spacebar puts Logic Pro into play mode, while pressing it again stops playback, and the Enter key returns to the beginning, I don't need many of these, but for you, you may feel more comfortable leaving it as it is.
Under LCD, notice that I have checked Sample Rate or Punch Locators. When we visit audio recording in the next chapter, you will understand why. I have also made some changes that suit me in Modes and Functions, but frankly, I change these often.
Once you have made your choices, you can then click Save As Default. While these are Project Settings and not Preferences, they are not global to Logic, but they will now ensure that every new Logic project will default to them. When you open an earlier Logic project, if you open your customizing window again, you can choose Apply Defaults and then resave the project.
Right-clicking or clicking on the Toolbar while holding the Control key gives you a similar menu of choices to what you see on the Toolbar. I rarely use the Toolbar so I have no specific recommendations, but you may reach a very different conclusion and that is fine.
Logic Pro's included content
Logic comes with a ton of content, including software instruments, FX, and Apple loops. You will want to make sure you have downloaded it all to your main hard drive. Later, you can move the content to another drive quite easily (you will see Relocate Sound Library… in the following screenshot):
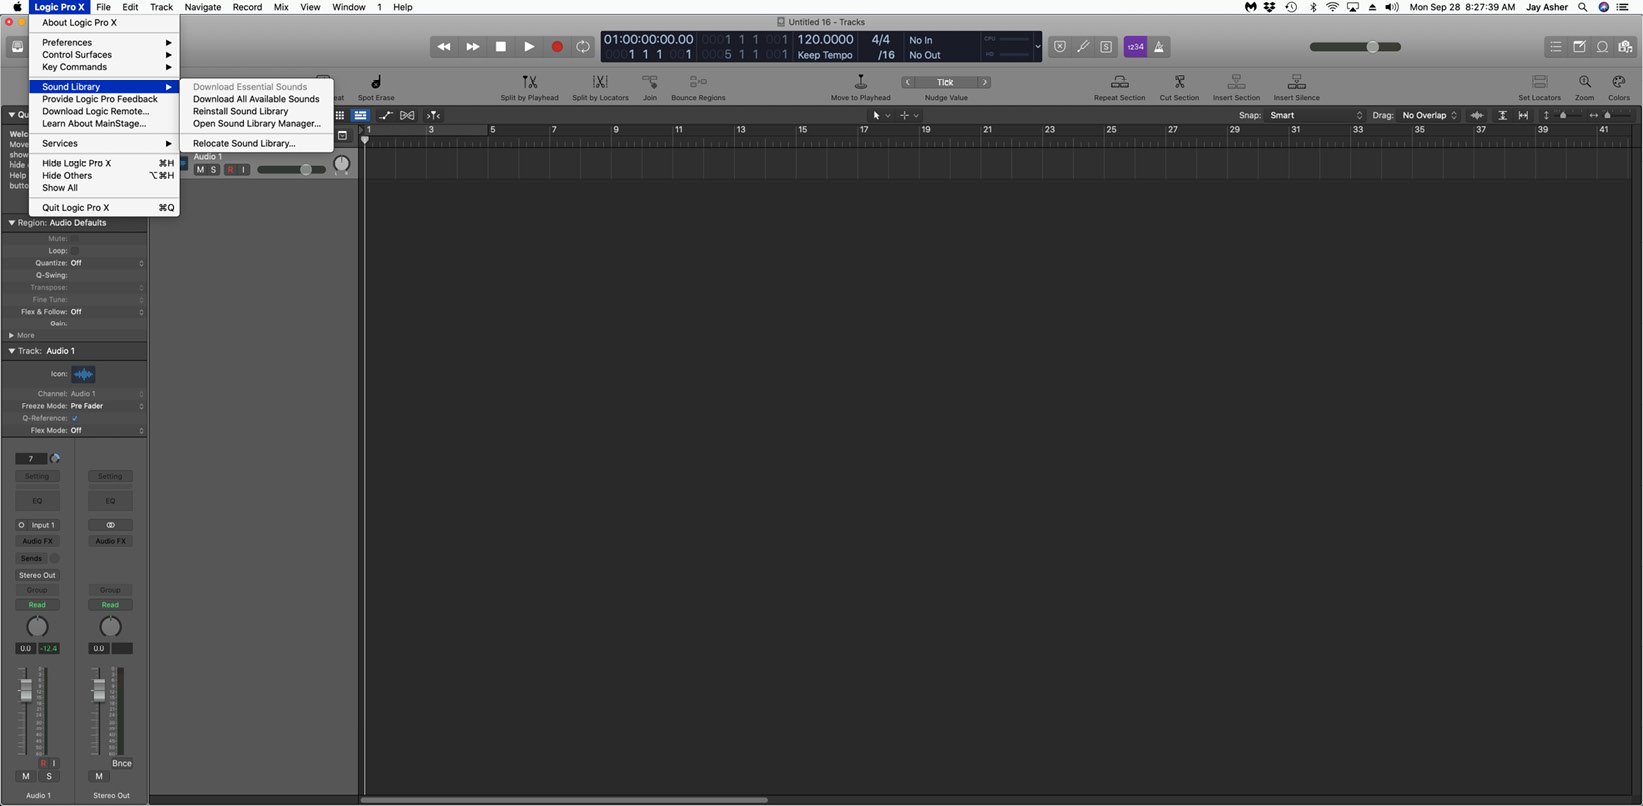
Figure 2.6 – Opening Sound Library to download content
If you choose Open Sound Library Manager…, you will see whether they are all installed. If not, choose Select all unfinished and they will download. You will see a thin blue progress bar below the Control bar. You can download in the background while you continue to work in Logic Pro.
The Browser is the area where you can see audio files that are in your project, in other projects, and in iTunes or your Movies folder.