
Navigating the admin panel
With the creation of a new development store, we will get the first glimpse of our store home page. The home page consists of the middle screen, which will contain some general advice for store owners to start their business, daily tasks, recent activity, and, on the left side of the screen, we will see the sidebar, which will be our primary focus.
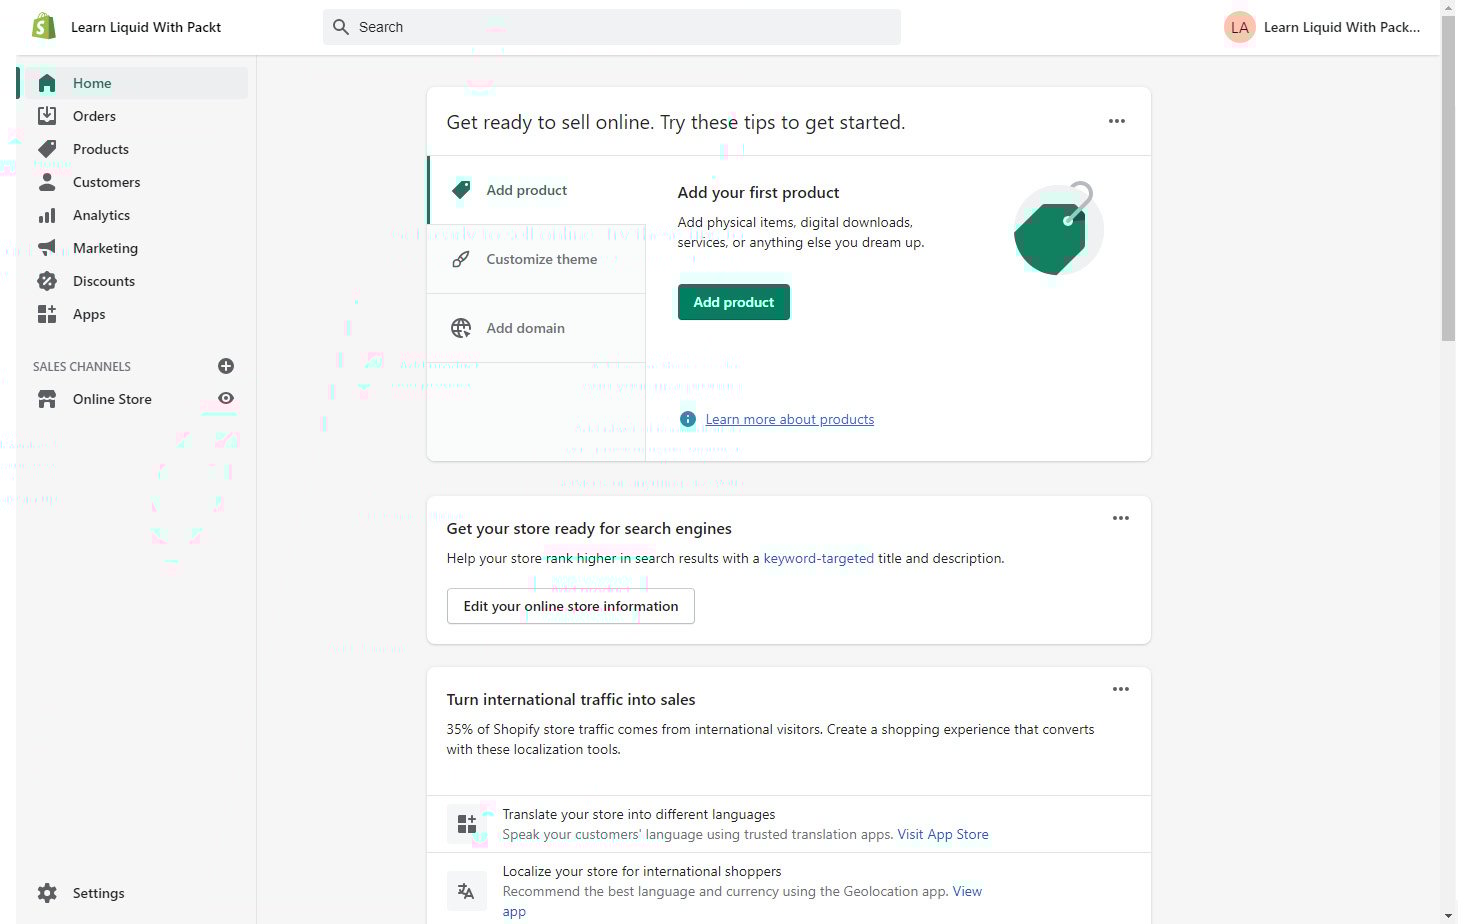
Figure 1.3 – Example Shopify admin home page
While we will not go into much detail straight away, it is imperative to have a basic understanding of each area of the store that we will be referencing later through different chapters of the book. We will split the sidebar into three sections for ease of reference, and we can list them as follows:
- Core aspects
- Sales channel
- Settings
Core aspects
The first section, Core aspects, contains the store-related options that the store owner generally uses, and this includes the following information:
- The Orders section contains all the information regarding the orders that the store owner has received. It is here that the store owner can preview each order individually and decide whether they would like to proceed with it. The owner may also manually create orders using the draft method and preview the abandoned checkout.
- The Products section consists of four separate areas that allow us to create and manage products, handle incoming inventory for the existing products, create and manage collections or product categories if you prefer, and create gift cards.
- The Customers section, as the name suggests, allows us to create and manage our customer database. This section, along with the previous Products section, will be of particular interest to us. We will return to them later with a detailed explanation of some of their functionalities that will be of interest to us.
- The following section, named Analytics, will primarily be used by the store owner. It offers a great deal of information regarding the store's performance, such as a detailed report on sales, along with a live view of the customers visiting the store and their behavior.
- The Marketing section, as its name suggests, allows us to view the store market strategy overview. We can create and manage campaigns via emails or other social networks and create automation to increase the store retention rate.
- We can use the Discount section to create a discount coupon code that we can share with our customers to manually enter the checkout to receive a discount on their complete order or a specific product. Additionally, we can make an automatic discount that will automatically trigger once we fulfill the requirements set by the store owner.
- The last section, named Apps, grants us a quick preview of all the apps installed on our store where we can manage or remove the apps if we choose to.
Important note:
Due to the Shopify platform's limitations, it is impossible to combine the discounts. If we have qualified for the automatic discount of 10%, we will not be able to enter the manual discount coupon code for free shipping that we have previously received from the store owner.
Tip:
While it is possible, you should never install an app on your own when working under a collaborator account on the managed type of store. Suppose you require a particular app to perform a task entrusted to you. In that case, you should reach out to the store owner, explain the need for it, and ask them to install it for you before proceeding, as they will need to grant specific permissions and share the store data with the app that should be reviewed and accepted by the store owner.
Sales channel
The second section of our sidebar, Sales channel, represents the various platforms we can use to sell our store products. By default, the only visible channel is Online store, which will be our primary objective; however, we can easily add more by clicking on the plus button next to the sales channel.
The Online store channel is the heart of the store as it provides us with the ability to output a visible storefront for our customers, and we can break it down into six individual sections:
- The Themes section allows us to manage our store look by customizing our store theme to our unique brand. The first thing that we can sometimes see once we open the Themes section is the note from Shopify that our online store is password-protected, meaning that the store is not yet visible to our customers. While password protection is in place, every visitor who tries to view our store will only see a notification that the store is password-protected and is currently inaccessible.
Important note:
We can easily disable password protection by clicking the See store password button on the password protection note in the Themes section or by visiting the Preferences section in the Online Store section. However, considering that we have selected the development option as our store, disabling password protection is unavailable. We can only remove password protection after transferring the store to our client or purchasing a subscription plan of our own.
After the password protection note, the next area that we can see under our Themes section is named Current theme. This section shows us the name and a small preview of the current theme, followed by the Online store speed section, which provides us with our store's speed report. The Online store speed section is currently disabled for password-protected stores.
Following the previous section, near the bottom of the screen, we can find the last section named Theme library. We can easily explore free and paid themes within this area by selecting their respective links or uploading our custom-made theme by choosing the Upload theme button.
- The Blog posts section allows us to manage and create blog posts that we would like to show on our store and categorize them under different blogs.
- The Pages section allows us to create multiple pages that our customers will be visiting frequently, such as the About us or Contact us pages, or the pages supporting our products by offering in-depth information. For more information on managing pages, refer to https://help.shopify.com/en/manual/online-store/pages.
- Inside the Navigation section, we can find the necessary tools that will allow us to create navigation with up to two-level nested menus that our customers can use to navigate our online store. For information on creating the navigation menu and managing the link list, refer to https://help.shopify.com/en/manual/online-store/menus-and-links.
- The Domains section shows us our current primary domain, which uses the format
my-store-name.myshopify.com. Additionally, we can purchase a custom domain by using the Buy new domain button, or if we have obtained a domain through a third party, we can then set that as our primary domain. For more information on domains, refer to https://help.shopify.com/en/manual/online-store/domains. - The last and final section under our Online store channel is named Preferences. As most of the options under this section are self-explanatory, we will not be going into too many details to keep the book to the point. However, if you would like to read more about each of them, you can visit their respective pages, which we will list, to get additional information. The Preferences section allows us to regulate some important settings that will help the store owners with their future store, and we can list them in the following way:
- Title and meta description: For detailed information on the title and meta description, refer to https://help.shopify.com/en/manual/online-store/setting-up/preferences#edit-the-title-and-meta-description.
- Social sharing image: For detailed information on social sharing images, refer to https://help.shopify.com/manual/using-themes/change-the-layout/theme-settings/showing-social-media-thumbnail-images.
- Google Analytics: For detailed information on Google Analytics, refer to https://help.shopify.com/manual/reports-and-analytics/google-analytics.
- Facebook Pixel: For detailed information on Facebook Pixel, refer to https://help.shopify.com/manual/promoting-marketing/facebook-pixel.
- Customer privacy: For detailed information on customer privacy, refer to https://help.shopify.com/en/manual/your-account/privacy/cookies.
- Password protection: For detailed information on password protection, refer to https://help.shopify.com/manual/using-themes/password-page.
- Spam protection: For detailed information on spam protection and usage of Google reCaptcha, refer to https://help.shopify.com/en/manual/online-store/setting-up/preferences#protect-your-store-with-google-recaptcha.
Settings
The third and final section of our sidebar, named Settings, contains many options to help store owners set up and run their store. Due to the significant number of sections and subsequent options inside Settings, we will not be covering all of them, but we will mention some of the options that will be of interest to us in some of the following chapters of the book.