Book Image

Democratizing Application Development with Betty Blocks

By : Reinier van Altena
Book Image

Democratizing Application Development with Betty Blocks

By: Reinier van Altena

Overview of this book

This practical guide on no-code development with Betty Blocks will take you through the different features, no-code functionalities, and capabilities of the Betty Blocks platform using real-world use cases. The book will equip you with the tools to develop business apps based on various data models, business processes, and more. You’ll begin with an introduction to the basic concepts of the Betty Blocks no-code platform, such as developing IT solutions on various use cases including reporting apps, data tracking apps, workflows, and business processes. After getting to grips with the basics, you’ll explore advanced concepts such as building powerful applications that impact the business straight away with no-code application development and quickly creating prototypes. The concluding chapters will help you get a solid understanding of rapid application development, building customer portals, building dynamic web apps, drag-and-drop front ends, visual modelling capabilities, and complex data models. By the end of this book, you’ll have gained a comprehensive understanding of building your own applications as a citizen developer using the Betty Blocks no-code platform.
Table of Contents (20 chapters)
1
Part 1: Citizen Development
4
Part 2: First Steps on the Betty Blocks Platform
10
Part 3: Building Your First Application
15
Part 4: The Pro-Coder

Adding notes to the current case

We also want to be able to add important notes to our case. Let’s take a look at how we can implement this in our application.

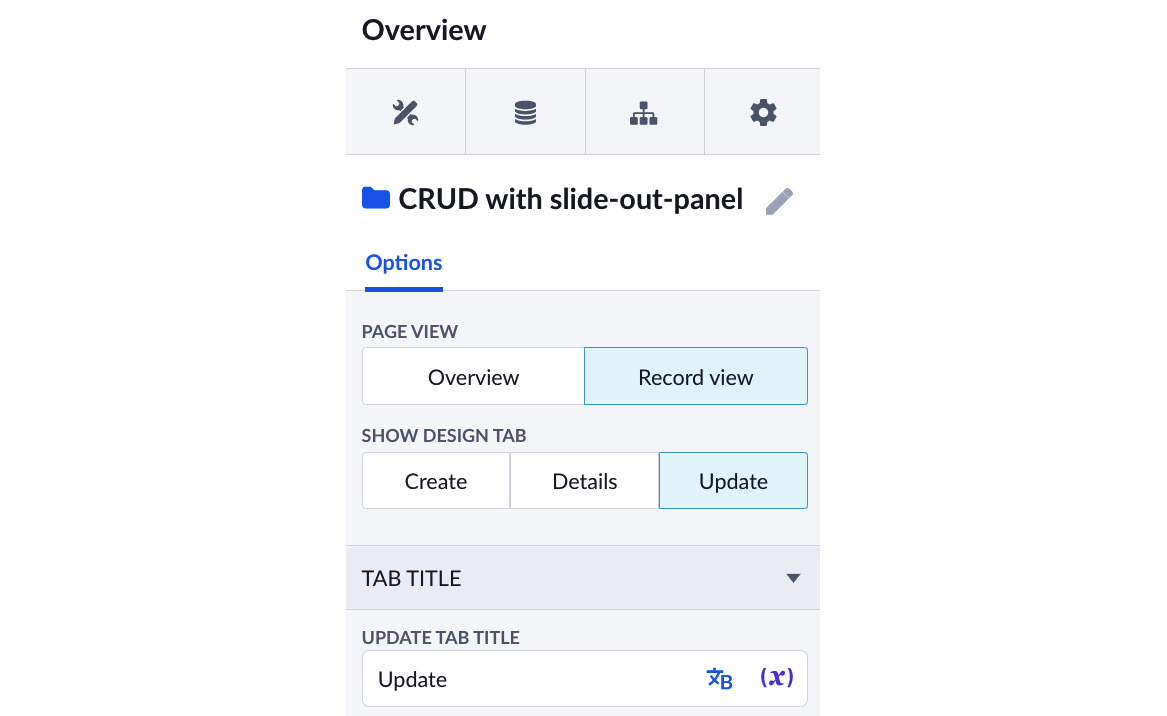
First, we need to select our update tab as we did before. To do this, we first need to find the wrapper called CRUD with slide-out panel in our component tree. Open the options of this wrapper by double-clicking on the wrapper in the component tree, or by selecting Options from the menu for the component.

Now that we’ve opened the options, we need to select Record view and the Update tab.

Figure 11.23 – The wrapper options where you can switch between tabs and the general overview

Figure 11.23 – The wrapper options where you can switch between tabs and the general overview

We will add a new button just below the existing button and dialog. For now, let’s call it Add note. If you want, you can also add an icon to make it more visual for the end user.

After this, we’ll add a dialog as well, by dragging it just below the button. We’ll rename...