

An important requirement for a Windows Store app is that it should comply with the Windows 8 UI lifecycle model, which is to save its state and important data when we stop using the application. So if it gets unloaded from memory, we can restore its state without any problem. It gives our application a good user experience (UX) and aligns itself with the expectations of the customers, in that when we open it back, it will seem as if it has never been closed.
As any Windows Store app would do, we propose evolving the resultant application from the previous recipe.
Here we will add some data to showcase the lifecycle steps that our application goes through, binding it to our interface and feeding it while stepping through the lifecycle events. To do this, we should start from the app resulting from our previous recipe.
In the
DataModelfolder, we will add a new class namedAppData.cs.Next we will add the following code to it:
using System;
using System.Collections.Generic;
using System.Collections.ObjectModel;
using System.Linq;
using System.Text;
using System.Threading.Tasks;

namespace OurFirstMetroApp.DataModel
{
public class AppData : OurFirstMetroApp.Common.BindableBase
    {
private string _appKeyValue = string.Empty;
public string AppKeyValue
        {
get { return this._appKeyValue; }
set { this.SetProperty(ref this._appKeyValue, value); }
        }
    }
}
We will open
App.xaml.cs, and, in theconstructormethod, locate the following line of code:this.Suspending += OnSuspending;
Add the following lines of code to implement the event handler of the
Resumingevent as theSuspendingevent is already handled. There we will accept the automatically created method that Visual Studio proposes after pressing += and the Tab key. The code should end as follows://We handle the suspending event to save the state this.Suspending += OnSuspending; //And the Resuming to control when we resume our app. this.Resuming += App_Resuming;
After this, we will add the
MyAppBindableDataproperty in theAppclass atApp.cs:Public AppData MyAppBindableData{ get; set; }We might need to add a reference to the
DataModelnamespace:using OurFirstMetroApp.DataModel;
We will initialize the
MyAppBindableDataproperty in the application's constructor with the following code://We initialize the AppBindableData this.MyAppBindableData = new AppData();
Next we will add the following code onto the
Suspendingevent handler method:private async void OnSuspending(object sender, SuspendingEventArgs e) { SaveUserSessionData(); }Note that there is already an implementation doing some work. We will avoid exploring or re-using that code for simplicity, but it would be a good exercise to explore the code, which is in the
SuspensionManager.cssource file in theCommonfolder of the project.Add the
SaveUserSessionDatamethod as follows at the end of theAppclass:private void SaveUserSessionData() { //Save application state and stop any background activity ApplicationDataContainer localSettings = null; localSettings = ApplicationData.Current.LocalSettings; localSettings.Values["KeyValue"] = " - I have been suspended "; }Note that we will have to add a reference to the
Windows.Storagenamespace:using Windows.Storage;
Implementing the other generated function,
App_Resuming, will result in the following code:Void App_Resuming(object sender, object e) { PrepareMessage (" and resumed"); }To implement the
PrepareMessagemethod, we will code it as follows:Void PrepareMessage(String msg) { ApplicationDataContainer localSettings = null; localSettings = ApplicationData.Current.LocalSettings; var kv = localSettings.Values["KeyValue"]; if (kv != null) { this.MyAppBindableData.AppKeyValue = this.MyAppBindableData.AppKeyValue + kv.ToString(); } this.MyAppBindableData.AppKeyValue = this.MyAppBindableData.AppKeyValue + msg; }Next we will override the application's
OnActivatedevent by adding the following code:protected override void OnActivated(IActivatedEventArgs args) { String msg = String.Empty; if (args.Kind == ActivationKind.Launch) { msg = msg + " - Previously I was " + args.PreviousExecutionState.ToString(); msg = msg + " and have been Activated"; } PrepareMessage(msg); base.OnActivated(args); }Next we will manage the application's
OnLaunchedmethod by adding the following code at the end of the method:String msg = String.Empty; if (args.Kind == ActivationKind.Launch) { msg = msg + " - Previously I was " + args.PreviousExecutionState.ToString(); msg = msg + " and have been Launched"; } PrepareMessage(msg);To wire this all up, we will go to our
HelloPage.xamlpage, and there we will createTextBlockthat we will name astbAppLifeHistory, binding this text property to theAppKeyValueproperty. We will locate it under the firstTextBlockcode of the application description. Note that we will have to add a row to the grid to properly position this new control. The result can be seen as follows: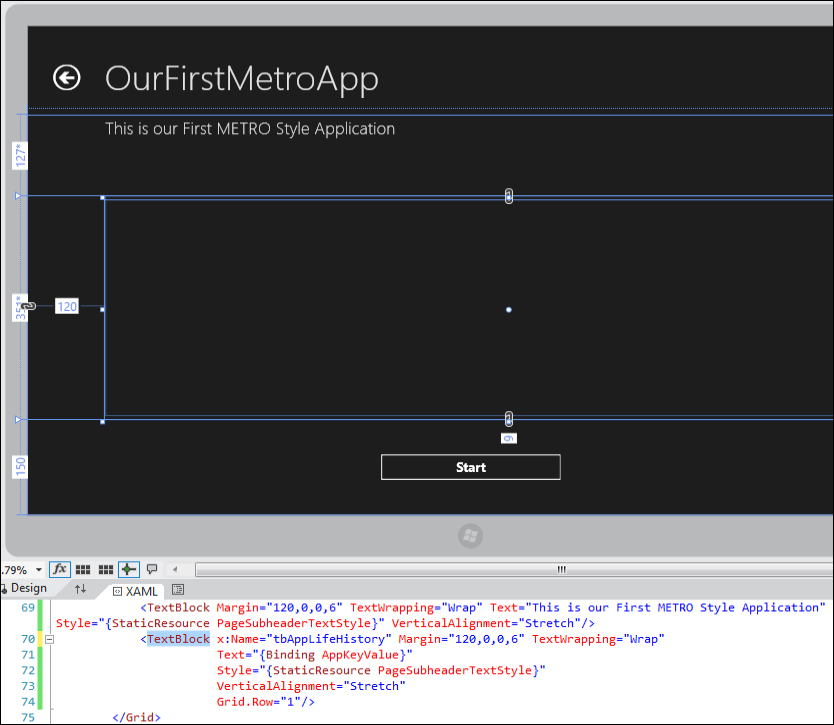
The XAML code for the
TextBlockwill look as follows:<TextBlock x:Name="tbAppLifeHistory" Margin="120,0,0,6" TextWrapping="Wrap" Text="{Binding AppKeyValue}" Style="{StaticResource PageSubheaderTextStyle}" VerticalAlignment="Stretch" Grid.Row="1"/>To finish our wiring, we will go to the code behind
HelloPage.xamland on the constructor, add a call to theCheckPreviousExecution()method as follows:Void CheckPreviousExecution() { this.tbAppLifeHistory.DataContext = (App.Current as App).MyAppBindableData; ApplicationDataContainer localSettings = null; localSettings = ApplicationData.Current.LocalSettings; localSettings.Values["KeyValue"]=""; }Note that we will have to add a
usingsclause for theWindows.Storagenamespace.Now we just have to compile and try it. A good way is to build and then deploy the solution to our Windows 8 operating system. We can use the menu option Build | Deploy Solution. We could also use the simulator and suspend/resume it.
Next we will go to our Windows 8 UI and run it. The first time we run our application, we will see the following message:

Now we will go to desktop mode where we will launch the Task Manager window. After approximately 5 seconds, we will see that our application goes into the Suspended state. Note that an easy way to launch the Task Manager is to right-click on the bottom taskbar and then click on Task Manager.

Go back to the Windows 8 UI and launch our application again. This is what we will see:

Next we will go back to the desktop mode and terminate the application from the Task Manager. If we go back to the Windows 8 UI and launch our application, this is what we will see:

We started creating the AppData class that inherits from BindableBase, which in turn implements the INotifyPropertyChanged interface and is used to notify the value changes in a property that we have bound to the user interface through binding.
Next we add an AppData property in our application class so that we can reference this property globally anywhere within our application.
Continuing, we will handle the suspending and resuming events that occur when the application is suspended, which will happen after we switch to another task or application. After 5 seconds, our application will save its state and become Suspended. In our case, we will only indicate that our application has been suspended.
For that we have the SaveUserSessionData() method responsible. There we will access our application data through the application data's ApplicationDataContainer class where we can store the settings and other information belonging to our application. The ApplicationDataContainer class is a private storage for our application and current user that we can access in many different ways, such as the key-to-value dictionary or through a filesystem-like method. This is very similar to Silverlight's isolated storage and if you have used it before it should feel very familiar.
For the resuming event, we are calling the PrepareMessage method. We will pass one message string to it and it will fetch the value from our application's localSettings property and concatenate it with the message, adding it to the AppKeyValue property.
Basically we are indicating our application lifecycle status changes and are concatenating them on a global property.
To finish, we must indicate the changes on the
OnActivated and OnLaunched
methods; there we will also add the PreviousExecutionState enumeration to the message that declares the original state from which the application comes.
We then added TextBlock control and bound it to the AppKeyValue property. In the code, we added its data context to the corresponding property of the application class holding this property; we did this to separate it from the App.cs class implementation and to take advantage of the BindableBase base class that the template had already provided.
We have also seen how to deploy our application, launch the task manager, and control our application states from it.
To properly understand the states, we have the following diagram:

Here we see clearly that when the application is not running, it can be put into the terminated (on purpose) or the not running (nobody terminated it, we just installed or deployed it, for example) state.
Then, we can launch it from the Windows 8 UI and the application will be in the running state. From this state we can close or terminate it or we can move to another application or window. After 5 seconds, our application will be automatically suspended. If we come back to it, our application will resume and get activated (not launched, as this would happen when we do it from the terminated or the not running state).
The application will remain as it was when it was suspended and we will have no clue that it has stopped its execution, unless we code the application to be aware of it.
It could be a good idea to save the user state and the application data, for example, if the user was working on a form. It would be nice that when he returns, he goes back to the same form he was working on and finds the same data.
If the application has been deactivated for a long period of time, a recommended practice would be to start afresh, as the user might not remember what was happening or where he was. Of course, it all depends on the application and the tasks being performed in it.
If the application works with online data, the activated and resuming events could be used to refresh the information from the online sources. For example, we could have an app with a financial purpose or our app is alive such as a chat, RSS reader, or a twitter app.
We could also associate our app with a file or a protocol so that it would be the default application for managing these file extensions or we could define auto-launching capabilities for AutoPlay or other contracts and extensions. Some possible contracts might be the camera, contact picker, print task, protocol, search, or share target.