

Open the
SimpleCalcproject in Xcode.Click on the item named
BTSAppDelegate.hand add the highlighted new interface@propertydefinitions and the button action interface definition for the SimpleCalc App. Notice they are placed in the template code after thewindowproperty and before the@endstatement as shown in the following code snippet:@interface BTSAppDelegate : NSObject <NSApplicationDelegate> @property (assign) IBOutlet NSWindow *window; /* Create the user interface elements */ // Buttons @property (assign) IBOutlet NSButton *mAdd; @property (assign) IBOutlet NSButton *mSubtract; @property (assign) IBOutlet NSButton *mMutliply; @property (assign) IBOutlet NSButton *mDivide; // Text Fields @property (assign) IBOutlet NSTextField *mValue1; @property (assign) IBOutlet NSTextField *mValue2; @property (assign) IBOutlet NSTextField *mResult; /* Create the App interface for the buttons */ - (IBAction)myButtonAction:(id)sender; @end
Click on the item named BTSAppDelegate.m and add the highlighted new interface
@synthesizedefinitions and the button action implementation for the SimpleCalc App.Again notice the position of the code after the
@implementationkeyword and before the@endkeyword as shown in the following code snippet:@implementation BTSAppDelegate /* Create the user interface setter and getter functions */ // Buttons @synthesize mAdd; @synthesize mSubtract; @synthesize mMutliply; @synthesize mDivide; // Text Fields @synthesize mValue1; @synthesize mValue2; @synthesize mResult; - (void)applicationDidFinishLaunching:(NSNotification *)aNotification { // Insert code here to initialize your application } /* Create the App implementation for the buttons */ - (IBAction)myButtonAction:(id)sender; { // For now, just beep NSBeep(); } @end
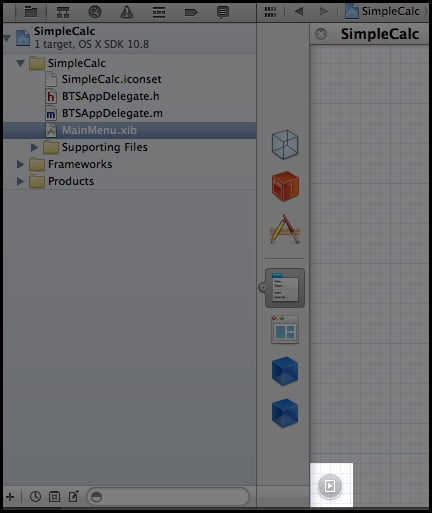
Click on the item named MainMenu.xib.
Click the Show Document Outline button as shown in the following screenshot:
Click on the Window - SimpleCalc tab in Objects to display the App window as shown in the following screenshot:

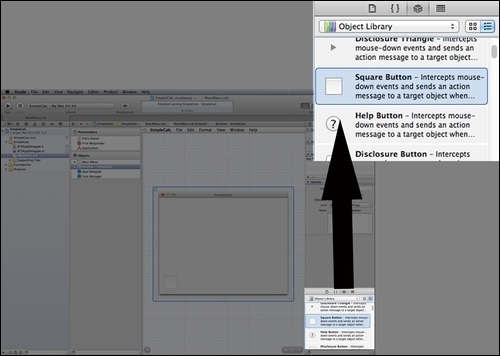
Locate the Object Library option and scroll to find the Square Button shape as shown in the following screenshot:
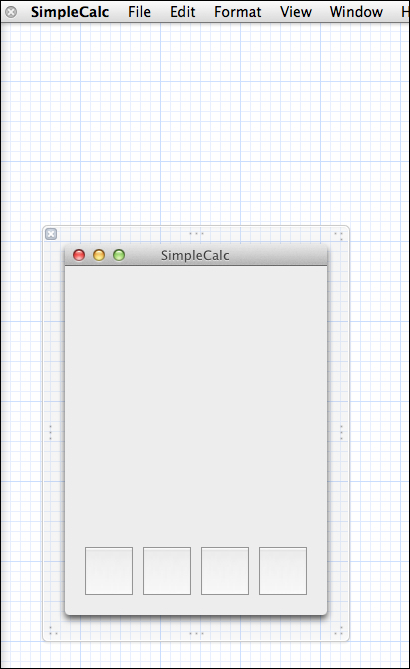
Click and drag a Square Button shape from the Object Library to the SimpleCalc window. Then drag three more buttons and place them beside the first button to form a row of buttons. Finally, resize the window so that it fits the four buttons as shown in the following screenshot:
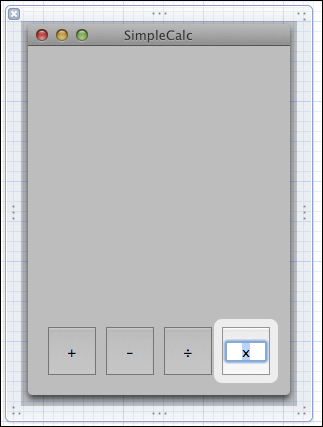
Double-click on the buttons one at a time and type the labels
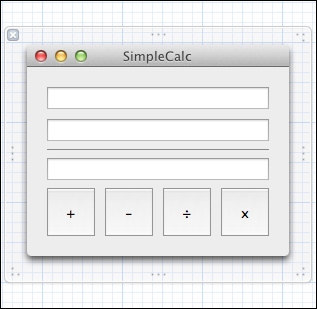
+,-,÷,xrespectively.You will end up with something that looks like the following screenshot:
Locate the Object Library and scroll to find the Text Field option.
Drag two Text Field objects into the SimpleCalc window, and place them one below the other.
Locate the Object Library and scroll to find the Horizontal Line option.
Drag a Horizontal Line into the SimpleCalc window and position it below the two Text Field objects.
Locate the Text Field object in the Object Library and drag a third Text Field into the SimpleCalc window.
Click and drag to select all the Square Button objects and drag them up below the third Text Field.
Resize the SimpleCalc window to fit the Text Field and Square Button objects. After you are done, you will have something like the following screenshot:
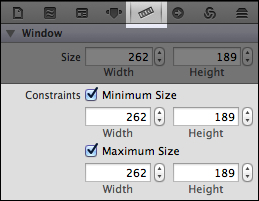
Because we don't want our calculator window to change size, we need to set constraints. Click on the SimpleCalc window to select it, select Show the size inspector in the inspector pane, and under Constraints, enable both the Minimum Size and Maximum Size options as shown in the following screenshot:
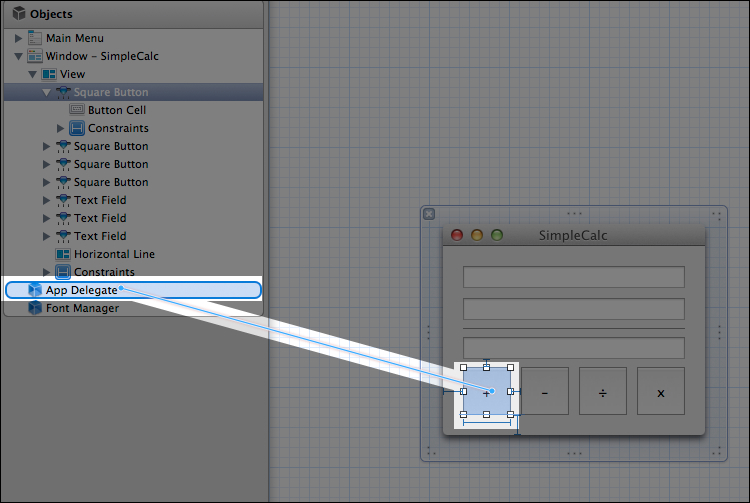
Right-click (or if you don't have a three-button mouse, hold down the Ctrl key and left click) on the + button and drag it to the App Delegate object as shown in the following screenshot:
When the App Delegate object highlights, release the mouse button and select myButtonAction from the Received Actions selection pane as shown in the following screenshot:
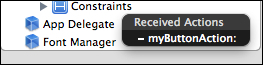
Repeat the process to connect the remaining three buttons to the – myButtonAction method.
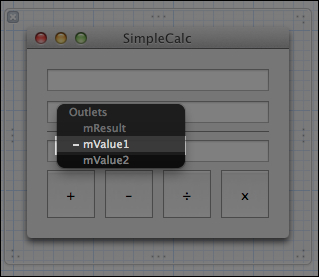
Right-click (or if you don't have a three-button mouse, hold down the Ctrl key and left click) on the App Delegate object and drag until the first Text Field is highlighted as shown in the following screenshot:

Release the mouse button and select mValue1 from the Outlets selection pane as shown in the following screenshot:
Repeat these steps to connect mValue2 to the second Text Field and mResult to the third Text Field.
We created the interface for our SimpleCalc App and connected the interface to the program code for our App. We also connected the App Delegate object to the Text Fields in the interface. Now when we run SimpleCalc we see the new interface and when we click any of the buttons we hear a system beep.