

Diving into OSINT with Kali
Finally, we have arrived at our desk. Kali Linux has been waiting patiently while we played around with the search engines, but now it’s time to get down to business. As we continue our OSINT journey with Kali, it’s helpful to understand the fundamentals. For example, you may have noticed during your time playing with Shodan that there is an API available. You may have also thought to yourself, this is cool, but can't we automate it? Perhaps, while you were playing with Google searches, you were stopped by a CAPTCHA with the suspicious traffic alert. Indeed, Google knows that their search engine can be used for nefarious purposes and some of the methods discussed in older Google hacking textbooks don’t even work anymore (for example, you’ll get zero results when looking for numbers in a range from 4,147,000,000,000,000 to 4,147,999,999,999,999, since that could pick up on Visa card dumps). Well, this is a Kali book and there is a comprehensive OSINT toolkit available to you. Let’s get to work and take this open source stuff to the next level.
The OSINT analysis tools folder
There’s a simple reason why Kali Linux is the premier pen testing distro: it just makes things so easy. Everything is neatly organized with just a right-click on the desktop, ordered by the different phases of your assessment. It’s like hacking candy from a baby. Another thing to note about Kali 2021.1 is that it puts emphasis on looking slick. If Neo from The Matrix, wearing his iconic trench coat and black glasses, was an operating system, it would probably have these same appearance settings. It’s a looker, but it doesn’t really do much for printing examples for you, dear reader. Not to mention, the dark blue on a black background with transparency enabled, giving us that blue-black dragon wallpaper bleeding through our terminal window? Hello, eye doctor. So, I have tweaked mine to make it easier to look at in our book. In the terminal, I’m going with BlackOnWhite with 0% transparency. You don’t have to change yours – just know it’s Kali 2021.1 and it should work the same.
Without further ado, let’s right-click on our desktop and find OSINT Analysis, a folder found under 01 – Information Gathering, as shown here:
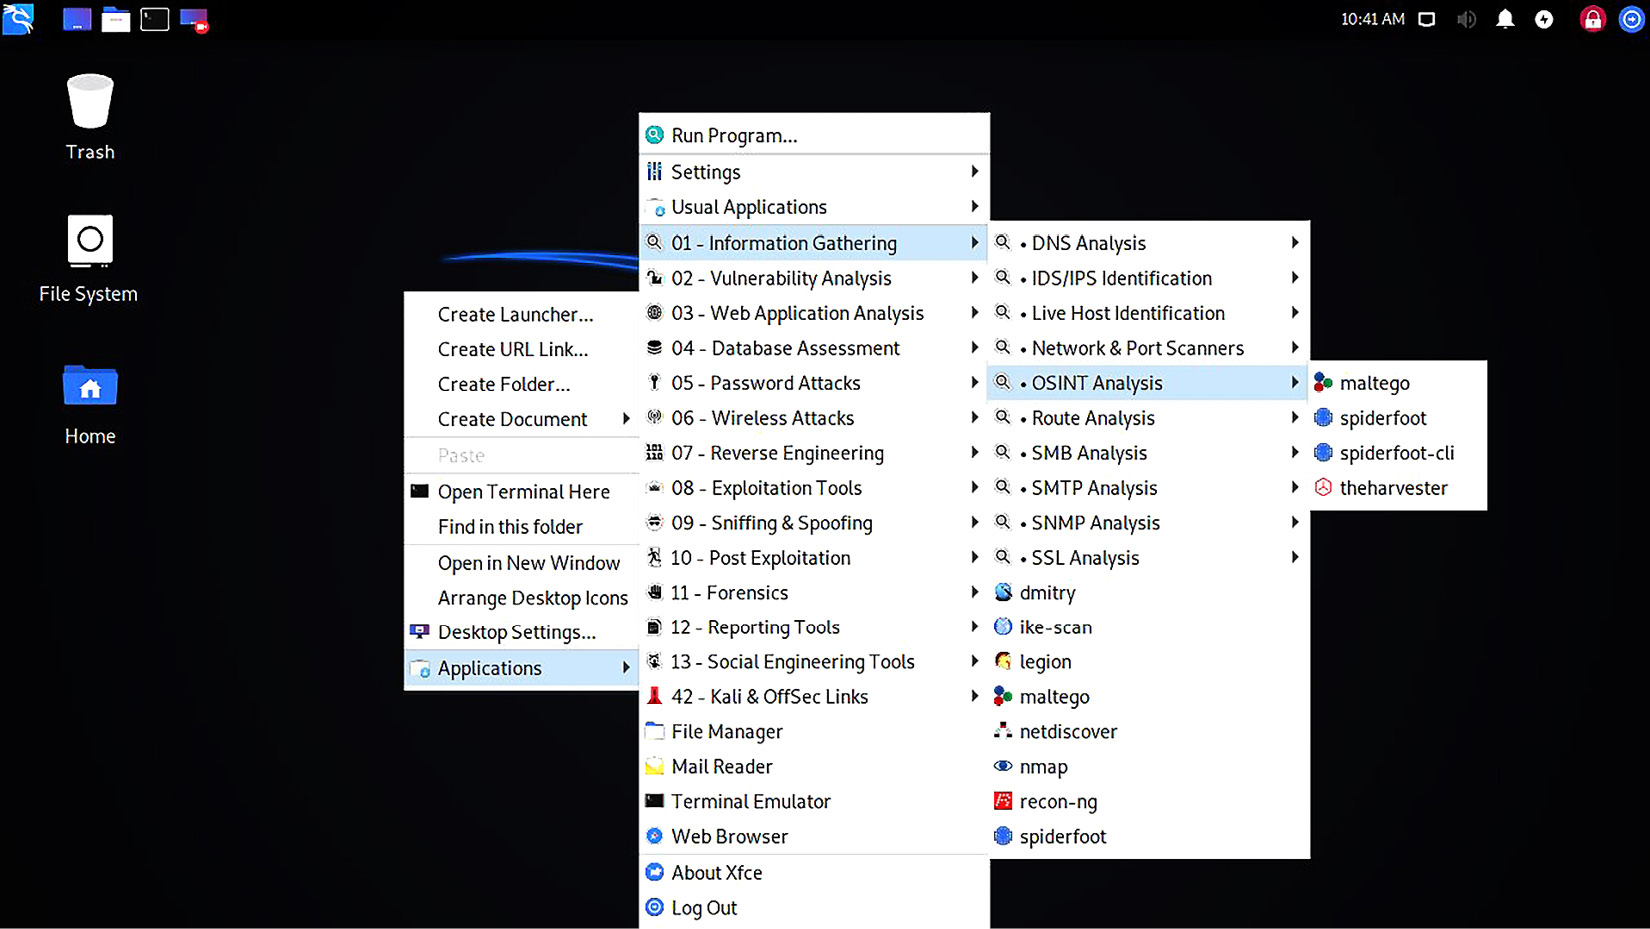
Figure 1.14 – Right-clicking the menu on Kali’s desktop
First, let’s clarify the distinction that renders OSINT Analysis a subfolder of Information Gathering. This goes back to the beginning of the chapter when we talked about passive versus active information gathering. Look at the other subfolders under 01 – Information Gathering: Live Host Identification, Network & Port Scanners, the various protocol analysis folders, and so on. There’s nothing passive and quiet about firing off thousands of SYN packets at your target’s network, and importantly, it isn’t open source analysis because you are conducting the analysis in real time – you aren’t relying on open source data sources. From the perspective of your target, the information gathering phase is like hearing rustling in the bushes. The OSINT Analysis toolset will not make any noise that your client can hear.
Keep in mind, just because most of the other tools in Kali aren’t under 01 – Information Gathering, doesn’t mean they are all noisy and only to be used during active phases of the engagement. A notable example that we will discuss is wireless analysis: all the Wi-Fi goodies are contained under 06 – Wireless Attacks, and indeed, the tools there can be used for active attacking. However, there’s nothing to stop us from merely listening to the radio signals around us (or as the old-school users of American Citizens Band radio would say, gettin' our ears on), and this would qualify as passive reconnaissance. But enough about gathering information about low-level network stuff. Let’s take a look at a true magician of OSINT.
Transforming your perspective – Maltego
OSINT isn’t just for pen-testers – it’s an important part of projects ranging from market research to private investigations to criminal investigations. Accordingly, some smart folks realized that providing an automated, intuitive, and just downright beautiful interface for this activity is a product in demand. Enter Maltego.
I remember Maltego’s more humble years, but these days, it’s a fully-fledged professional product. Indeed, if you have the money and it’s part of your work, it’s a worthy investment. Thankfully, Maltego caters to its community of faithful users with its Community Edition (Maltego CE). Maltego CE is completely free, but there are some feature limitations, and the software licensing requires that it is not used for commercial purposes. We’re going to work on the free Community Edition in our book, as it’s immediately accessible to any Kali user – but if you are (or planning to become) a professional pen-tester with commercial needs, make sure you review and abide by any software licensing agreements. With that said, dig into 01 – Information Gathering | OSINT Analysis, and click maltego. You should see this splash screen:
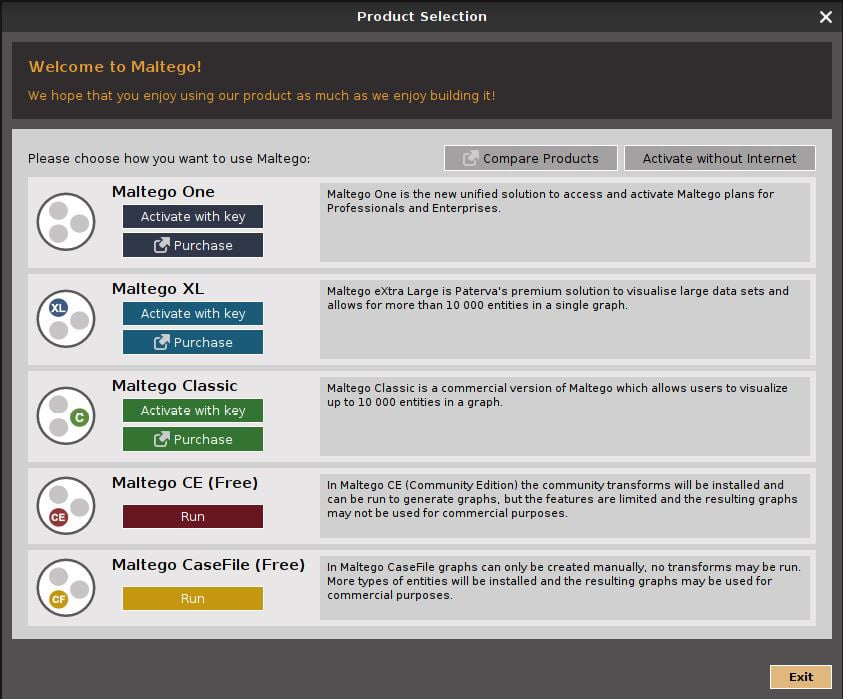
Figure 1.15 – The Maltego splash screen
Of course, we’re going to click the Run button under Maltego CE (Free). Then, you’ll have the opportunity to read and agree to the license agreement and get your community account registered. During this phase, you’ll see the word transforms: the product is downloading and installing transforms, and you’ll end up in the transforms hub. Transforms are the soul of Maltego, so let’s explore what they are and how we leverage them.
Entities and transforms and graphs, oh my
Put simply, a transform is a little program that takes some piece of information that we already have about our target (for example, a person’s name) and digs up more information. Each of these pieces of information is an entity, and when we supply our entity information to Maltego and it spits out more entities, that process is called running a transform. This is the process that ultimately allows us to visualize any relationships between entities. It’s useful to remember that this transform program isn’t actually local to your machine (hence the necessity to register for an account). It runs on a Maltego server, which is using the transform code plus the entities you provided it with against open source data. Finally, the canvas on which you will paint your OSINT masterpiece is the graph, a workspace where the relationships between entities are visualized and you can point-and-click to run additional transforms. Let’s jump in.
Once you’re up and running, you should be looking at a Home tab with a Start Page and a Transform Hub button, as shown in the following screenshot:
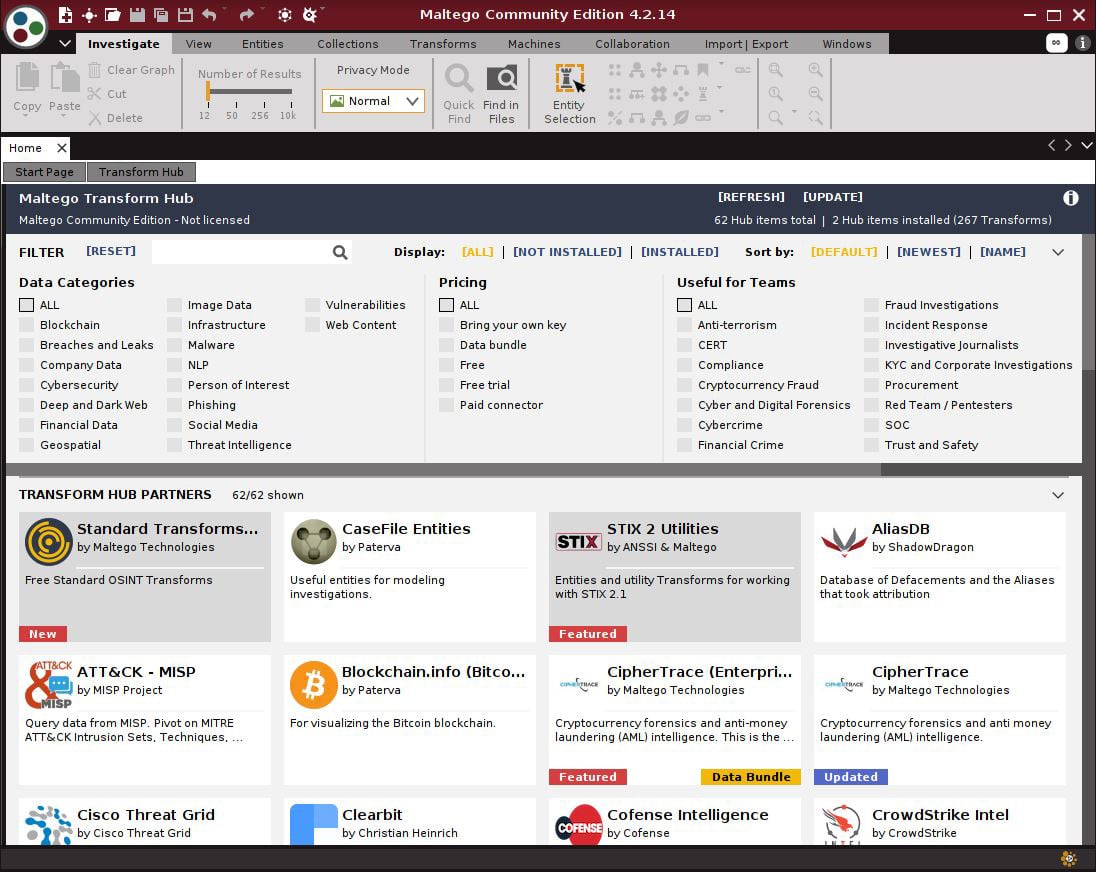
Figure 1.16 – The rather busy Home tab
Your installation already comes with the basics, but other organizations or individuals are often working on their own transforms that may be available to you. It’s worth checking out what you can grab. Use the FILTER box at the top to select all Data Categories, and then select Free under Pricing. Finally, click [NOT INSTALLED] at the top. Let’s see what pops up:
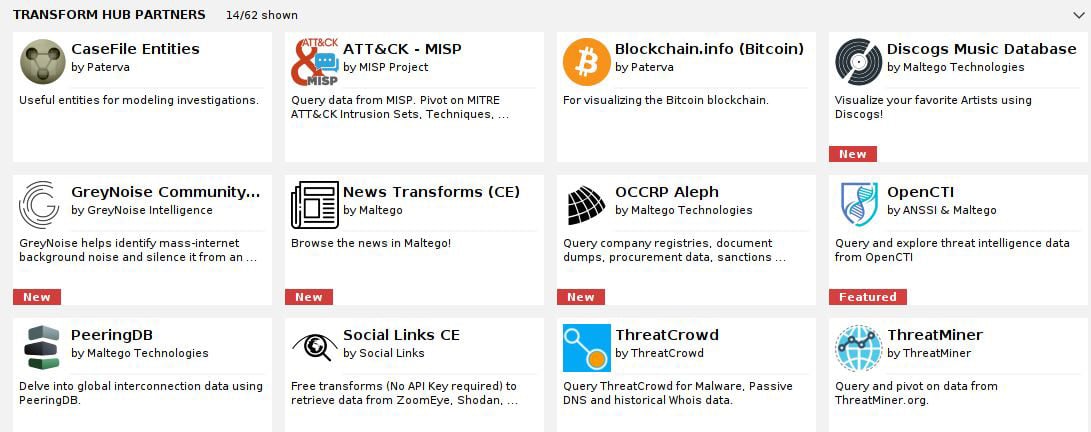
Figure 1.17 – Transform Hub partners in Maltego
What you pick will depend on your needs. Pay close attention to something like Social Links CE for social engineering efforts, OCCRP Aleph for information gathering, and ATT&CK – MISP for the analysis of your target’s attack surface. For now, let’s run through the basics with a real-world client. Hit Ctrl + T to create a new graph. A blank workspace will appear where your graph will be built. Look over to the left at the Entity Palette, as shown here:
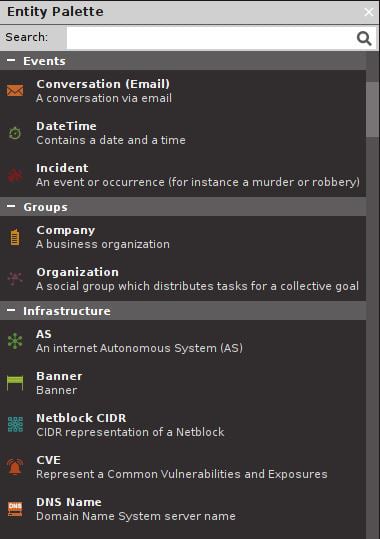
Figure 1.18 – The Entity Palette in Maltego
Go ahead and browse the different entities. Here we can see just how powerfully Maltego caters to different investigation types (anyone want to dig up information on a robbery?), and some of these you may never use. For the pen-tester, a very common entity category is Infrastructure. For my example, I’m going to click and drag Domain over into the blank graph space. This will create an entity icon with a domain in the middle. Whenever you create an entity in your graph, it will have a default entry for it (it doesn’t prompt you). So, you’ll double-click on the default text to put in the domain you’re researching. Now, right-click on your domain entity to see the transforms available for it, as shown here:
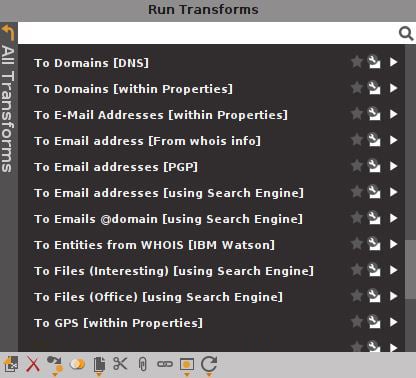
Figure 1.19 – The Run Transforms menu
At the top of the list, you’ll see transforms built by Maltego’s transform partners (other organizations). Some of them require an account or an API key to run the transform, and some of them are free. As always, your needs will dictate how deep this gets.
Let’s start exploring with my example domain entity. I tried To DNS Name – MX (mail server). Here are my results:
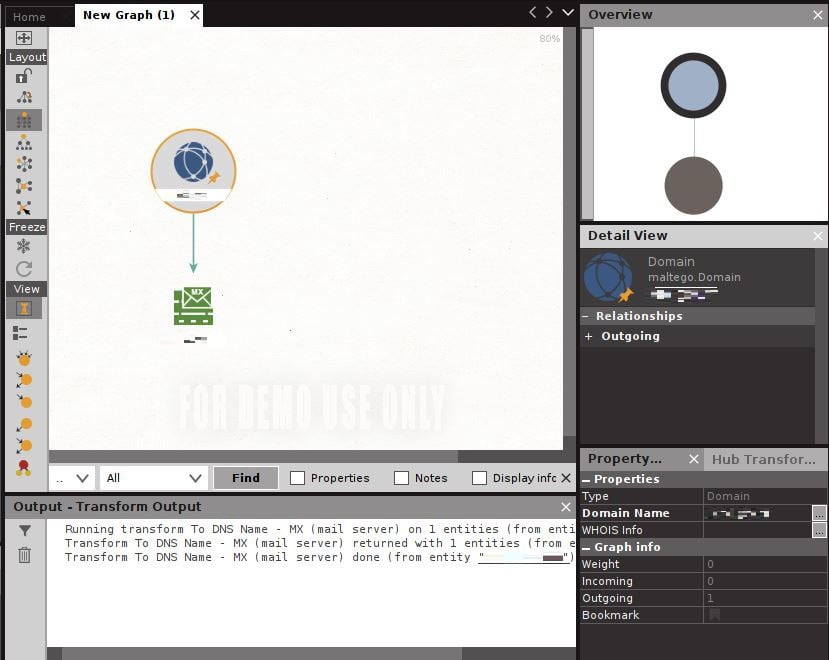
Figure 1.20 – The graph after running the MX transform
Now, we see a new entity has appeared – an MX server. An arrow is drawn from our original domain entity to demonstrate the relationship between the two. I’m confident that you have a good idea of where to go next: that’s right, run some more transforms! Click on the domain entity that you provided. Then, check out the Run View menu over at the lower left. Try running one of the Footprint transforms, as shown here:
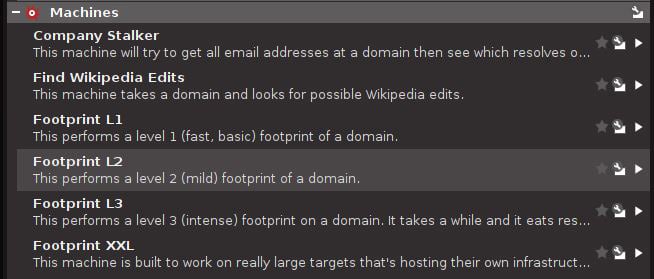
Figure 1.21 – Finding the Footprint transforms after selecting the domain entity
Maltego will start doing some of the basic digging for you. What’s nice about the Footprint transforms is that you’ll get to validate some of the returned data while it’s running, as shown here:

Figure 1.22 – Picking and choosing the relevant entities
Now, watch as all of these new tasty entities appear. In my testing shown here, I discovered email addresses, IP addresses, netblocks, and ASNs. I even discovered the location of a satellite dish responsible for one of their remote locations – that one was surprising.
At this point, I don’t even need to tell you what to do next – you’ve just discovered the start of a long and scenic path of discovery for your client. Try jumping into those other transforms. The important lesson here, young hackerlings, is discovering perspectives about your target that will inform other efforts. Let’s look at social engineering (SE) as an example. After running a few transforms and adjusting my graph layout a bit, I found this company tech’s email address linked to numerous domains, including ones I was just learning about at the time:
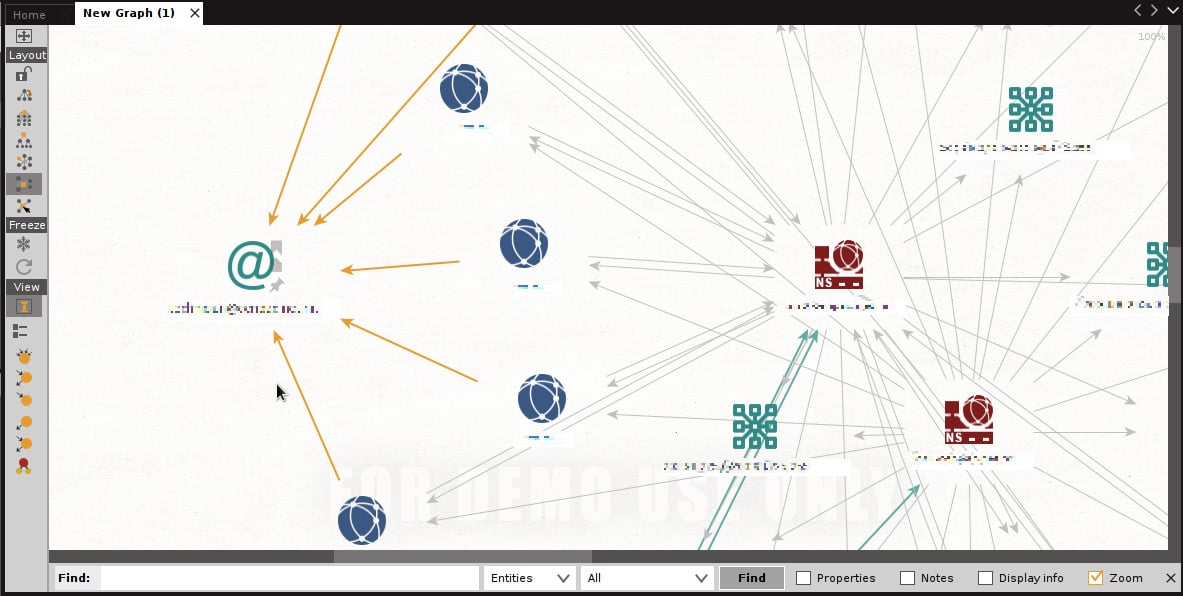
Figure 1.23 – Different entity types and their relationships exposed
Imagine the SE attacks I could leverage with that address, exploiting knowledge that the target may not even realize is associated with these entities, as laid out by Maltego. Consider that satellite dish I mentioned earlier – I even found a Federal Communications Commission (FCC) filing related to the company that owns the dish. The FCC document was a public notice, and hence readily available on the internet – but it doesn’t contain any information about my client! It’s linked to my client via an ASN discovered with Maltego. Why should we care? Once again, social engineering. A well-formed email or well-placed telephone call (I found dozens of phone numbers with Maltego, by the way), pretending to be affiliated with the company that provides the satellite communications? Heck, maybe it wouldn’t work at all. Doesn’t matter – it’s the brainstorming that matters, and Maltego can fuel your imagination.
OSINT with Spiderfoot
Surely there's some sort of open source alternative to manually poking around the internet, you wonder. Maltego is cool, but it's a bit much for my needs, you bemoan. Have no fear, for I have saved the best for last: my personal go-to, Spiderfoot. Some of you may have already clicked it, considering it’s right there in the OSINT Analysis menu. All that happens is it executes spiderfoot –-help, so you can review the options in the command window. I think this is just Kali’s way of reminding us that Spiderfoot is indeed there. From there, you may have even executed spiderfoot –M so you can get a look at the available modules and started to build your first command. I’m going to stop you right there – the real prize in this tool is its web interface. Just run this command: spiderfoot –l 127.0.0.1:5009. Then, pull out a web browser and visit http://127.0.0.1:5009. You can also host this across the network, as I did here:
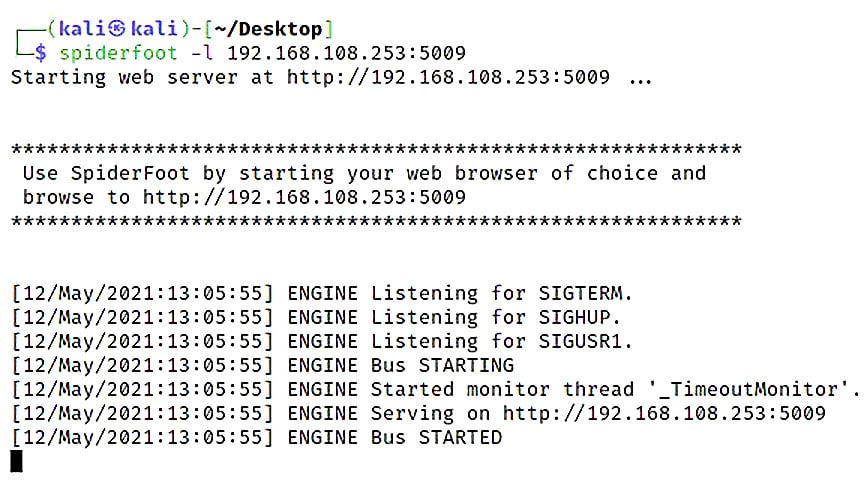
Figure 1.24 – Starting the Spiderfoot listener
Note
Be aware that access is not authenticated – run over your private network at your own risk.
Once you’re in the web interface, click New Scan. You’ll see three tabs that allow you to define how your scan will work: By Use Case, By Required Data, and By Module. The By Module tab is useful for your own custom modules or when you need to fine-tune Spiderfoot’s behavior, and By Required Data is basically like a modules listing, but in a more descriptive way. My standard choice is one of the use cases. Notice how it distinguishes the Passive option – perfect for removing the guesswork about whether your target is getting touched or not. For my assessment, I’m running a quick footprint:
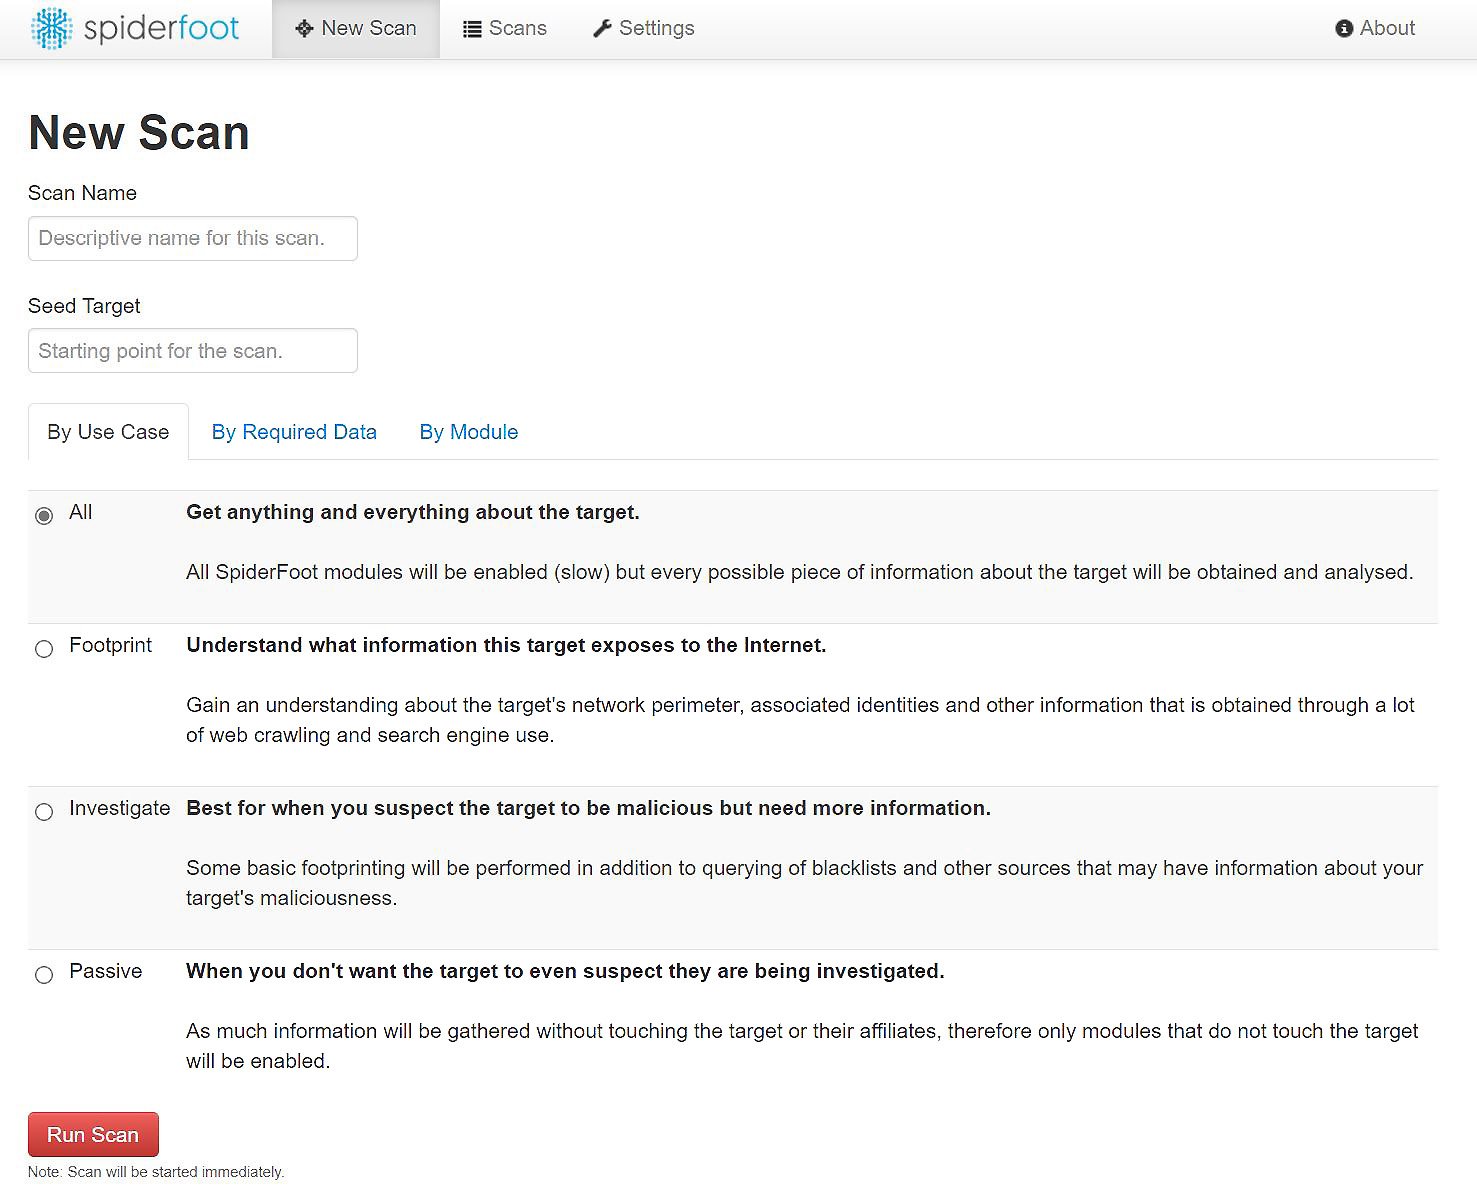
Figure 1.25 – Spiderfoot use cases
Just click Run Scan, sit back, and relax. This is a good time for a coffee break. You can also watch the progress of the scan in real time. The individual data points are called elements, and you can review them while the scan is running, if you’d like. I prefer to let it run in full so that any relationships between the elements can be established. The Status screen will categorize elements by the module type that discovered them, as shown here:
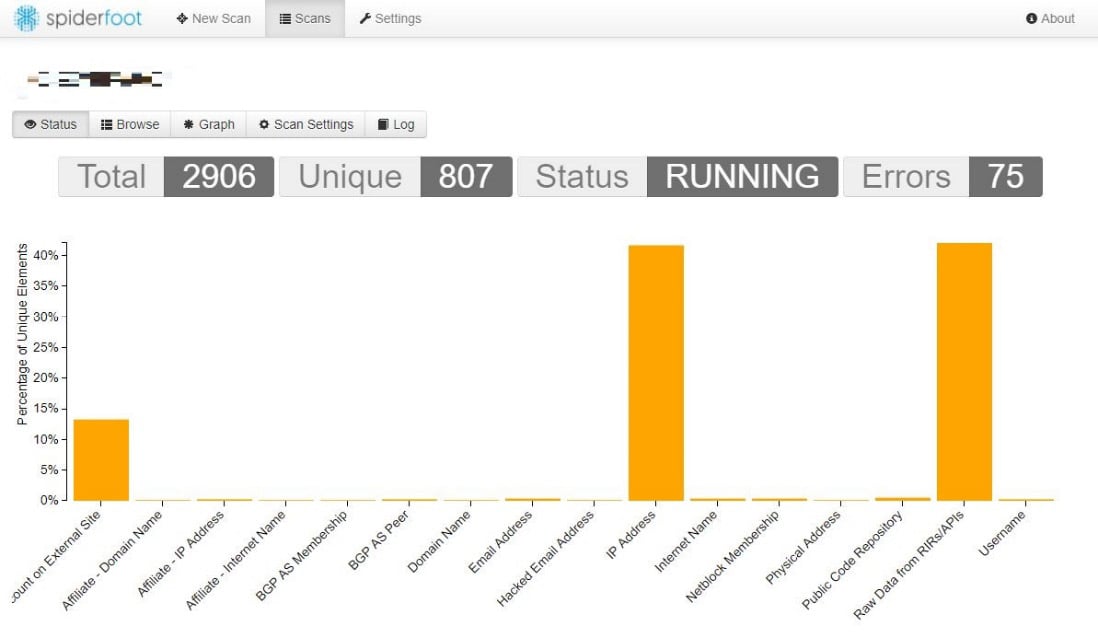
Figure 1.26 – The Status graph during a Spiderfoot scan
Finally, for the visual geek in all of us, there is a graph layout as well. Each element displayed can be dragged, so with a little work, you can create your own layout to highlight relationships between elements. For those larger clients, however, it can look like a mess:
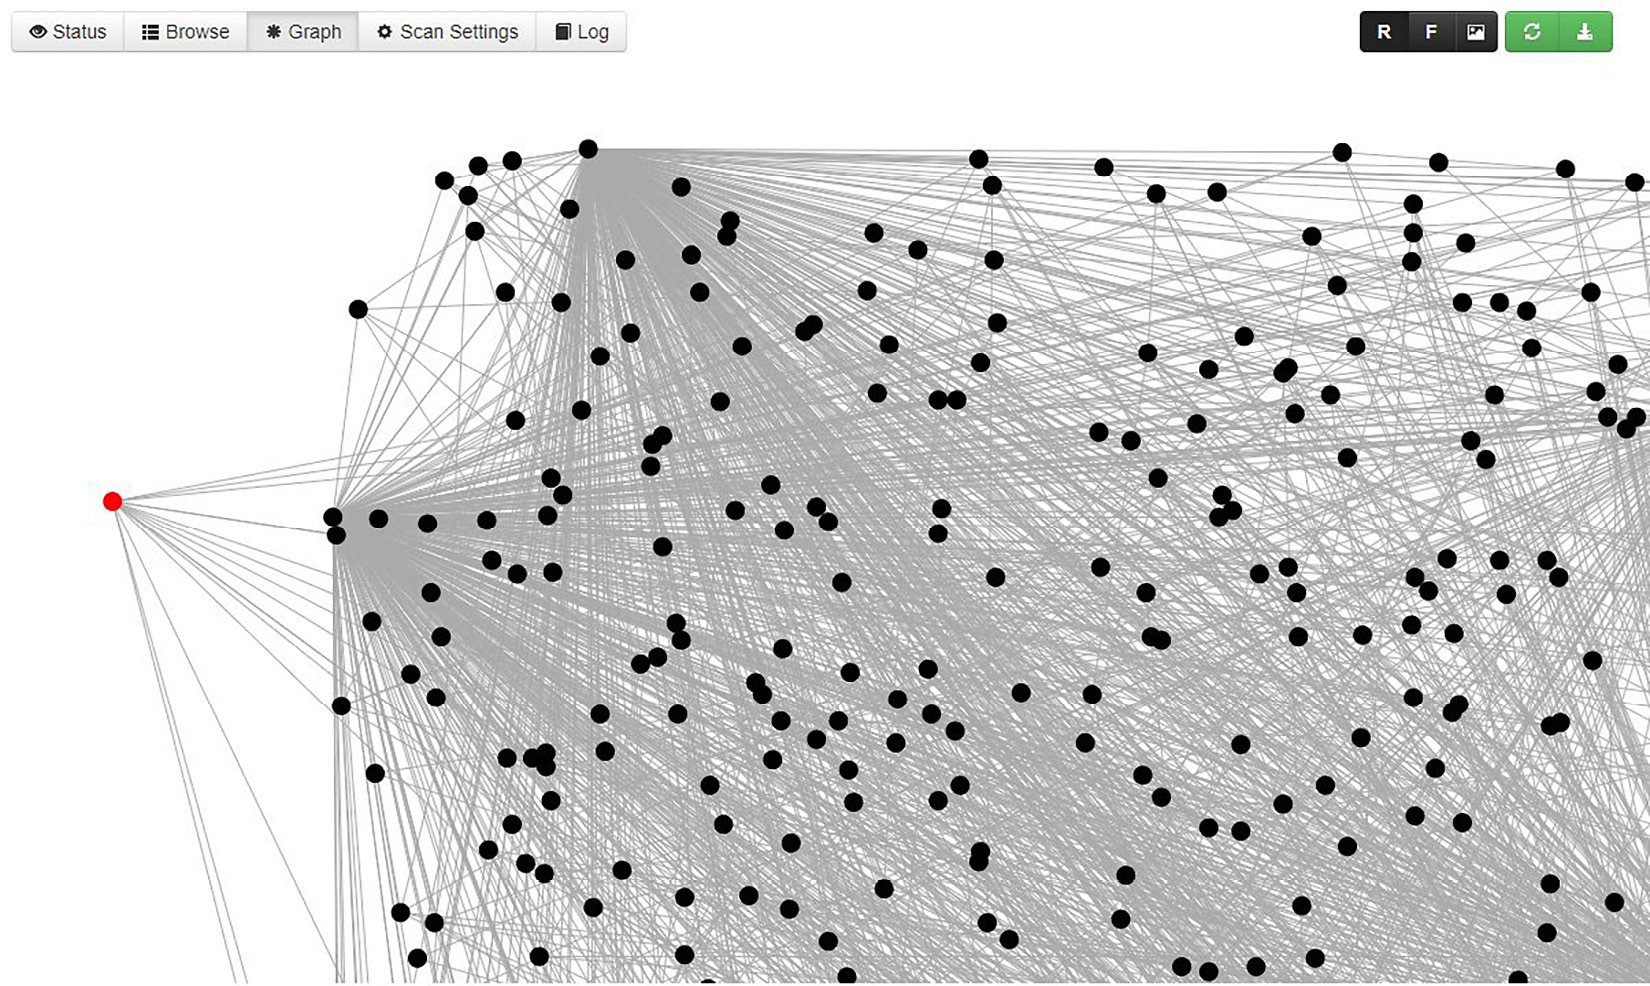
Figure 1.27 – Spiderfoot’s web of relationships
The visual representation of your OSINT data points and their relationships is definitely something at which Maltego excels. Spiderfoot is fast and easy, however, so it might be perfect for getting the ball rolling on your intelligence gathering.