-
Book Overview & Buying
-
Table Of Contents

Oracle Linux Cookbook
By :
Oracle Linux Cookbook
By:
Overview of this book
Discover the power of Oracle Linux 8, the free and enterprise-grade Linux distribution designed for use in any environment, with this recipe-style book.
Starting with instructions on how to obtain Oracle Linux for both X86 and ARM-based platforms, this book walks you through various installation methods, from running it as a Windows service to installing it on a Raspberry Pi. It unravels advanced topics such as system upgrades using Leapp for major version transitions and using a PXE server and kickstart files for more advanced installations. The book then delves into swapping kernels to take advantage of Oracle’s UEK, exploring boot options, managing software with DNF, and achieving high availability. Detailed recipes involving security topics will assist with tasks such as data encryption, both at rest and in motion.
For developers, it offers guidance on building RPM files, using Docker and Podman in a containerized environment, working with AppStreams, and more. For large-scale deployments, the book introduces Oracle Linux Automation Manager for enterprise-level Ansible utilization, from setting up the Ansible server to basic playbook writing. Finally, you’ll discover strategies for cloud migration.
By the end of this book, you’ll possess a comprehensive toolkit that will elevate your skills as a Linux administrator.
Table of Contents (16 chapters)
Preface

Chapter 1: Oracle Linux 8 – Get It? Got It? Good!
 Free Chapter
Chapter 2: Installing with and without Automation Magic
Chapter 3: Exploring the Various Boot Options and Kernels in Oracle Linux
Chapter 4: Creating and Managing Single-Instance Filesystems
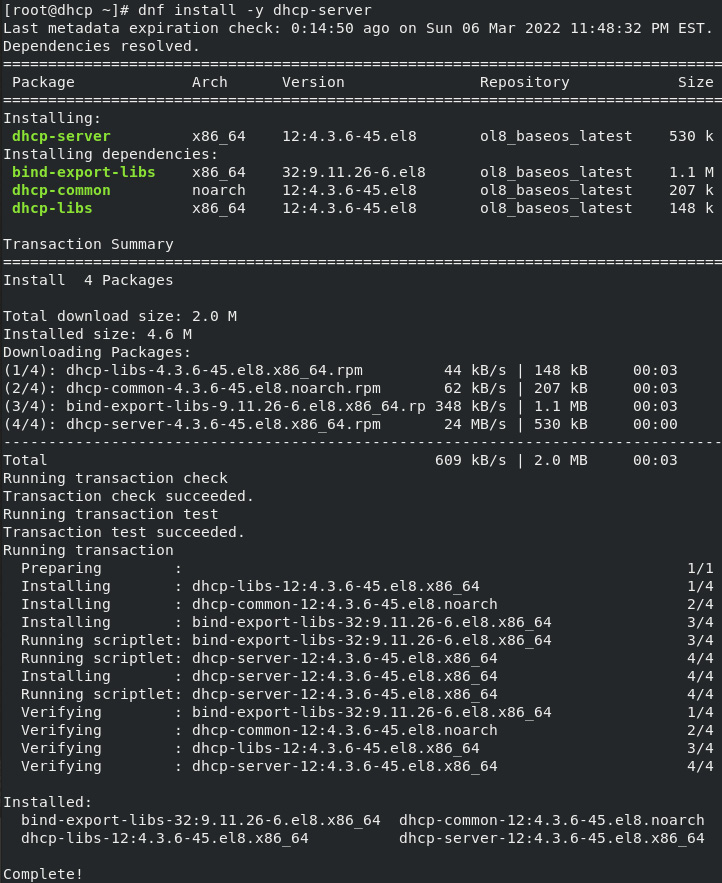
Chapter 5: Software Management with DNF
Chapter 6: Eliminating All the SPOFs! An Exercise in Redundancy
Chapter 7: Oracle Linux 8 – Patching Doesn’t Have to Mean Rebooting
Chapter 8: DevOps Automation Tools – Terraform, Ansible, Packer, and More
Chapter 9: Keeping the Data Safe – Securing a System
Chapter 10: Revisiting Modules and AppStreams
Chapter 11: Lions, Tigers, and Containers – Oh My! Podman and Friends
Chapter 12: Navigating Ansible Waters
Chapter 13: Let’s All Go to the Cloud
Index